The ideas here run from a small wood slice photo display on a side table to a freestanding arbor and a barrel drink station that need real floor space.
Your venue decides which end you work from: signs, bowl candles and table numbers fit any room, while arbors, ladders and barrel stations need open ground or a tent.
Engraved favors and keepsakes can’t be fixed once ordered, so I’d place those orders only after the guest list is final.
1. Wooden Welcome Signs
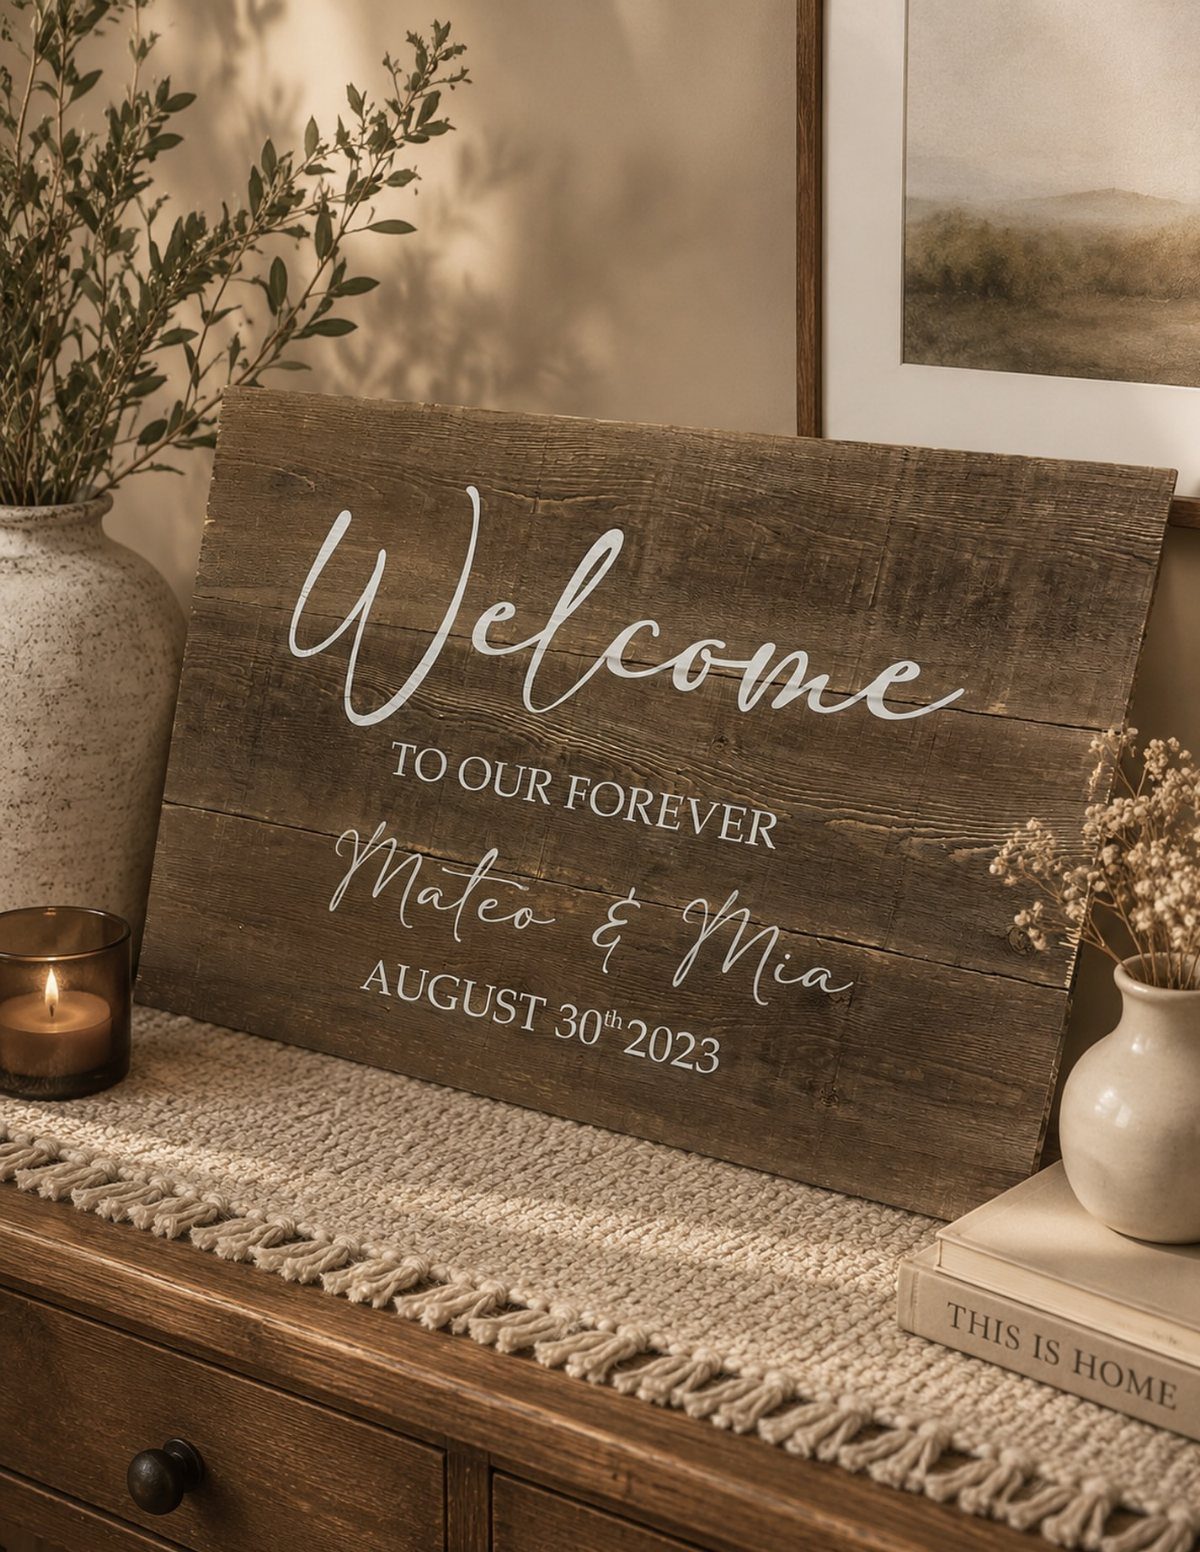
A welcome sign tells guests they have found the right place before anyone says a word.
Names and date are enough. I like it standing on a dresser or console rather than the ground, with greenery and a candle beside it to soften the wood.
Add a smaller second sign with an arrow toward drinks or the guestbook, so guests know where to go next.
2. Wooden Table Numbers

Spelled-out numbers like "Table one" and "Table five" look softer than digits, and white cursive on dark wood reads clearly. Small wooden blocks hold each square sign upright on the table.
Give the head table its own sign, as the "Top Table" one here does. Keep the lettering style identical across every sign, because mixing styles undoes the cohesive look you’re building.
3. Wooden Seating Plan

One large board with every guest listed under a table letter is my pick over a pile of small cards.
Title it with the couple’s names and the date, and paint the names in white calligraphy so the lettering reads clearly on the dark grain.
Lean it against a wall instead of hanging it, which saves you hooks and drilling. Set it where guests pass on their way into the reception.
4. Wooden Name Tags

Engraving a guest’s name on a small wooden bowl replaces the paper place card with something that marks the seat and feels personal.
Check every spelling against your guest list before the order goes in, since engraving can’t be fixed afterward.
5. Wooden Cake Toppers

A gold finish on a wooden topper catches the eye against a plain cake, and cursive names keep the look romantic rather than rustic-heavy. Pair it with a simply frosted cake so the lettering gets the attention.
Order it early, confirm the spelling of both names, and hand it to whoever sets up the cake so it goes on at the last minute.
6. Wooden Wish Box

A wooden box with a clear acrylic front lets guests watch the envelopes pile up, which I find more fun than a closed box.
Put the couple’s names and the date on the front, and add a "Wedding Post" label so nobody wonders what it’s for.
Set it near the guestbook or gift table, and leave blank envelopes and a pen beside it. Candles around it make it look like part of the decor.
7. Wooden Invitations
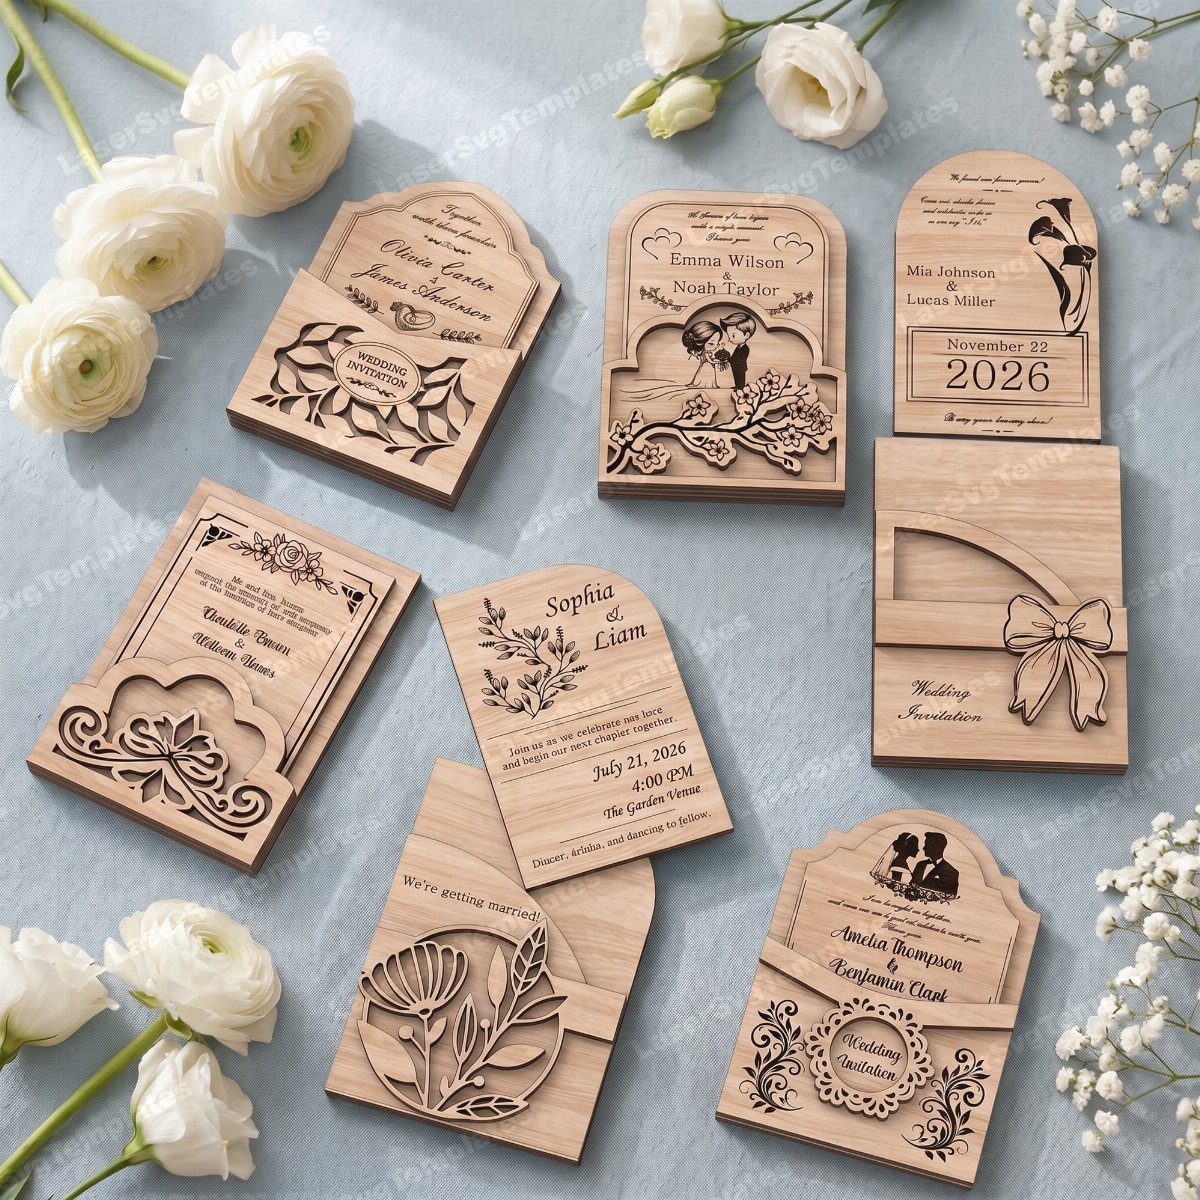
Engraved wood invitations double as keepsakes, which paper can’t match.
Names, floral borders and ornate lettering all cut cleanly into the grain, and a set with a different design for each guest suits a list you want to feel individually addressed.
Choose one engraved style for the whole list if you want the look to stay uniform. Proof every name and spelling before ordering, since engraving can’t be undone.
8. Rustic Outdoor Bar
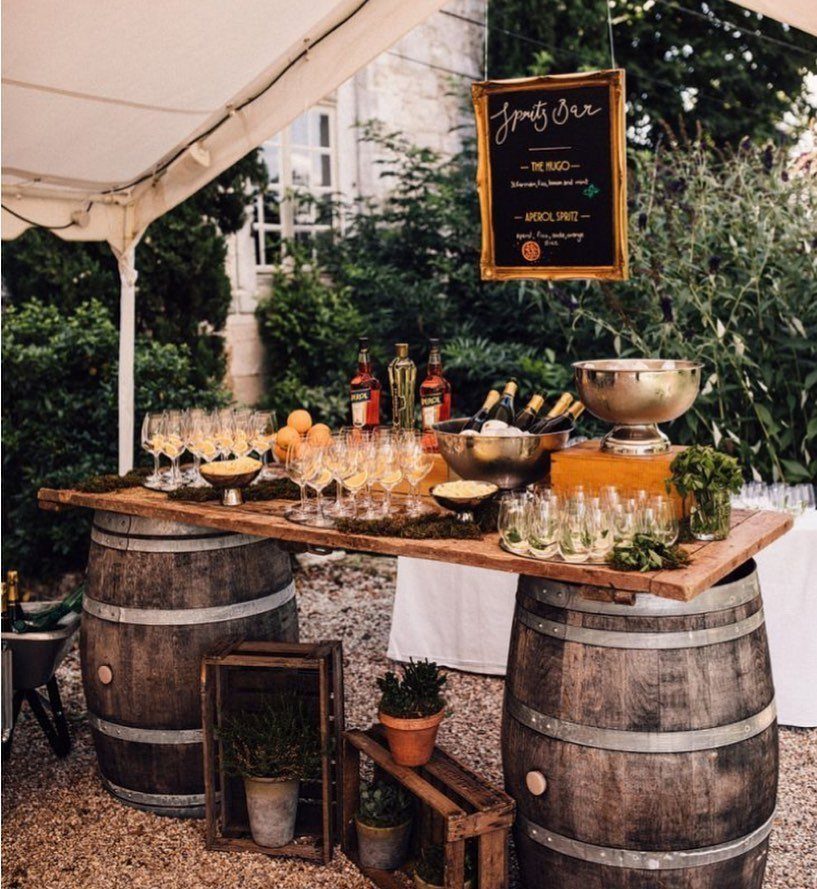
Two wine barrels with a wooden slab laid across the top make a bar that looks built for the day yet costs far less effort than hiring one.
A chalkboard menu propped on the slab names the drinks without a printed sign.
I’d pick a single signature drink over a full menu, so the slab stays uncluttered and the line moves fast. Keep glasses and bottles in neat rows along the front edge.
9. Mismatched Hanging Lanterns

Lanterns in mixed colors, hung at different heights from the ceiling, give a plain white tent a warm, loose feel without a single extra table decoration.
I prefer varying the heights over hanging them in one tidy row, because the uneven layers are what make it cozy.
Run them above the long tables so the light sits right over the guests. Wooden chairs and low floral centerpieces keep the eye on the lanterns overhead.
10. Wooden Backdrop

A wooden lattice behind a dessert table turns one corner into its own small scene.
White flowers tucked into the lattice tie the cake to the backdrop, and a welcome sign in front, in any language that fits your guests, tells them whose celebration this is.
Pick one table to frame, such as cake or dessert, rather than backing every table. A single focal point reads as intentional.
11. Ladder Floral Display

An old wooden ladder with shelves holds flowers at 3 levels, and you only need a ladder you already own or can borrow. Orange and white roses spilling down the side soften the hard wood lines.
Put your tallest arrangement on the top shelf and let stems trail over the lower ones. Artificial flowers let you set the ladder up days ahead without any wilting.
12. Wooden Arbor

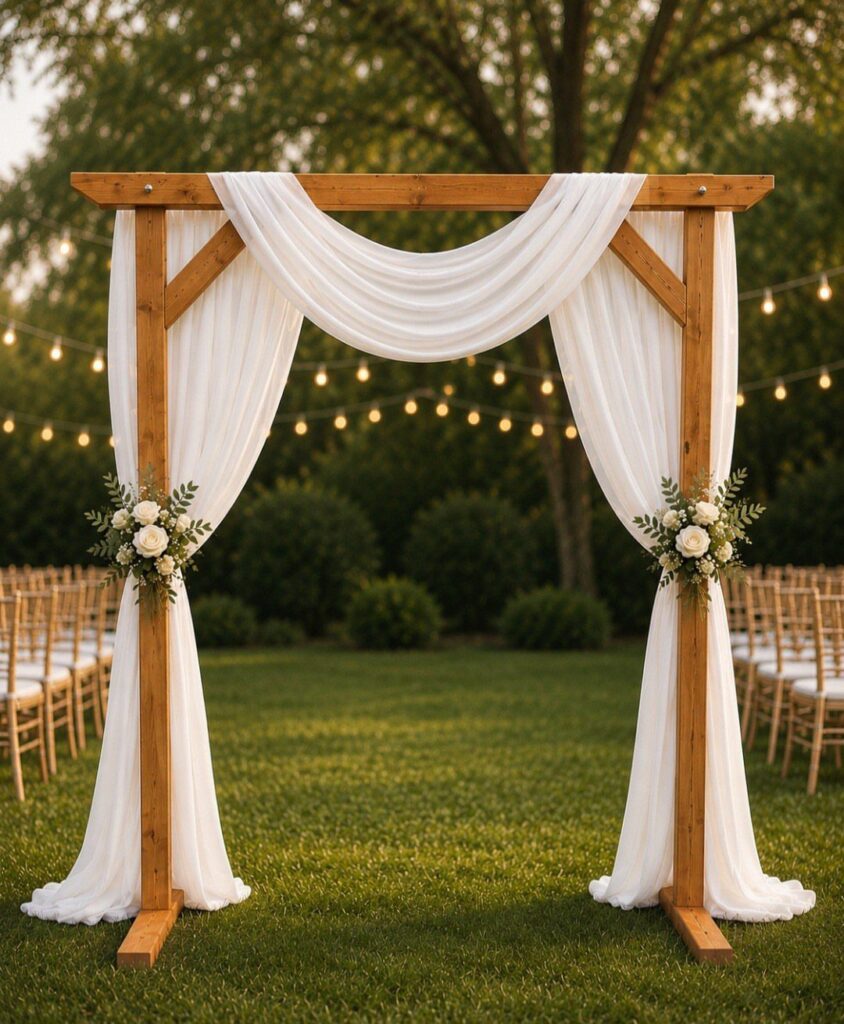
A freestanding wooden arbor gives an outdoor ceremony a clear focal point, even on an open lawn. Pink and white flowers with green foliage worked along the frame make an arbor look planted rather than assembled.
Place it so the guests’ seating faces it squarely, and keep the greenery heavier on the top and one side. That asymmetry looks more natural than flowers spaced evenly all the way around.
13. Natural Wood Table Setting

Skip the tablecloth and the wood does the styling for you. A bare table gives the cake, cupcakes and brownies a warm base, and the wooden stands and platters read as one set with it.
Against a brick wall, I’d keep the dessert pieces in a single material family so nothing competes with the grain.
14. Rustic Drink Cart
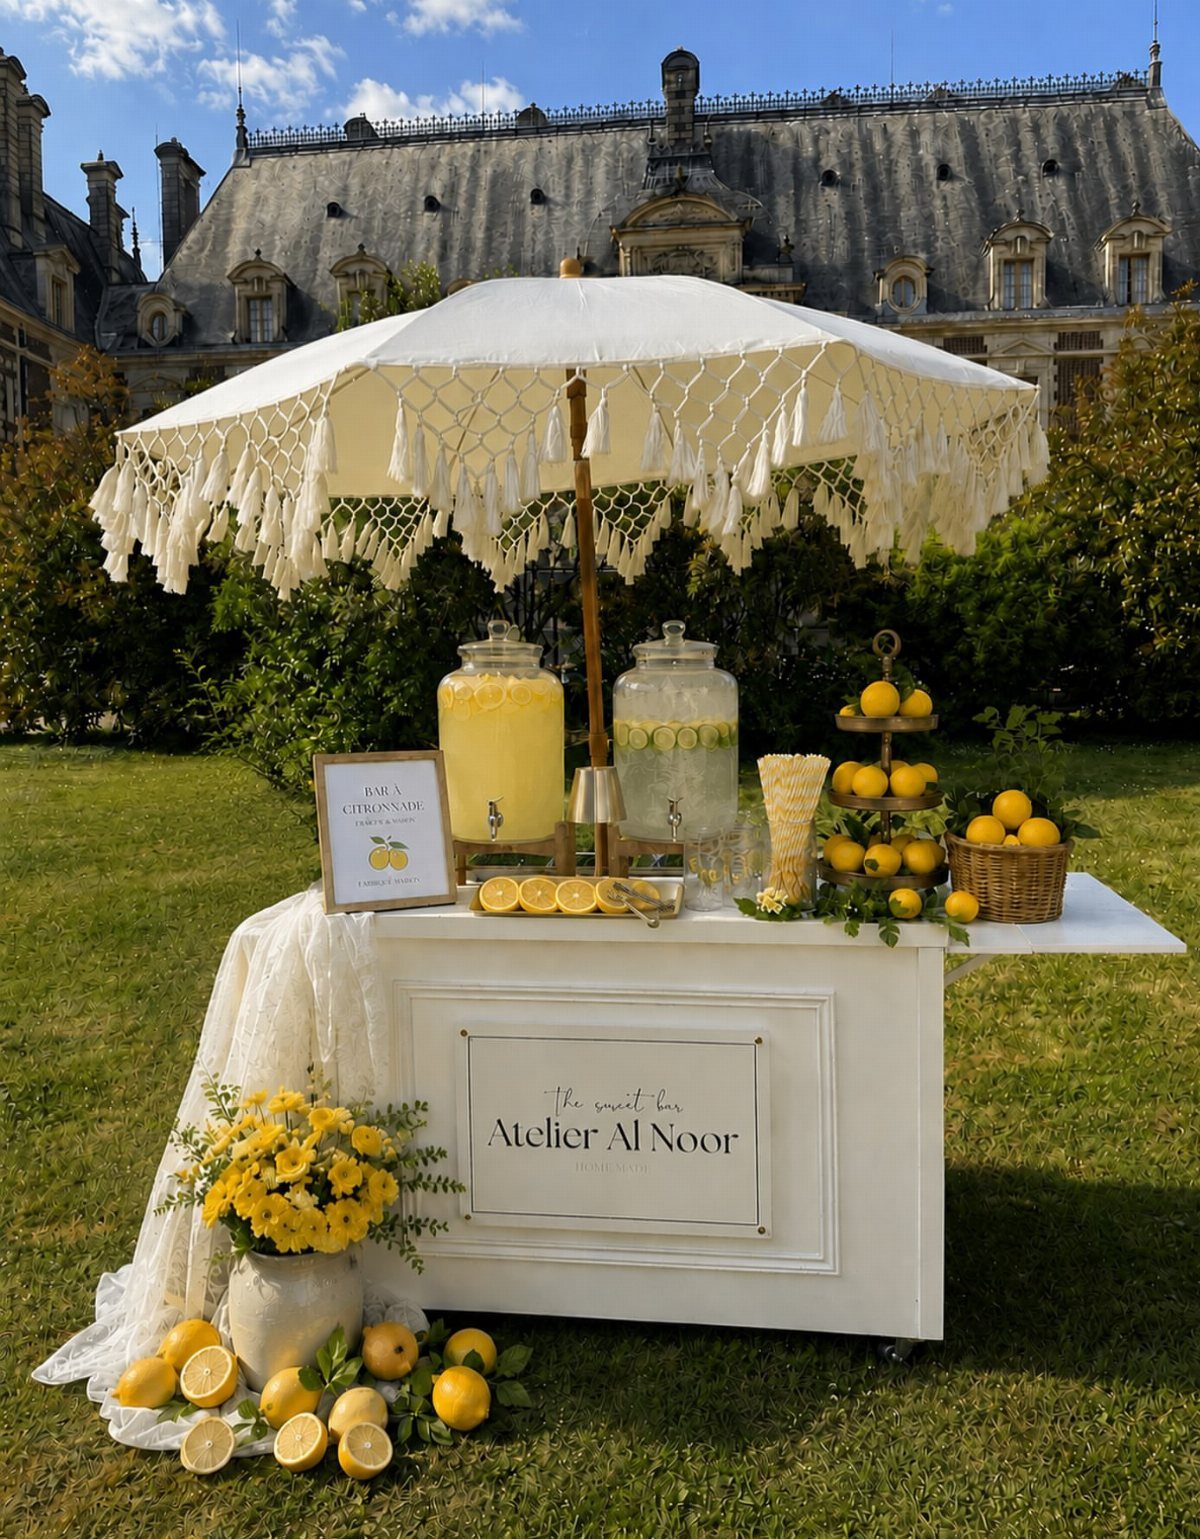
Set up a self-serve drink cart before the ceremony and guests have something cold in hand the moment they arrive.
Keep the drink cart to one thing: a spigot dispenser of lemonade, a bowl of sliced lemons beside it, and a fringed umbrella overhead so guests have an obvious place to gather.
I’d choose one drink, not three, so nobody stalls at the cart. Add a small sign naming it, in any language that suits your crowd.
15. Chalkboard Seating Chart
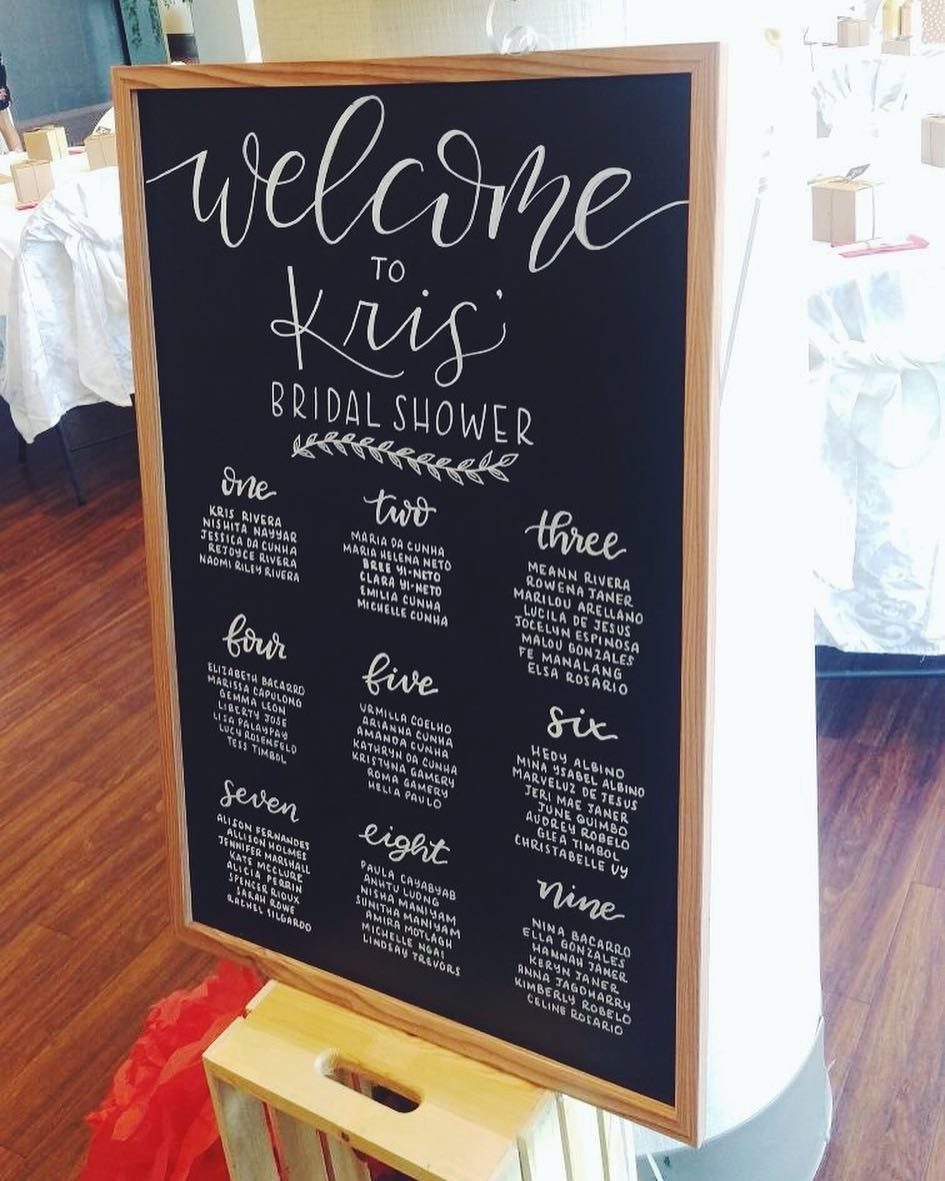
Chalkboard paint turns a wooden frame, panel or crate-top into a seating display for the cost of a can of paint and some chalk.
Use a white paint pen or chalk marker on the black board, since white on black reads from farther away, and list each table’s names together under its number.
A wooden crate makes a good stand, since it holds the board upright without hooks. Write the names last, after you’ve confirmed every table, because chalk wipes off and can be redone.
16. Engraved Wood Slice Favors
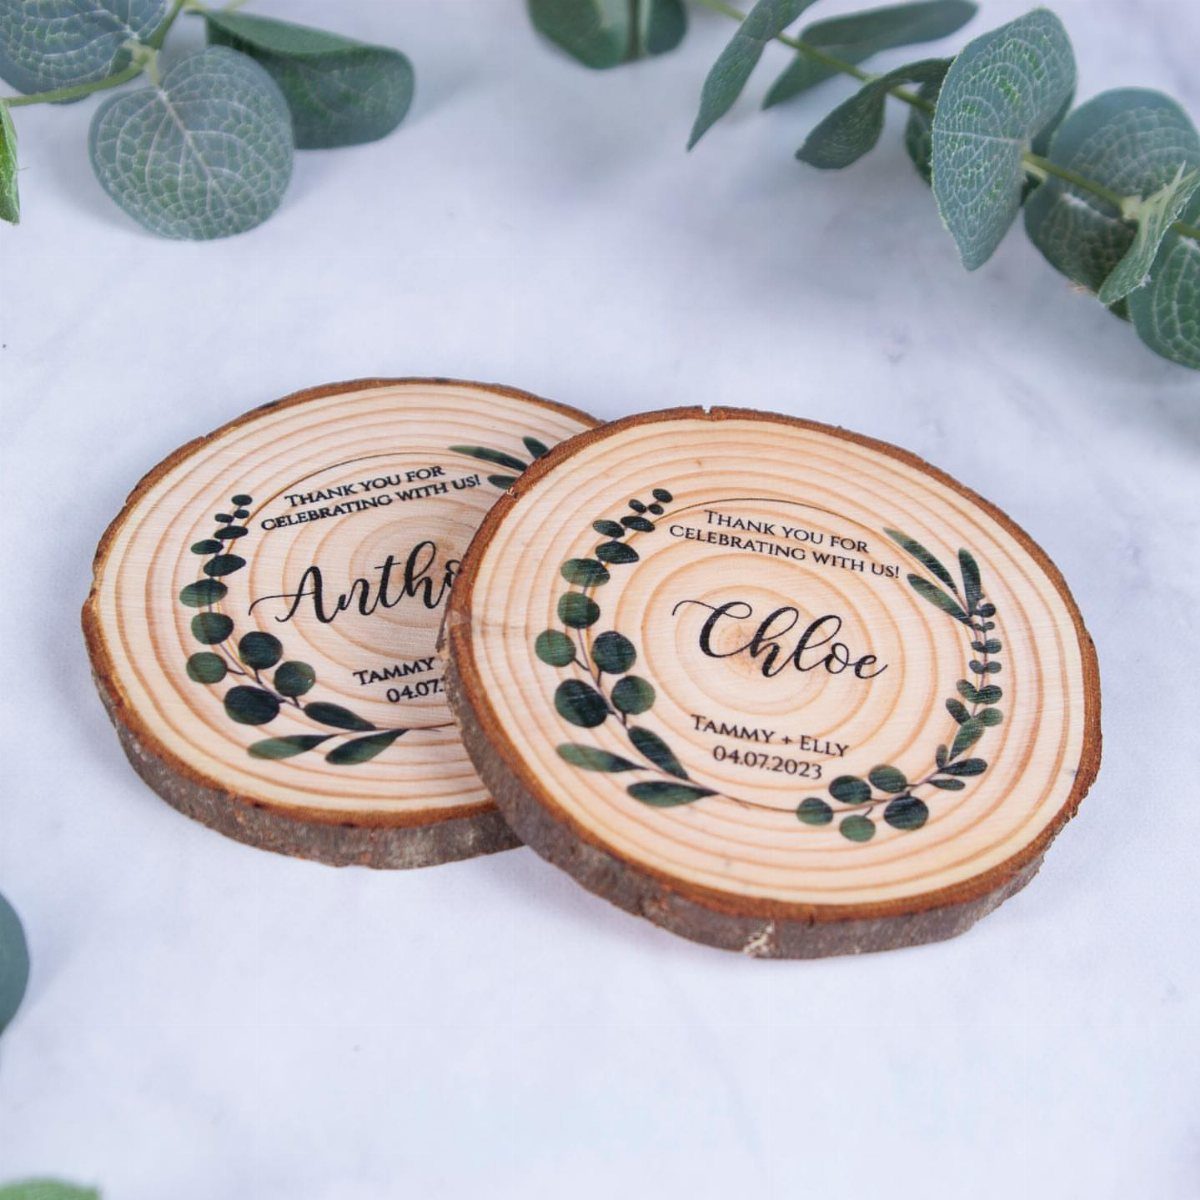
Bark-edged wood slices engraved with the couple’s names, the date and a few leaf patterns make favors guests will actually keep.
Leave the bark on; the rough rim against the smooth engraved center is what makes each slice look natural and personal.
A sprig of eucalyptus laid on top finishes it. Engraving is permanent, so have a second person read every name and the date aloud before you place the order.
17. Engraved Wooden Keepsake

A round wooden cutting board engraved with the couple’s names and the wedding date works as decor on the day and as a kitchen piece afterward.
A family name across the top, with first names and the date beneath, keeps the layout clean.
I like it better as a gift than as a favor, since one good board makes a bigger impression than a pile of small items. Lean it on a counter or shelf to display it.
18. Wooden Candle Holders

Small wooden bowls make candle holders with built-in character.
For a second option, add one sculptural wooden holder with a tea light among them to vary the shapes. Group the bowls in odd numbers on a table so the clusters look gathered, not lined up.
19. Wooden Dessert Display

Wood slices cut to different heights give a dessert table levels, so the cake, cupcakes and brownies each sit at their own height and nothing hides behind a neighbor.
I’d put the cake on the tallest slice and step the cupcakes and brownies down from there.
Add a small chalkboard sign for each flavor, since guests like to know what they’re picking up. Write the flavor names in white chalk or a chalk marker so they read from a few feet back.
20. Wooden Reception Seating

Beige linens keep the table quiet, which lets the wood of the chairs show as the one natural accent. Wooden cross-back chairs also run in a continuous line down a long table, so the material repeats at every seat.
I’d use the same chair all the way along instead of mixing styles. Tall leafy centerpieces sit above the chair backs, so the green and the wood stay on separate levels without competing.
21. Wooden Schedule Sign

Guests want to know when things happen, and a wooden sign answers that without a printed program. Put the welcome message with names and date on the top board, and the order of the day on the lower one.
List only the moments guests need, such as ceremony, meal and last send-off, each with its time.
For an American crowd, write the date month first and add am or pm to every time, so nobody misreads them. Set the sign where guests arrive.
22. Wooden Guest Book Station
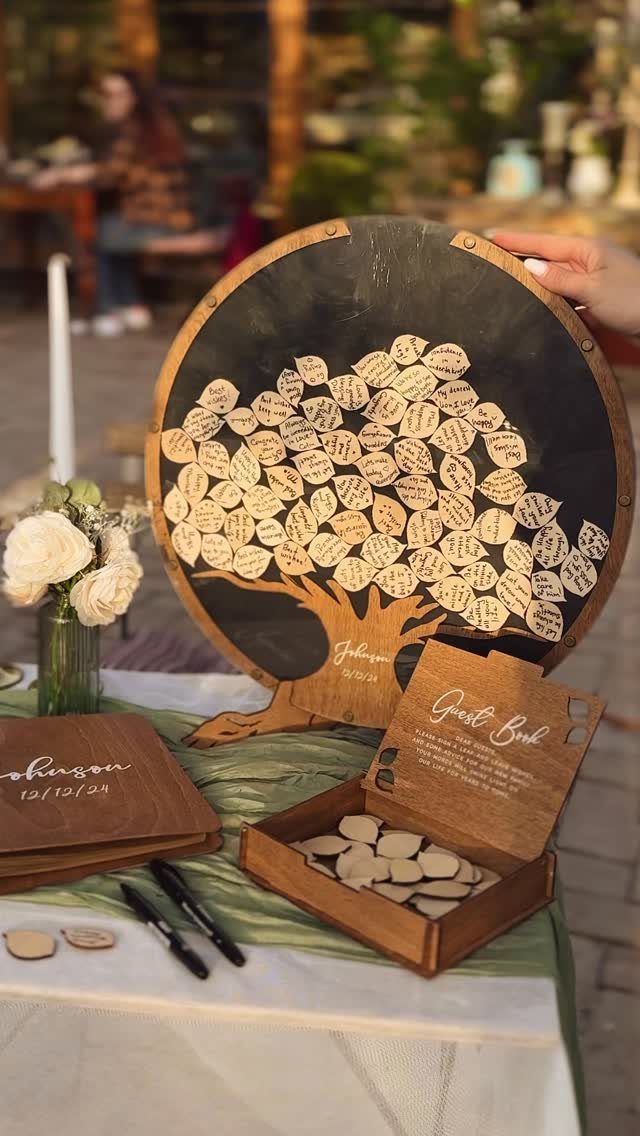
Leaf tokens give guests a smaller job than a blank page, and I find more people take part when the task looks that easy.
Keep the leather book, the matching box and the wooden tree together on one table, with the title "Guest Book" and the couple’s name and date where guests will see them.
Lay out a pen beside the box. Put the table near the entrance, so guests find it before the ceremony or on the way in.
23. Wood Slice Centerpiece

Setting the whole arrangement on one wood slice turns a jar of flowers and a few candles into a single centerpiece you can move as a unit.
A sunflower with wildflowers in a jar, taper candles and a tealight all fit within the slice’s edge.
Keep the white tablecloth plain so the grain and rim of the slice stand out. Place the tallest pieces, the jar and tapers, toward the middle and the tealight in front.
24. Wooden Bowl Candles
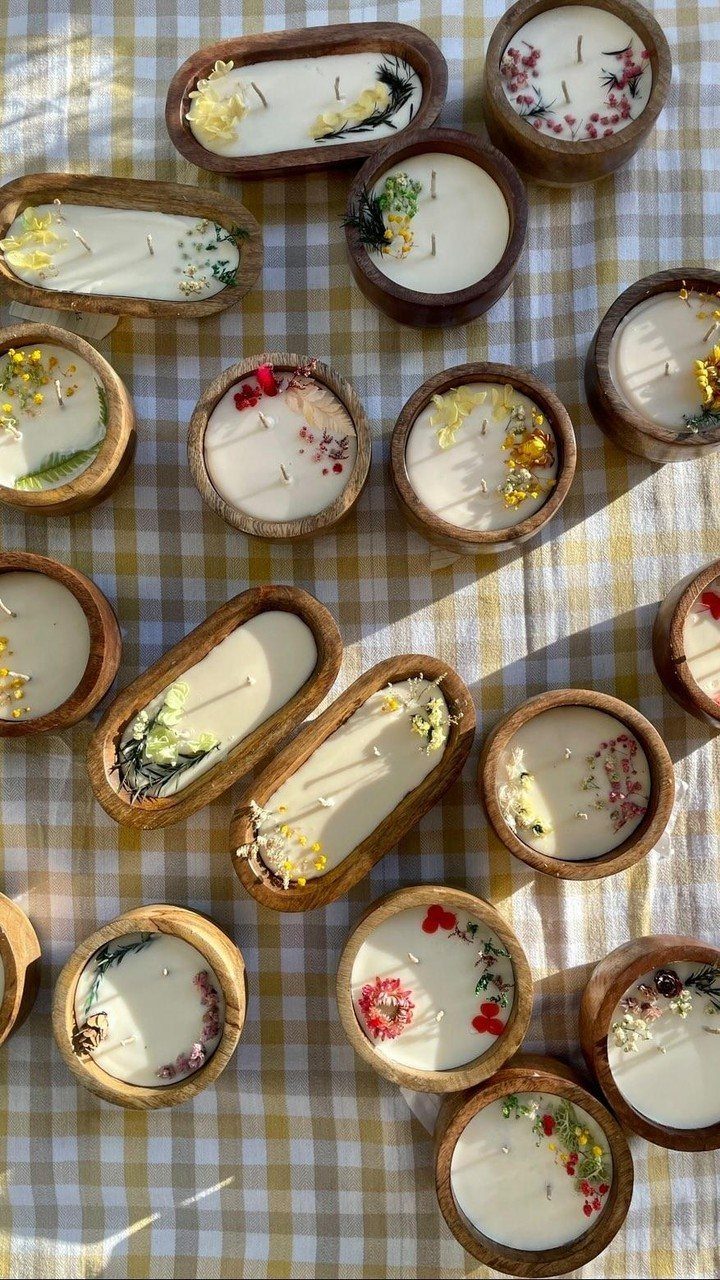
Dried flowers on handmade candles in wooden bowls give a soft, textured look without a single fresh stem. Mix round and oval bowls, and choose bowls the candle fits snugly so the wood frames the wax.
Keep the dried flowers away from the wick, as dry stems burn easily. I’d decorate the outer edge and leave the center of each candle clear.
25. Wooden Barrel Drink Station
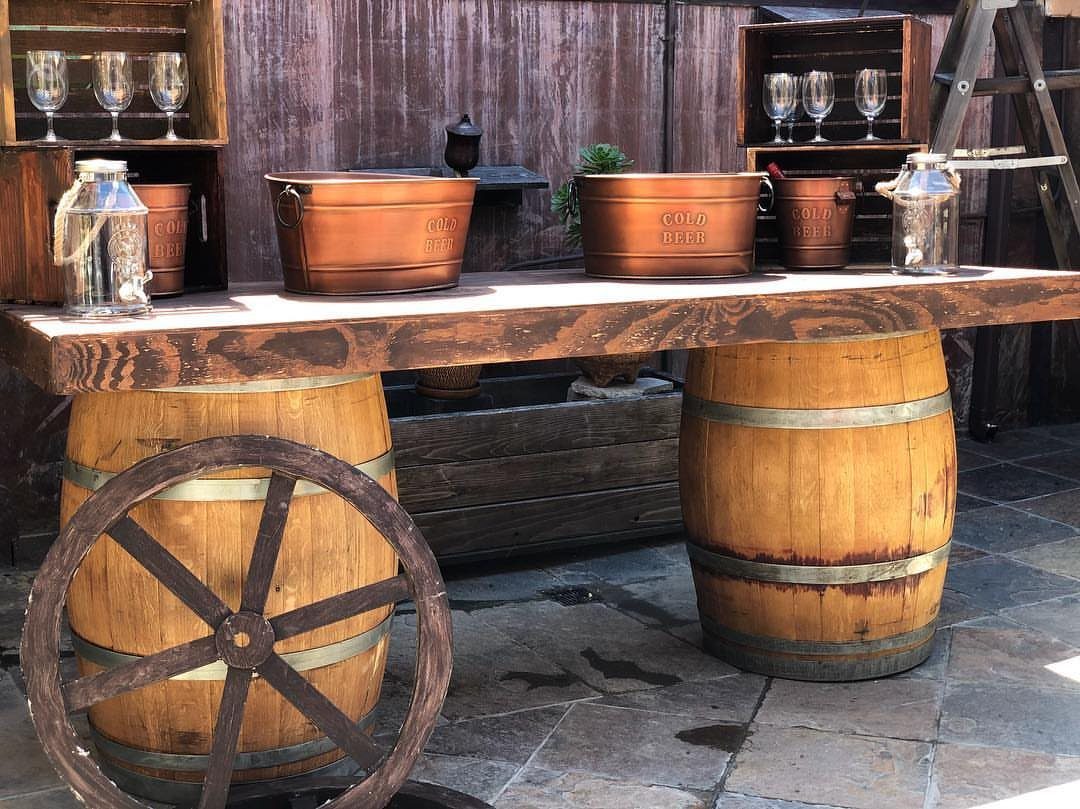
A thick wooden slab across 2 barrels holds a full drink setup at a comfortable standing height, and the copper buckets, glass dispensers and wine glasses in crates all sit on the wood without needing a cloth.
I like the crates for the glasses, since they keep stemware grouped and easy to grab.
Label each bucket the way "COLD BEER" is labeled here, so guests know what’s inside before they reach in. Keep the wagon wheel off to one side as a prop so it doesn’t crowd the working space.
26. Wood Slice Photo Display

A single wood slice can hold a couple’s photo and a burlap-wrapped jar of white daisies together, so the whole display moves as one piece.
I’d keep the jar small and set it beside the photo, not in front, so the faces stay fully visible.
A heart-shaped tag tied on adds a personal line, and any language that fits your family works for it. Stand the photo upright against the jar for support, or use a small easel-style frame if it tips.