
Which lamp is yours depends on the tools you already have, because this list runs from a paper shade you score and fold in an evening to a reclaimed oak post that needs a lathe.
A ceramic base calls for a slow drill and a bit made for tile, while the paper shade needs only a cutting mat and a metal ruler.
Two of the entries here, the stability check and the wiring test, apply to every lamp on the list: keep the base heavier than the shade, and test the wiring before the lamp sits on a table.
1. Figurine Table Lamp
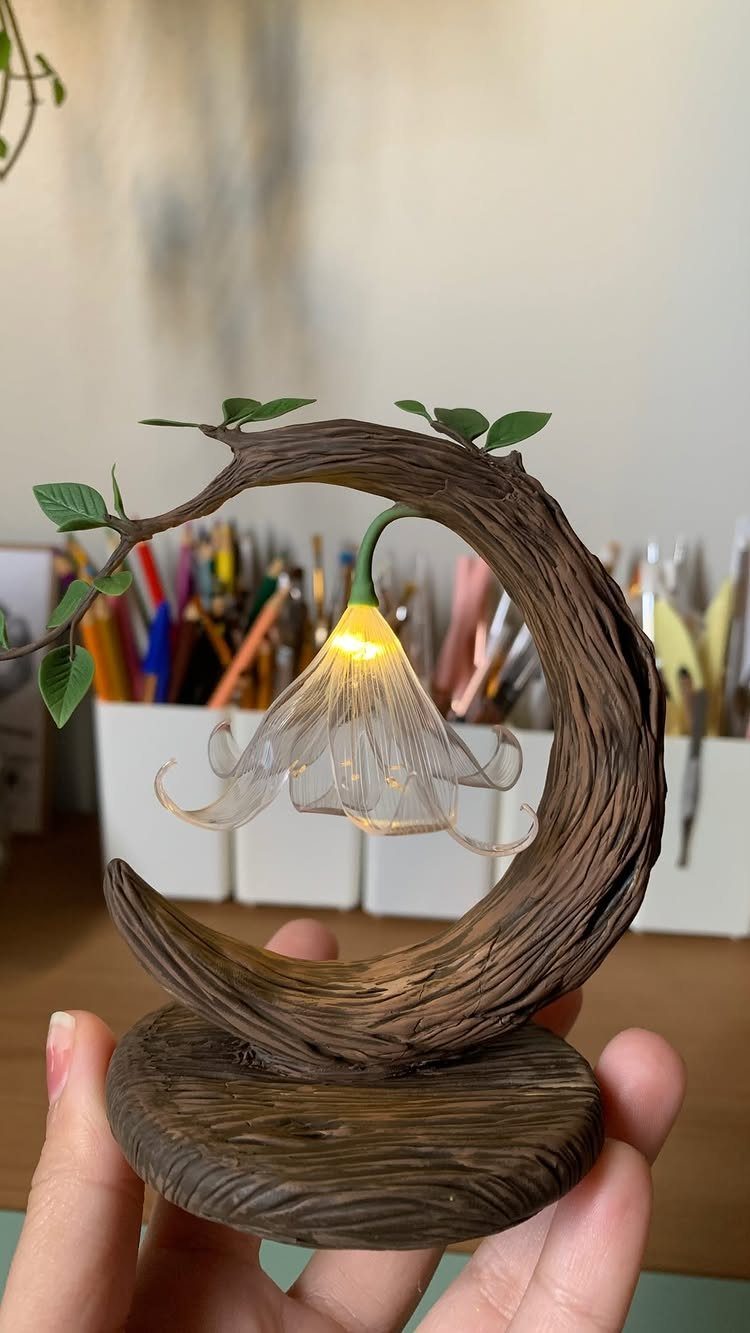
A small decorative figurine becomes a lamp once it is mounted on a wood base and wired through. A figurine with a translucent or hollow part, like a flower bloom, gives the bulb something to light from inside.
A figurine this size suits a desk or nightstand better than a living room side table. I’d keep the wood base plain and let the figure carry the look.
2. Ceramic Base Lamp
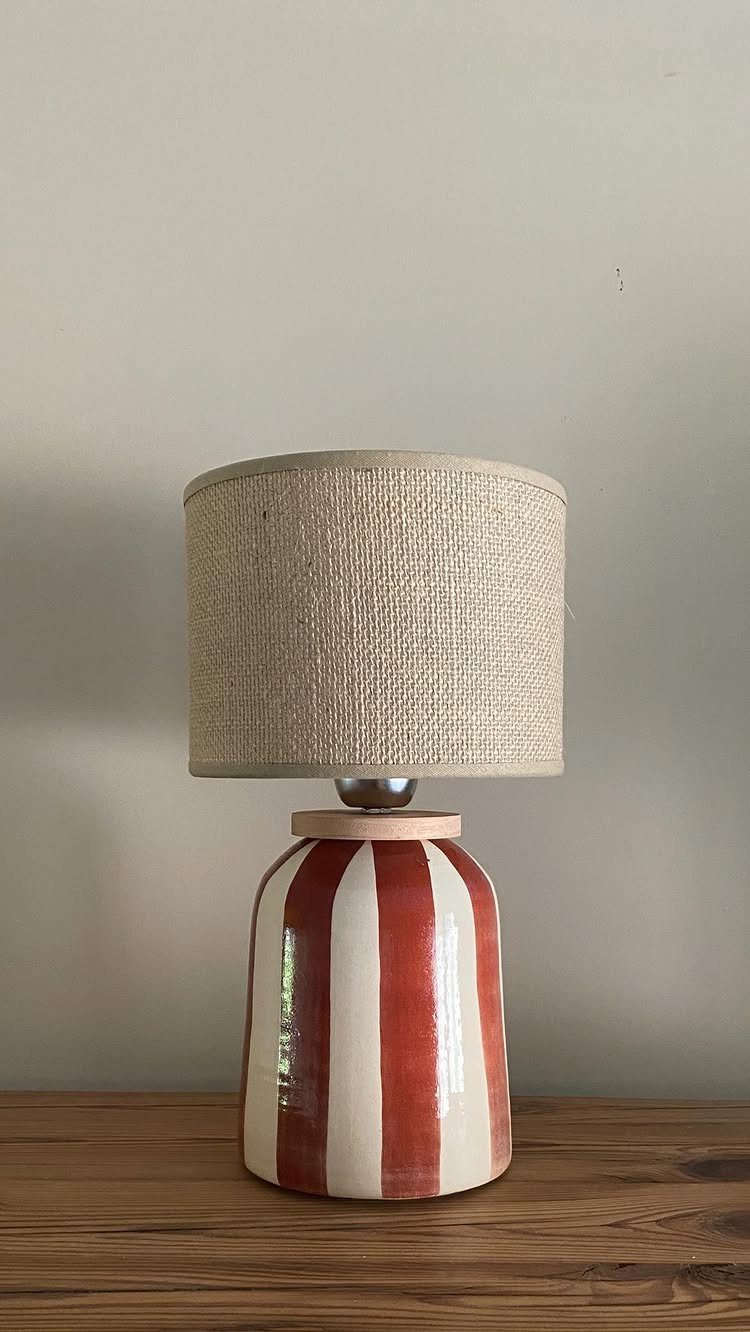
Stripes this bold do the heavy lifting, so I’d keep the shade quiet: beige or another neutral fabric, as here.
Building the lamp around a ceramic base means it is wired in and fixed, so pick a base you will still like in a year.
Ceramic cracks easily. If the base needs a hole for the cord, drill slowly with a bit made for ceramic or tile.
3. Reclaimed Oak Lamp
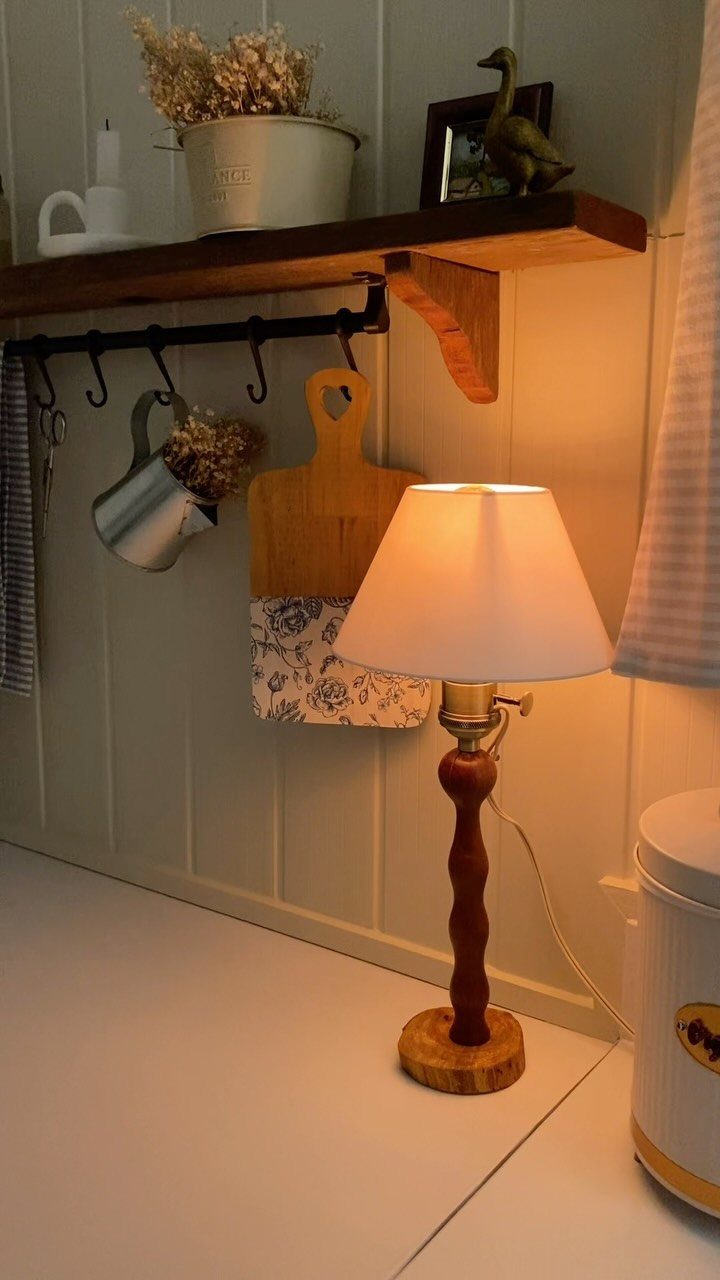
Woodturning shapes this lamp, so you need a lathe or access to a shop that has one. A reclaimed oak post is shaped into a rounded profile, then fitted with a lamp kit and a shade.
If you have never turned wood, I’d treat this as a project to learn on a cheaper piece first. A plain white shade keeps the eye on the grain of the oak.
4. Freestanding Fabric Lamp
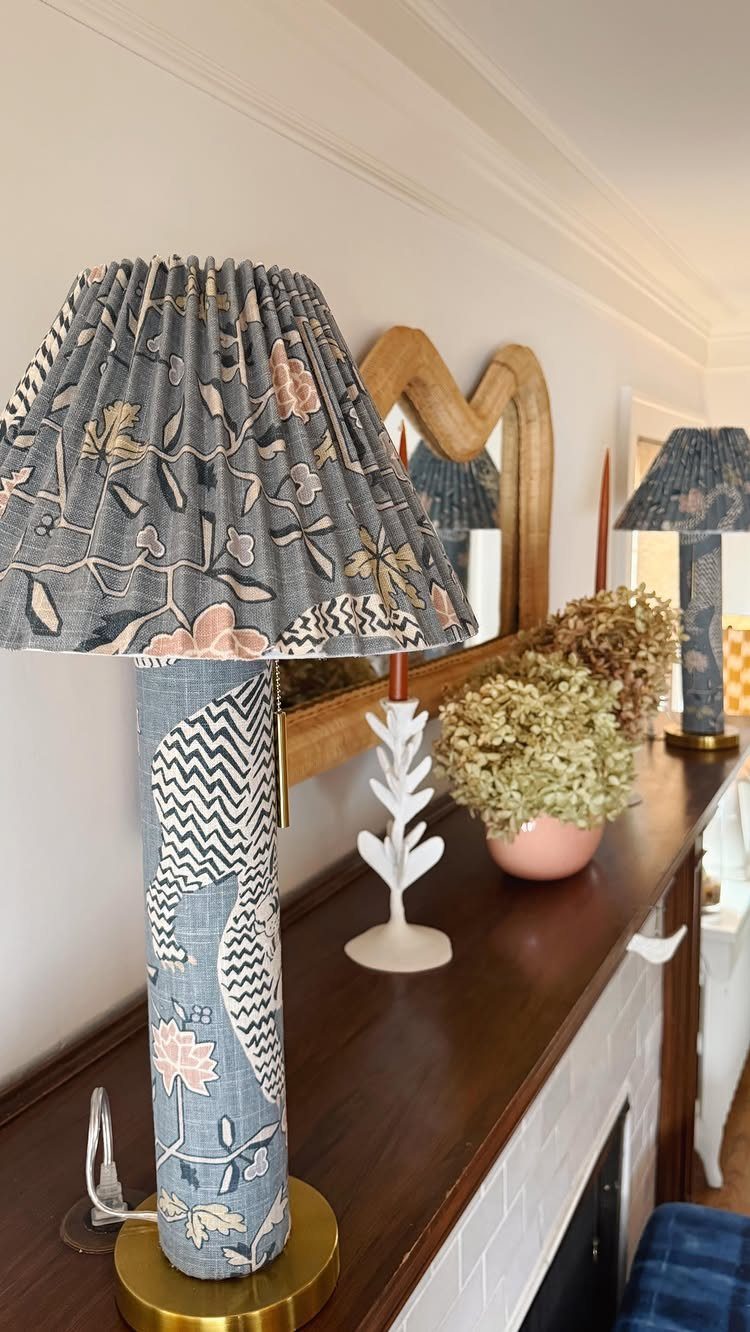
Two rings and one panel of lampshade material give you a freestanding cylinder. Wrap the panel in fabric first, then curl it into a cylinder and fix it to the rings.
Measure around the rings before you cut, and add a small overlap for the seam. A pleated shade on top is a separate choice: it suits a fabric body well, but the cylinder looks fine without one.
5. Pleated Shade Cover
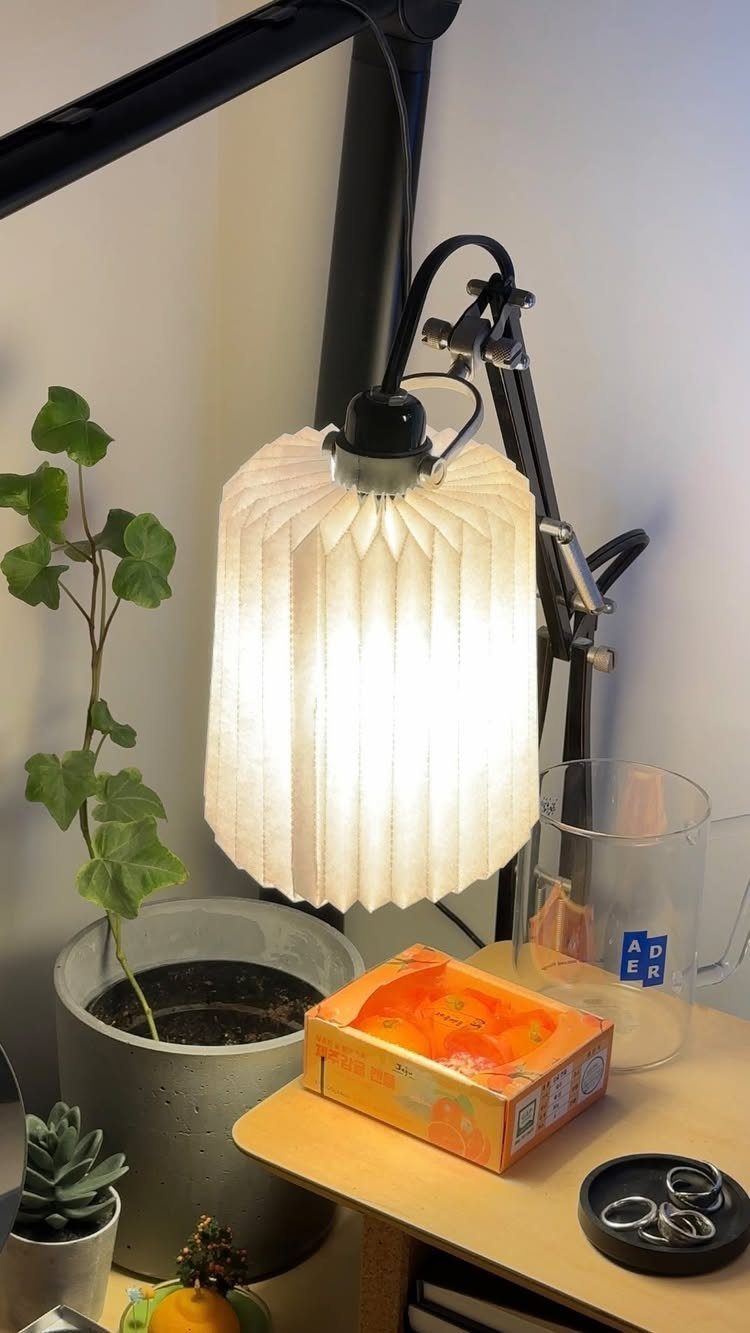
Box pleats eat fabric, so buy more than the shade’s circumference suggests. The cover is a fabric skirt that fits over a lampshade you already own, which makes it one of the cheaper upgrades here.
Pin every pleat to the same depth before stitching, and press each one flat. White fabric over a black base gives a clean contrast, though any solid color works the same way.
6. Wooden-frame Can Lamp
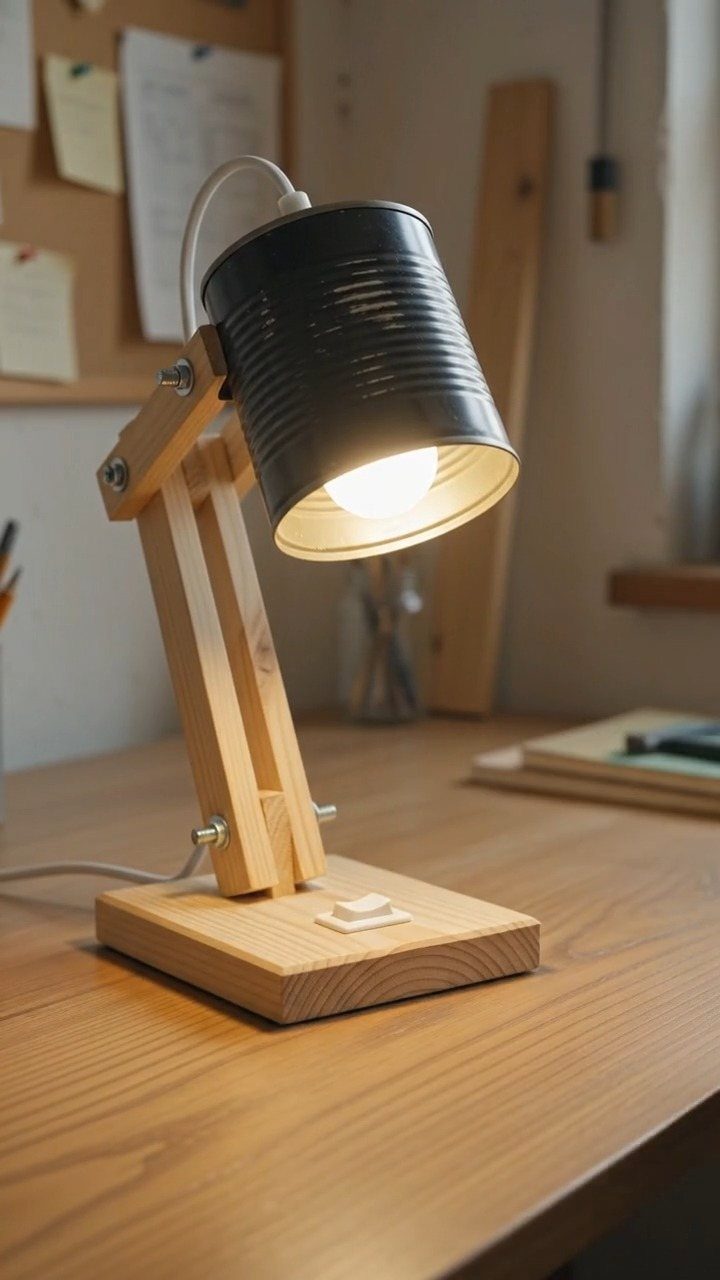
A black metal can makes a free shade if you already have one in the recycling. It sits on a simple wooden frame, and the frame should stay plain so the can remains the focus.
Sand or file any sharp edge on the can’s rim before you mount it. For a desk lamp like this, a light wood frame against the black can reads clean and modern.
7. Glass Orb Lamp
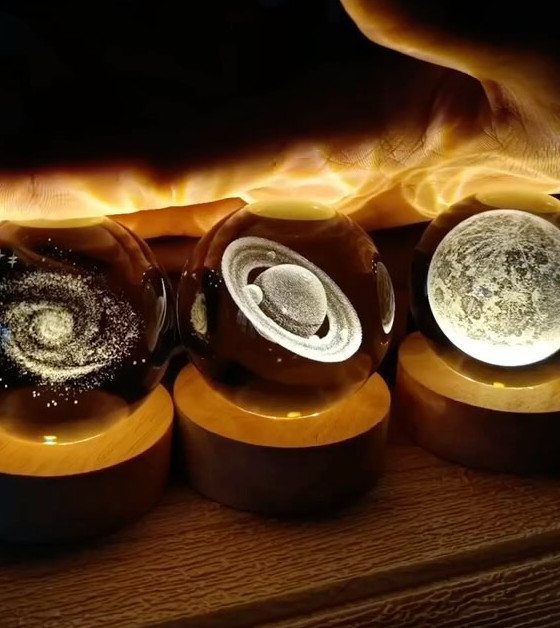
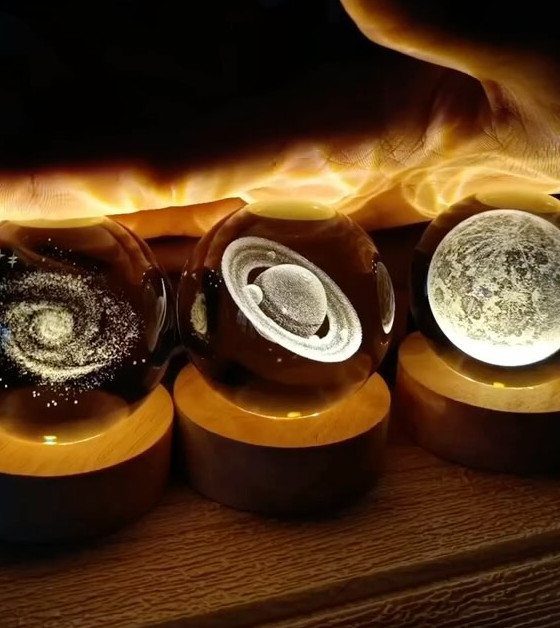
Galaxy, Saturn and moon designs work as a set because each sphere carries a different scene while the round wooden bases stay identical.
I’d keep the bases plain and the same size, so the glass is the only thing that changes from one lamp to the next.
Three on a shelf looks like a collection. A single sphere is enough for a nightstand, and I’d choose the moon for that, since it’s the calmest of the designs.
8. Woven String Orb Lamp
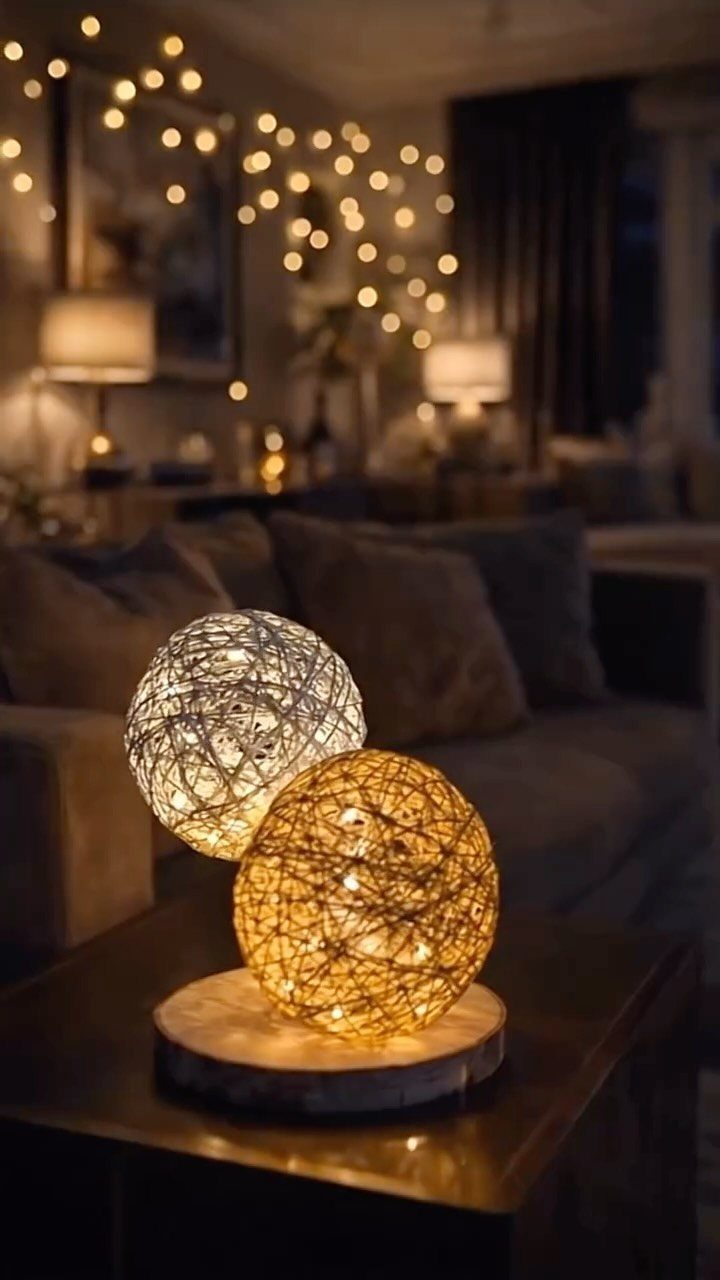
Dim rooms are where a string orb earns its place. The open weave lets light spill out in a pattern, which a solid shade can’t do.
If you’re making the shade, stick to one thickness of string or wire so the weave stays even across the whole sphere.
A round wooden base keeps the look simple, and a matched pair on a console or a pair of nightstands reads as intentional rather than cluttered. I’d put them near other soft lighting instead of under a bright overhead.
9. Acrylic Rose Night Lamp
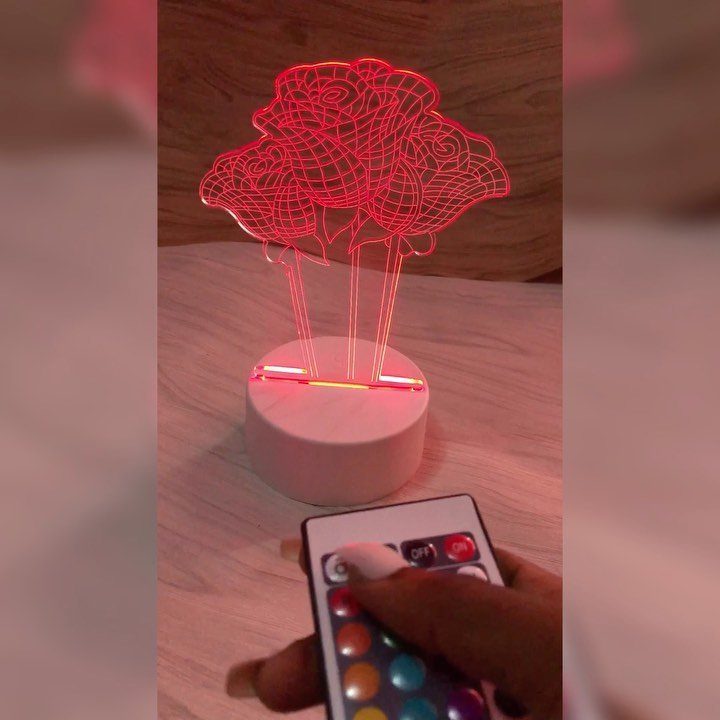
Color is the feature here: the etched roses can glow in different shades, and a remote lets you pick the mood from the bed or the couch. I like the red, but a cooler color suits a desk better.
A small white cylinder base keeps all the attention on the clear plate. Leave the surface around it mostly empty, because clutter next to an acrylic piece competes with the glow.
10. Glowing Stone Lamp
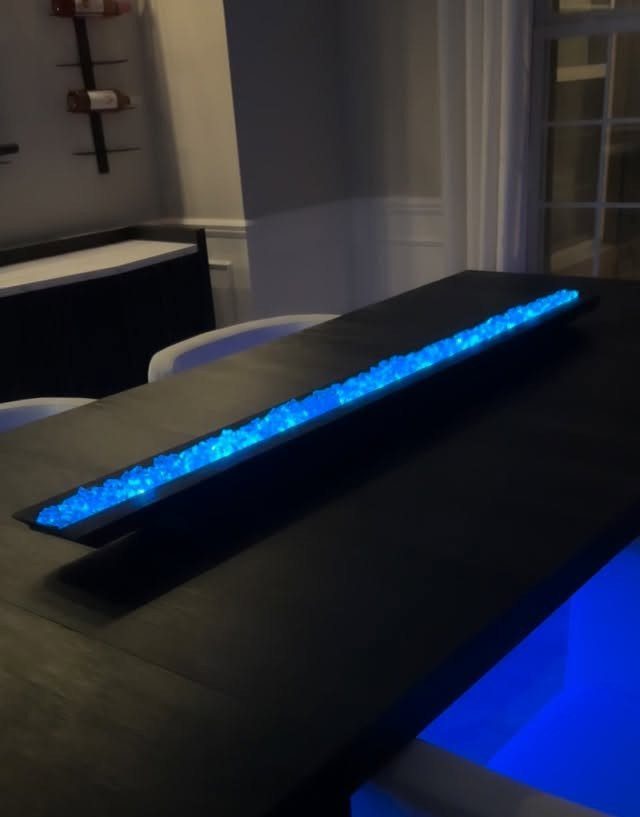
A long, narrow body suits places where a round-based lamp has no room: a console, a deep windowsill, the back edge of a desk.
The black frame makes the blue stones look brighter, so I wouldn’t paint or cover it in anything lighter.
If you’re filling it yourself, choose stones of similar size and sort out the chipped ones first. A mix of sizes looks messy through a narrow opening.
11. Driftwood Lotus Lamp
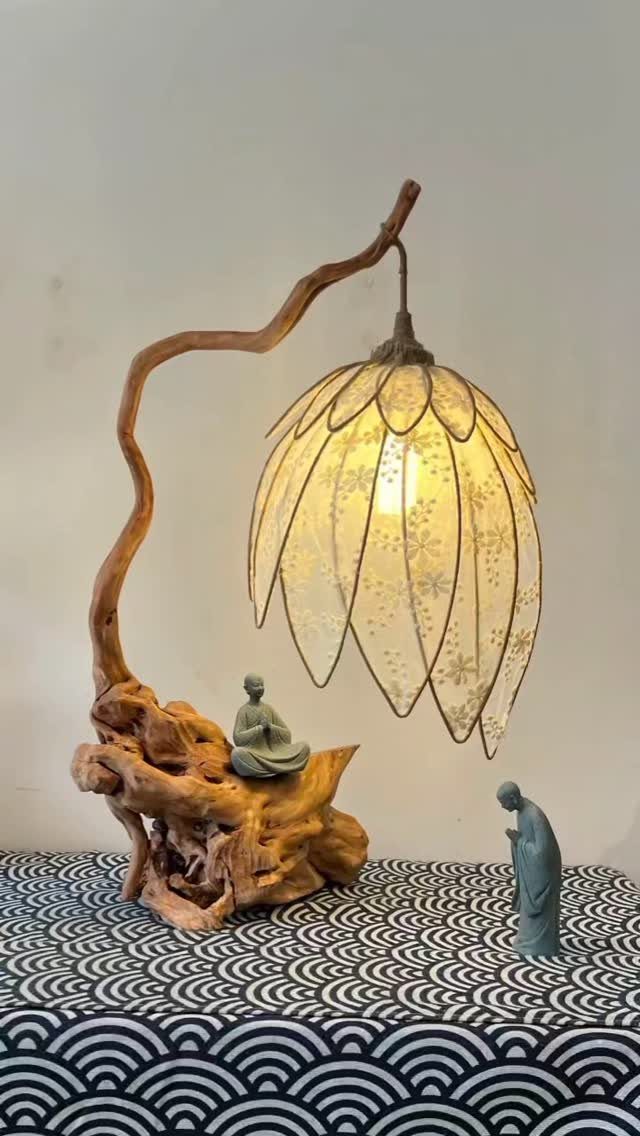
Look for a branch with a natural curve, because the curve is the whole stand. Sand any rough or splintery spots, then check that the branch stands upright on its own before you attach the lotus shade.
The small figurines at the base are an optional extra, and I like them: they give the eye a place to rest below the glow. Keep the table around it simple, since a branch this irregular already supplies the pattern.
12. Flower-shaped Lamp
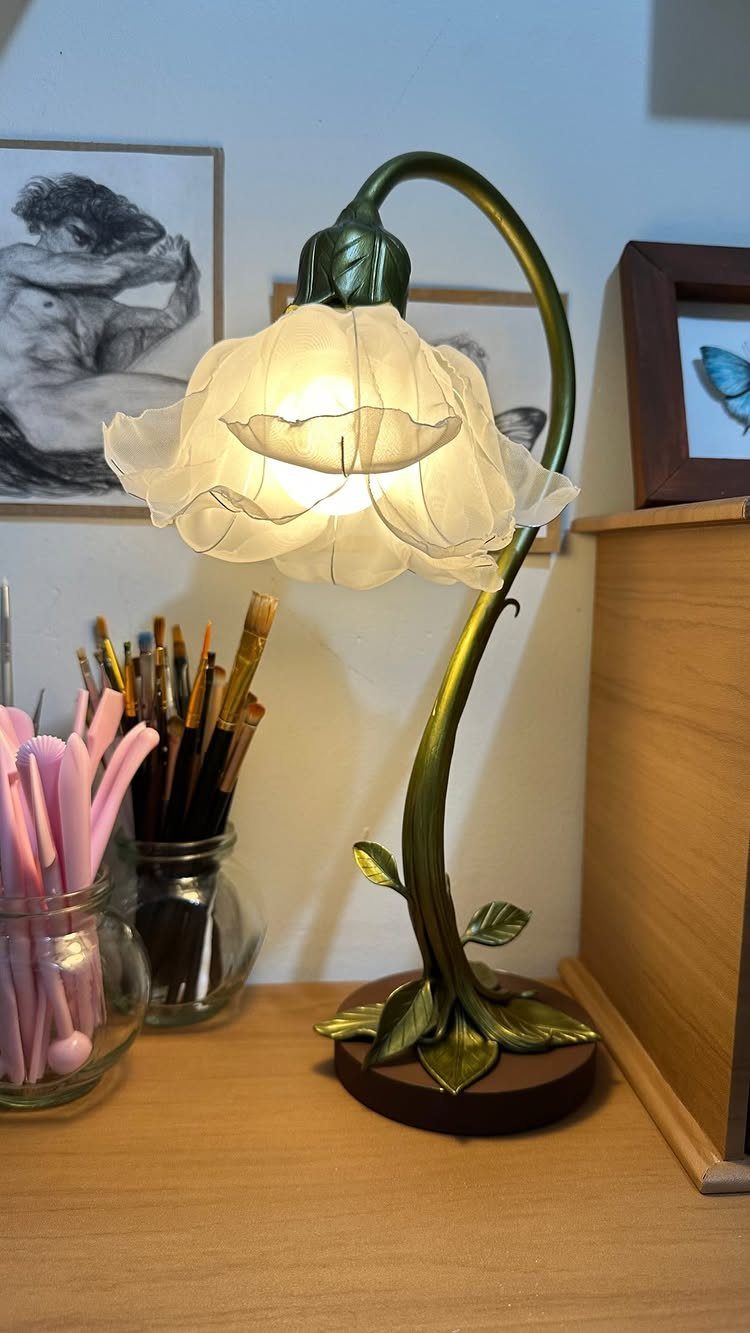
A desk is the natural home for a flower lamp, where the curved green stem can arch over your work like a plant would.
Keep the petal shade white, as here, so the light stays soft and the stem is the only color.
Choose a stem that bends but doesn’t droop. If the shade leans too far, the whole lamp looks tired instead of fresh.
13. Handmade Ceramic-base Lamp
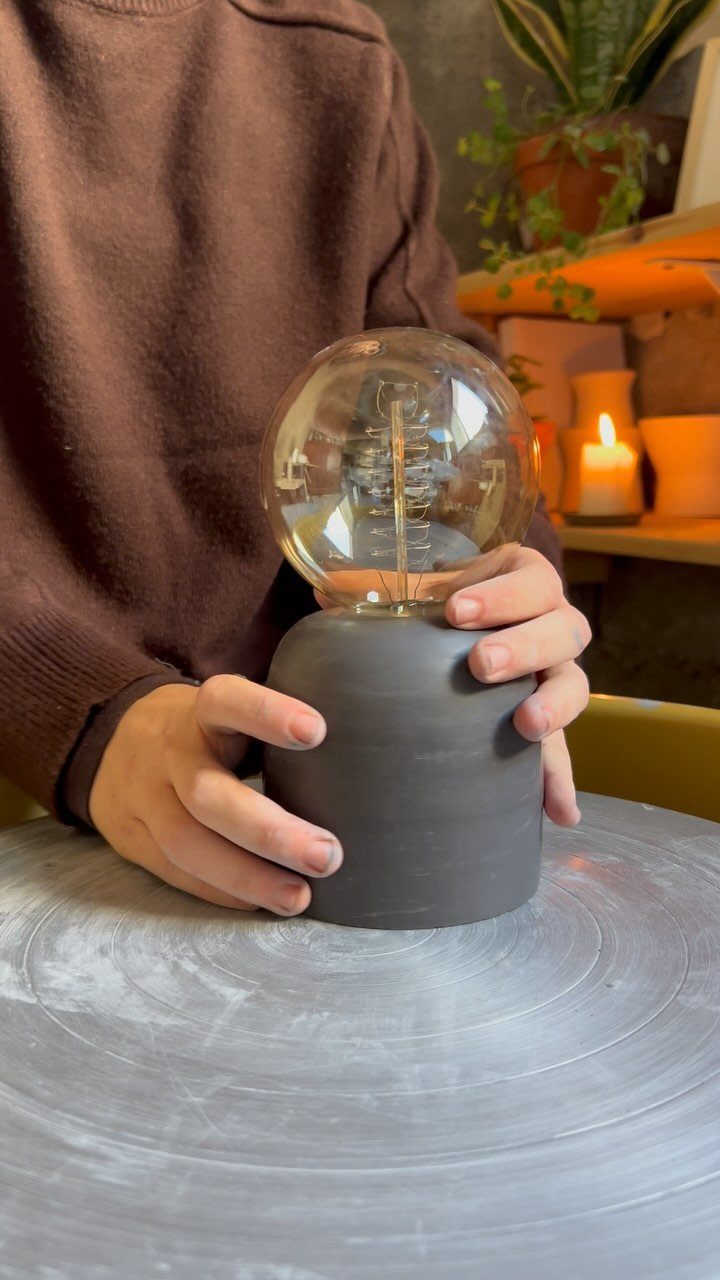
An oversized clear globe bulb on a matte black ceramic base lets the bulb act as the shade.
Nothing covers the filament, so choose a bulb that looks good bare, and keep the base plain so the 2 shapes read as a pair.
Matte black hides fingerprints better than gloss does. If you throw or buy the base, make sure the neck is wide enough to hold a socket and the cord can pass through.
A hole in ceramic needs a slow, careful drill, so use a diamond or carbide-tip bit and keep the spot damp.
14. Paper Pleated Lamp
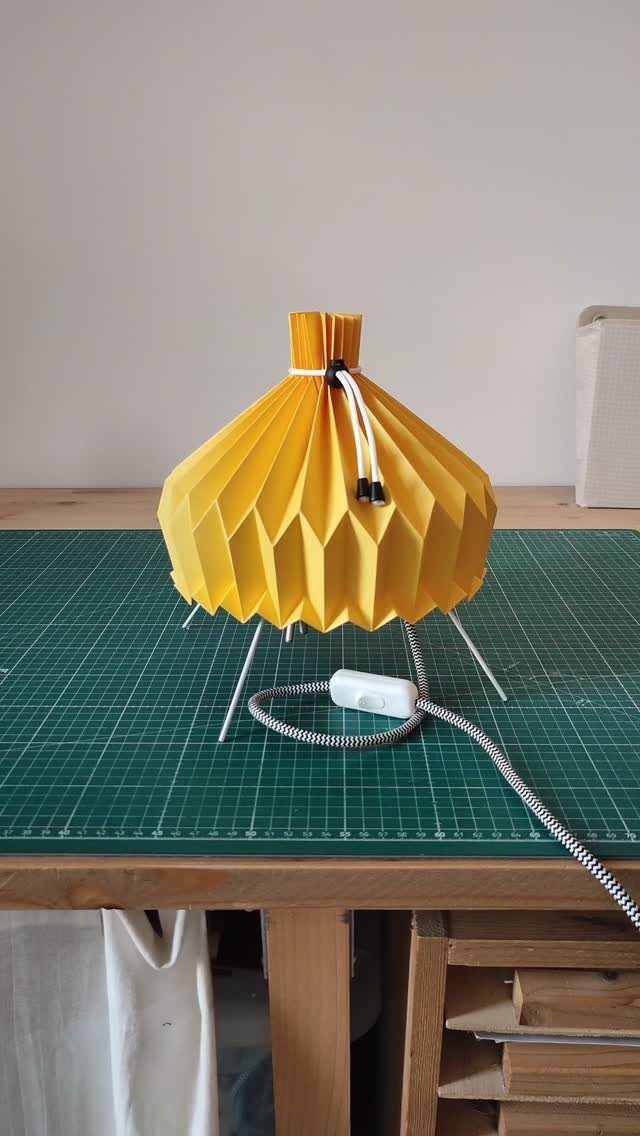
Pleated paper makes a shade that costs little and folds in an evening. The yellow here sits on thin white legs with a cord and switch, so the whole lamp is light in both look and weight.
Score each fold line before creasing so the pleats come out sharp and even. A self-healing cutting mat and a metal ruler make scoring and cutting pleats far easier and more accurate than working freehand on a table.
I’d keep the legs and cord in black and white and let the paper supply the only color. Paper and a hot bulb don’t mix well, so choose a bulb that stays cool.
Check Stability and Reclaimed Wood
A lamp with a shade is top-heavy, so the base has to outweigh it. Set the shade on the base before you wire anything and nudge it from the side; if it rocks or tips, choose a heavier base.
Reclaimed wood needs a check before any cutting or drilling. Run your hands over every face and look for nails, screws, and staples, then pull out the metal or reject any piece that hides it.
Rot, splits, and cracks are the other things to rule out. Press a screwdriver tip into any dark or soft spot, and skip a piece that crumbles or has a crack running toward where the hole will go.
Look over the threading on the lamp’s arm first, then choose your drill bit.
Most table lamps use 3/8 inch, which calls for a 3/8-inch bit, and the hole should sit well away from the back edge or the arm won’t hold firm.
Test and Secure Lamp Wiring
Sort the 2 wires by feel before you touch a screw.
Once the ends are stripped and twisted, the two wires are easy to swap by accident: smooth wire lands on the brass screw, and ribbed wire lands on the nickel one.
Tie a knot in the cord near the socket before you tighten the connections, so a tug on the cord pulls on the knot instead of the screws.
Insulate each connection so no bare wire is exposed, and give each one a light tug to confirm it holds.
Then screw in a bulb, plug the lamp in, and switch it on. If it flickers or stays dark, unplug it first, then recheck every connection for a loose wire or a gap in the insulation.
Frequently Asked Questions
How can I make my own table lamp at home?
Pick a base with some weight, such as a tall candlestick, a vase, a planter, a jar, a ceramic base or a wood post.
Fit it with a lamp kit and a shade, and check that the base outweighs the shade before you wire anything. Knot the cord near the socket, insulate every connection, then screw in a bulb and test the lamp.
What is the rule for table lamps?
A shade sits high and pulls the weight upward, so a base that feels light for its height will tip the first time someone bumps the table.
Before any wiring, rest the shade on the bare base and push gently at the rim; any wobble means the base needs more heft.
What parts do I need to make a table lamp?
You need a base, a lamp kit, a shade and a bulb. Your base needs a channel for the cord, and since most lamp kits use a 3/8-inch threaded pipe, a bit that size is what I reach for.
Ceramic calls for a diamond or carbide-tipped bit, a little water on the spot, and a slow drill speed.
Can I paint the ceramic base of a lamp?
Yes, raw or plain ceramic can usually be painted.
Buy acrylic paint made for use on ceramic so it grips the surface. Paint is an easy way to change a base you like in shape but not in color.
What’s the difference between porcelain and ceramic, and is one better for a lamp base?
Porcelain is a type of ceramic made from white kaolin clay, while the broader ceramic label covers pottery made from nearly any clay. Thin porcelain glows when you hold a bright light behind it, and most other ceramic stays opaque.
Neither is better; it comes down to looks. Porcelain gives a delicate, translucent finish, and glazed ceramic gives bolder color.