
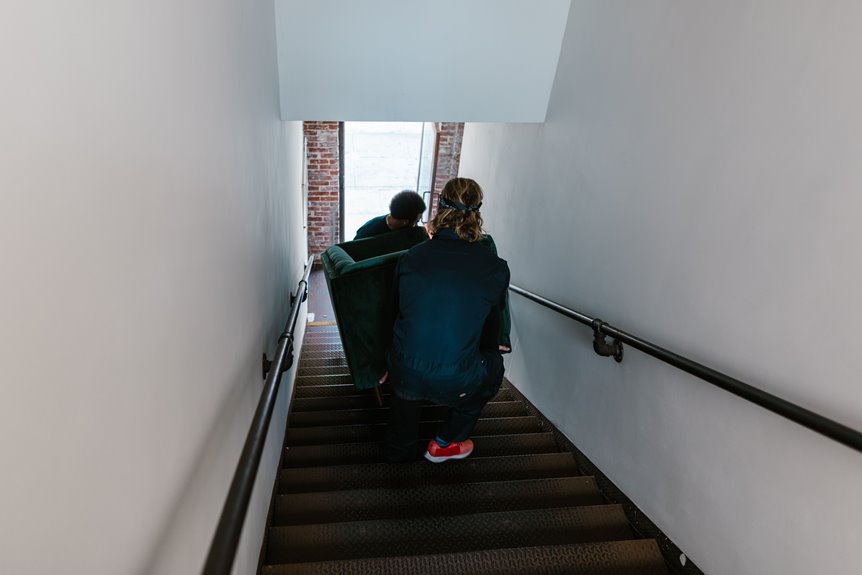
I’ve wrestled a solid oak credenza up a spiral staircase in a 1920s Brooklyn brownstone, my knuckles still carry the railing grooves. Brute force won’t save you here. Map every inch first, measuring doorways and that sneaky landing ceiling with diagonal checks for tilt clearance. I pad everything with 2 inches because Murphy’s Law loves stair moves.
Strip that beast down by removing drawers, legs, and shelves separately since dropping 25% of the weight makes a significant difference. Rent a stair-climbing dolly and Forearm Forklift straps, blanket-wrap corners like you’re swaddling a giant, and move with a partner using sharp “lift, step, reset” commands. Pause after each tread, regrip, breathe. Momentum on stairs is a traitor that will send you both tumbling. If your couch laughs at your measuring tape, there is no shame in calling pros who do this weekly. Stick around and I’ll show you exactly how to outsmart that one nightmare corner every old building hides.
How Stairs Change the Physics of Heavy Furniture
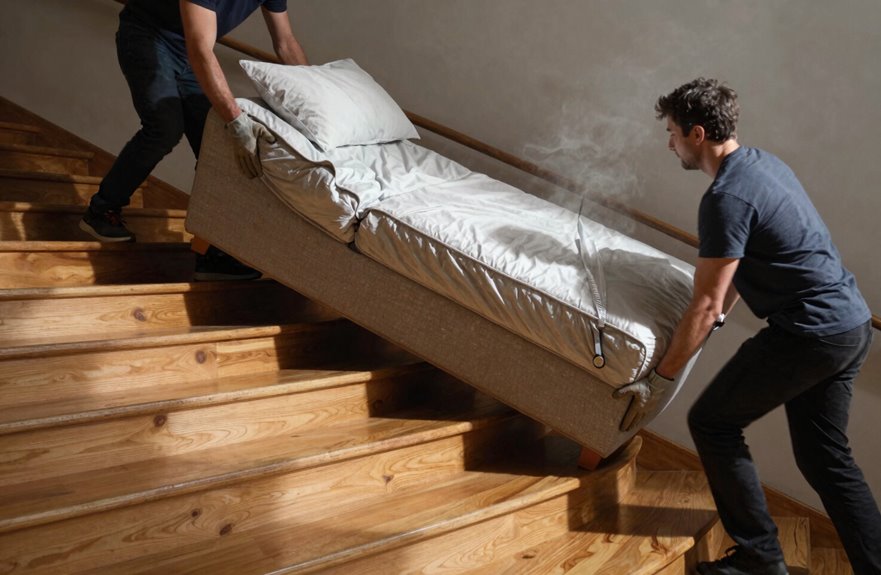
Why do stairs turn a manageable couch into a back-breaking nightmare? It’s all about your center of gravity shifting wildly as you tilt that IKEA Kivik upward. Every step changes the game. Your shoulders scream, your knees wobble, and suddenly you’re questioning every life choice that led here.
Stair geometry, particularly those narrow 1910 brownstone steps, dictates your tilt angle, while handrails become your best friend or worst obstacle. I’ve jammed a dresser against a banister more times than I’ll admit. That’s why stair-climbing dollies and lifting straps work so effectively. They redistribute weight so the lower partner bears more, keeping hips aligned. Regular dollies create significant risks during transport. Proper equipment prevents joint injury and reduces strain on your body.
Map Your Full Route Before You Lift
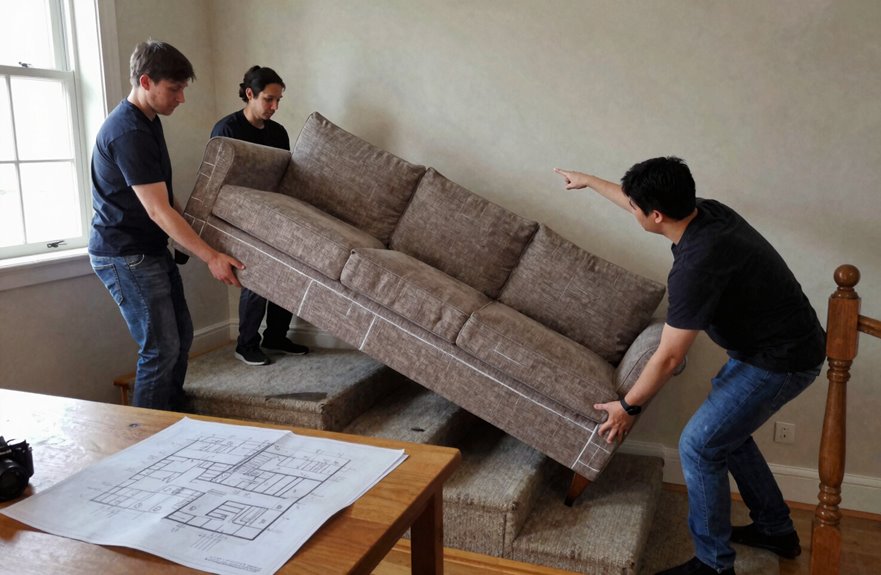
You can have the strongest lifting straps on the market and a partner with biceps like a Marvel poster, but none of it matters if your couch gets wedged in a hallway like a cork in a wine bottle. I’ve learned this the hard way, which cost me my security deposit.
Start by walking every inch of the route: doorways, that weird jog by the bathroom, the stair navigation itself. Grab your tape measure for measurements that prevent costly mistakes. Check ceiling clearance at landings, banister width, and whether that vintage sconce will hit your dresser.
Remove obstacles next: shoes, rugs, and any debris. Jot red flags on a receipt, visualize pivot points, and only then lift.
Measure Furniture and Stair Clearance Twice
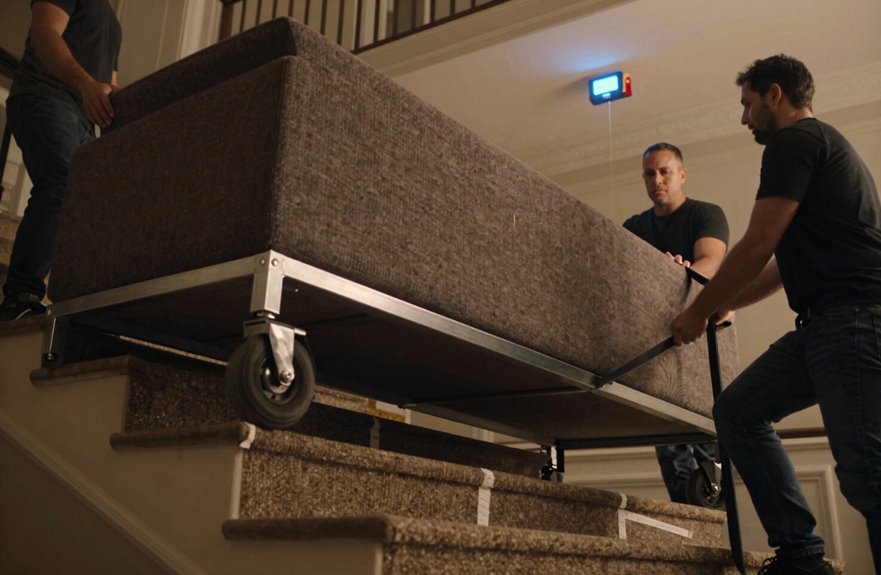
I grab my tape measure the second I finish mapping the route, because guessing is how you end up wedging grandma’s china cabinet into a stairwell like a cork in a wine bottle. I’ve encountered this exact problem at 11 PM. I’ll jot down every dimension: the height, width, depth of my dresser, then every doorway and ceiling height. My forehead still remembers that basement bulkhead from 2019. When those numbers don’t play nice, say my sofa’s diagonal clears the landing only at a 45-degree angle with two inches to spare, I know it’s time to pivot the plan before my walls sustain damage.
Why Measurements Prevent Headaches
Because nothing ruins a moving day quite like wedging a beloved velvet Chesterfield halfway up a narrow Victorian staircase, I’ve learned to rely heavily on my tape measure. I measure every doorway, every awkward landing, every inch of those stairs, twice, because the first attempt is usually wrong. Those measurements tell me if I’ve got actual clearance or if I’m dreaming. I add an inch or two for wiggle room, because “close enough” means a scratched Biedermeier and tears. Sometimes the numbers indicate disassembly is necessary. I photograph tight spots, jot everything down, and suddenly I’m not guessing. I’m moving with the confidence of someone experienced with these situations.
Key Dimensions to Record
Precision, that old friend of anyone who’s ever cursed at a stuck sofa, starts with knowing your numbers cold. I grab my tape measure and dive in, because guessing gets you nowhere, except maybe a torn lampshade and a chipped banister.
First, I tackle doorway clearance throughout the path, then stair dimensions including that sneaky ceiling height at landings. Don’t forget handrails either. They eat into your usable width more than you’d think.
Tilt clearance requires careful measurement. I measure diagonally from step nose to overhead obstruction, because that dresser might pivot beautifully or not. A vintage armoire taught me this lesson the hard way.
I pad every measurement with 1–2 inches for wiggle room, then build my measurement checklist with photos. You’ll avoid being wedged against drywall at midnight when you reference these details.
When Numbers Change Plans
Against every stubborn instinct I’ve got, I measure everything twice because that “perfect fit” in my head has lied to me more times than my ex’s GPS. Measuring clearance isn’t paranoia; it’s survival. I grab my tape measure and attack every doorway, every awkward landing, every sneaky handrail that wants to sabotage my stair planning.
Tilt clearance is everything. That gorgeous West Elm dresser becomes useless if it can’t pivot past your ceiling. I measure diagonally, step to landing, because my back depends on it. Entryway clearance gets an extra inch or two; “close enough” means “stuck forever.”
I snap photos, scribble numbers, and when plan changes hit mid-move, which they always do, I’m ready. No more furniture hostages.
Clear Obstacles and Protect Surfaces
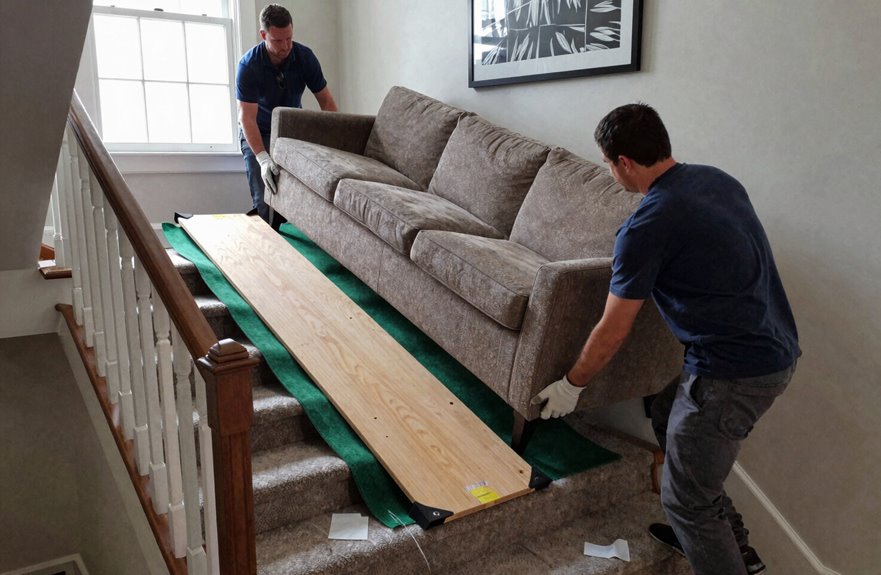
Why do I always start moving day with a stubbed toe and a crushed houseplant? I’ve learned the hard way that you need to clear path obstacles before lifting anything heavier than a lamp. I sweep stairs like I’m preparing for a photoshoot, removing shoes, toys, and rugs. Then I lay moving blankets over every tread because stair safety is essential. I tape down rogue carpet edges (learned that one from a spectacular face-plant in 2019) and secure wobbly fixtures that love snagging couch corners. For furniture protection, I wrap pieces in thick moving blankets, think of them as puffer jackets for your credenza. I even tape cardboard around tight corners to protect surfaces and guide items smoothly. Your walls and your security deposit will benefit from these precautions.
Disassemble Whatever You Can First
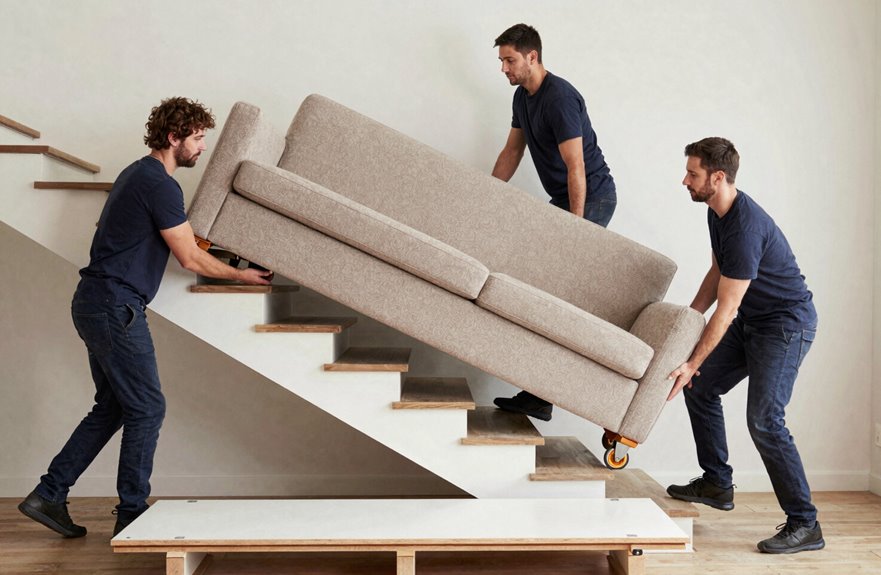
The first thing I do when I’m staring down a three-flight walk-up with a dresser is grab my screwdriver like it’s a lifeline. I’m talking drawers out, legs off, shelves separated, whatever I can disassemble to save my sanity and my security deposit. That weight reduction is significant; drawers alone cut 25% or more off the total heft before I touch the stairs. I learned this the hard way with a vintage credenza that now has a corner permanently shaped like my apartment’s banister. Disassembly ahead beats squeezing a sofa through a doorway like a bloated tick. Pre-plan your clearance, embrace the teardown, and you’ll join the wise movers who’ve discovered that smaller pieces conquer tight stairs every single time.
Rent or Buy Essential Moving Gear
I always rent before I buy because a $200 dolly will gather dust in my garage when I can rent a sturdy one for ten bucks a day. I learned this after buying a “must-have” hand truck in 2019 that’s moved exactly one plant since. For hauling dressers and sofas up stairs, you’ll need lifting straps (the forearm forklift kind, not flimsy rope), sliders like SuperSliders, and thick moving blankets. Rent these items as a bundle from U-Haul or your local hardware store to protect your back, your floors, and reduce strain during the move.
Rent vs. Buy
How much are we really talking here when it comes to getting our hands on the good stuff? Rental costs for moving gear won’t demolish your wallet. I’m talking $7 to $15 daily for a solid dolly, maybe $20 for the heavy-duty beast. A stair-climbing dolly? Rent that if you’ve got one brutal move ahead. I’ve learned this on a spiral staircase in Queens.
Now, buying blankets, sliders, lifting straps represents a smart investment. Small upfront cost yields significant returns when you’re not patching drywall later. Disassembly is your concealed weapon. Break that sectional down, and suddenly you need way less gear. If you’re moving once every blue moon with nightmare stairs, just call professional help. There’s no shame in that approach.
Essential Gear Types
So you’ve done the math on renting versus owning. Next, figure out what actually belongs in your hands when you’re staring down a three-flight walk-up. Grab furniture dollies for bulky couches, and lifting straps like Forearm Forklifts so you and a buddy don’t destroy your backs. For stairs, a stair-climbing dolly with tri-wheels handles steps effectively. Wrap everything in protective padding, including moving blankets and wall sliders, to protect your security deposit. Don’t forget disassembly tools. Trying to maneuver a fully assembled headboard turns you into a human pretzel. Rent these locally for about $7–$15 daily.
Cost-Smart Options
Let’s figure out where to put your money without emptying your wallet. I focus on keeping things safe without going broke, so here’s my take on gear.
| What You’re Feeling | What Saves You |
|---|---|
| Panic about scratching Mom’s antique dresser | Gear protection from a furniture dolly (worth every penny!) |
| Dreading that awkward couch angle | Lifting straps making you feel like a team |
| Sticker shock at rental cost | $7-$15/day beats a hospital bill |
| “I’ll never move again!” | Buy straps for $20, reuse forever |
| Pure exhaustion halfway up | Come Apart Sofas = zero equipment needed |
I learned the hard way: skimping hurts. That $20 daily rental costs far less than replacing a cheap bookshelf. We’re in this together. Let’s move smart, not sorry.
Pivot Vertically Around Tight Corners
Why does every stairwell seem designed by someone who never owned a couch wider than a toaster? I’ve wrestled a sectional through a 1920s Chicago walk-up, and the Pivot technique saved my security deposit.
Stand that heavy furniture vertically, and suddenly you’re working with gravity instead of against it. My buddy Mike (top of the stairs, steering) and I (bottom, controlling momentum) became a teamwork machine. We reduced our effective width by half, gliding around that nightmare corner like we planned it.
Protection matters. Slap moving blankets everywhere and clear the path completely. I learned that the hard way with a drywall scar I’ll never live down. When even vertical won’t cut it, disassemble or grab a stair-climbing dolly.
Lift Heavy Furniture With Your Legs, Not Back
Once you’ve got that sofa standing on end and Mike’s ready at the landing, you actually have to pick the thing up. This is where I’ve watched grown men (myself very much included) turn into walking chiropractic billboards. Your back safety isn’t negotiable when you’re tackling stairs with a credenza that weighs more than your first car.
Here’s how to do this properly:
- Plant those feet shoulder-width apart, bend at the knees, and let your legs do the heavy lifting while your core stays locked tight
- Keep that load hugged close to your chest. No superhero arm extensions that turn you into a wobbly crane
- Grab lifting straps (the kind I borrowed from my neighbor Dave after my last disaster) to split weight evenly with your partner
- Invest in proper moving equipment now, because physical therapy later costs significantly more than renting gear
Your spine will thank you Monday morning.
Use the High-Low Technique on Stairs
Let me walk you through the high-low technique. I’ve learned this one the hard way (RIP my dignity and that IKEA dresser on the Brownstone steps of 2019). I’ll position myself low on the stairs where my quads can handle the grunt work, while you take the high ground and call the shots like a director framing a shot. Think of it as our own little Mies van der Rohe “less is more” moment, except we’re definitely using more muscle. We’ll tilt that couch to match the staircase angle, keeping the center of gravity hugging the slope like a Le Corbusier ramp at Villa Savoye, so nothing wobbles or crashes backward into my face (again, been there).
Weight Distribution Basics
A few years back, my buddy Mike and I nearly destroyed his grandmother’s antique credenza (and our lower backs) because we both grabbed the same height on a spiral staircase in his 1920s Craftsman. We learned that stair safety isn’t about brute force. It’s about smart weight distribution.
- The high-low technique puts the stronger partner below, bearing the load while the top guides. Gravity creates significant downward force on the upper position.
- You’ll keep grips solid, syncing your tilt to match each stair angle to avoid centre-of-gravity failures.
- Your legs do the lifting, not your twisting torso. Mike still complains about his back at poker nights.
- Coordinated lifting demands clear commands: “ready,” “lift,” “move,” “stop.” Unclear communication causes mishaps.
Pair this with proper protective gear, dollies, and blankets, and you’ll complete a damage-free move.
Partner Positioning Roles
Smart weight distribution means nothing if you’re both standing there like confused flamingos, so let’s talk about where you actually put your bodies. In the High-Low Technique, I’m taking the bottom if I’m stronger and taller. I’ll bear more weight while my partner up top steers and sets our pace with moving straps secured tight.
We nail this teamwork by knowing our roles cold. I’m the muscle, they’re the guide, and we keep that furniture tilted to match the stairs perfectly. Stair climbers live or die on coordination, so we use clear verbal cues: “Ready? Lift on three, one, two, three.” We sync every move this way. When space gets tight, we pause after each step to reassess. No heroes here, just two people who’ve got each other’s backs.
Stair Angle Alignment
Why does every staircase feel like it was designed by someone who never moved a couch in their life? I’ve wrestled enough spiral monstrosities to know stair angle alignment separates the heroes from the herniated.
Here’s how I nail it every time:
- I match the furniture tilt to the stair angle itself, keeping that center of gravity hugged close. No twisting.
- I’m the stronger partner taking the bottom when moving stairs, pacing each step while my buddy guides from above
- I call out pivots before they happen: “pivot technique at the landing.” Nobody wants a crushed banister.
- I visualize each furniture tilt around handrails beforehand, adjusting alignment on the fly
Gear helps. But clear communication is essential. “Ready? Lift on three. One, two, three.”
Coordinate With Counted Commands and Clear Roles
How exactly do you keep a sofa from crushing your buddy on a narrow staircase? It all comes down to moving coordination and clear roles.
Before we even touch that IKEA Kivik, I’m assigning jobs: one lifter, one guide (that’s usually me, because I’m bossy), and one path clearer. No confusion, no chaos. We use lifting straps, those nylon loops that distribute weight effectively, and I count us in: “Ready? Lifting on three. One, two, three.”
For stair navigation, I put my taller friend below, me above (short girl solidarity), keeping furniture parallel to steps. We pivot feet, never twist spines. I learned that lesson after a failed West Elm dresser incident. Constant chatter keeps us synced. Lifting techniques matter, and trust enables the whole operation to work.
Pause and Reset After Each Step
After each step, I stop dead in my tracks and reset my grip position, usually because my palms are already sweating through those cheap work gloves I bought at Home Depot. I make sure my hands mirror my partner’s placement on that IKEA KALLAX unit we’re hauling. I check my balance point by feeling where the weight settles into my thighs, not my lower back. If you’re off, your spine will react instantly with sharp pain. I take a quick breath, lock eyes with my helper, and we confirm we’re ready before tackling the next riser. A dropped dresser and an urgent care trip will derail any moving day momentum.
Reset Grip Position
- I call out “Ready? Lift? Pause. Set down” to keep my partner and me locked in sync
- I grip reposition immediately, finding fresh hand placement before fatigue sets in
- I check load balance, making sure weight hasn’t shifted toward my partner Dave, who is shorter
- I reestablish two-person coordination with eye contact, confirming we’re both steady
During each stair maneuver, that deliberate reset prevents the spine twist that wrecked my neighbor’s moving day. We’re in this together, and these micro-pauses are our most effective strategy for conquering any staircase.
Check Balance Point
Why do I insist we freeze like statues after every single step? Because momentum is not our friend on stairs.
I keep the load hugged tight, elbows tucked, feet planted shoulder-width in a stable stance. Then I check: where’s our center of gravity? Are my lifting straps biting evenly, or is one side going rogue? Grip security prevents fatigue from catching us off guard. I use a sharp cadence, “Set? Set.” so we’re synced.
Here’s my mental checklist:
| What I Check | Why It Saves Us |
|---|---|
| Center of gravity | Prevents backward tumbles |
| Lifting straps | Distributes weight evenly |
| Grip security | Catches fatigue before it catches us |
| Clearance above | No doorframe disasters |
| Partner’s stance | We’re in this together |
One step, reset, repeat.
Breathe and Communicate
- We use safety cues—”lift,” “turn,” “set down”—so nobody’s guessing mid-staircase navigation
- I pause fully after each step, checking our lifting technique before that next lunge upward
- When momentum builds, I kill it; twisting spines are for bad dance floors, not furniture moves
- At landings, we communicate clearance, regrouping like we’re planning a heist (the boring, legal kind)
This rhythm keeps us safe and efficient.
Know When to Call Professional Movers
Sometimes you need to recognize when a task requires professional help. I learned this the hard way after damaging drywall during a move in 2019. When heavy furniture meets tricky stairs, professional movers are the right choice.
Sometimes you need to recognize when a task requires professional help. I learned this the hard way after damaging drywall during a move in 2019.
Safety is critical. Without proper equipment, such as shoulder dollies, stair rollers, and harness systems that professionals use, you risk injuring your back, losing your security deposit, and damaging your home. Very heavy pieces, spiral staircases, and narrow landings like those in older brownstones require professional expertise.
White-glove services handle complex tasks: in-room assembly, strategic padding, and careful handling. I used HireAHelper to compare local moving crews and protected both my sanity and my furniture.
When you’re uncertain about weight limits or access points, call the professionals. Professional movers will protect your walls, your belongings, and your safety.
Troubleshoot: When the Furniture Won’t Fit
How do you react when that gorgeous West Elm sectional you measured three times refuses to budge past the second-floor landing? I’ve been there, sweating through my favorite vintage tee, and I can walk you through it.
- Disassembly saves the day. Yank off legs, cushions, anything detachable for precious inches.
- Clearances matter. I always leave 1–2 inches wiggle room, learned that the hard way with a CB2 credenza.
- Tilt techniques like upright, 45 degrees, or standing on end transform impossible stair negotiation into a workable solution.
- When tilt techniques fail, call for professional help before your walls and budget suffer more damage.
Sometimes that dream piece just won’t cooperate. At that point, it makes sense to explore other options or accept the furniture won’t work for your space.
Prevent Future Moves With Modular Furniture
After my war with that West Elm sectional, I swore I’d never lose another Saturday to a stairwell standoff. That’s exactly when I discovered modular furniture, and now I’m obsessed with stair-friendly pieces that practically beg you to disassemble them.
Come Apart Sofas & Sectionals (yes, that’s their real name, and yes, I giggled too) break into lightweight components you can carry one-handed. I just pop off cushions, yank out drawers, instantly cutting weight by 25%, and haul sections up without scraping my walls.
The genius part is that I reassemble everything in the room without stair navigation required. No more “will it pivot?” panic. Designing around modular, stair-friendly furniture means I’m future-proofed for every move, every layout change, and every impulsive rearranging spree. You’ll eliminate moving day wall damage and backache from hauling furniture through tight spaces.






