The ideas range from an apple pinch pot shaped with just your thumbs to a textured slab vessel, and from a small clay frog to a boho-style wall hanging.
What the finished piece has to hold decides which one is yours, whether that’s rings on a ring holder, a candle in a clay holder, or stems in a vase.
A ring holder or marbled trinket dish can take rings and small odds and ends as is, but a clay vase or flower pot that meets water or soil needs a glass or a nursery pot set inside, since clay you haven’t tested shouldn’t be trusted to hold water.
1. Ring Holder
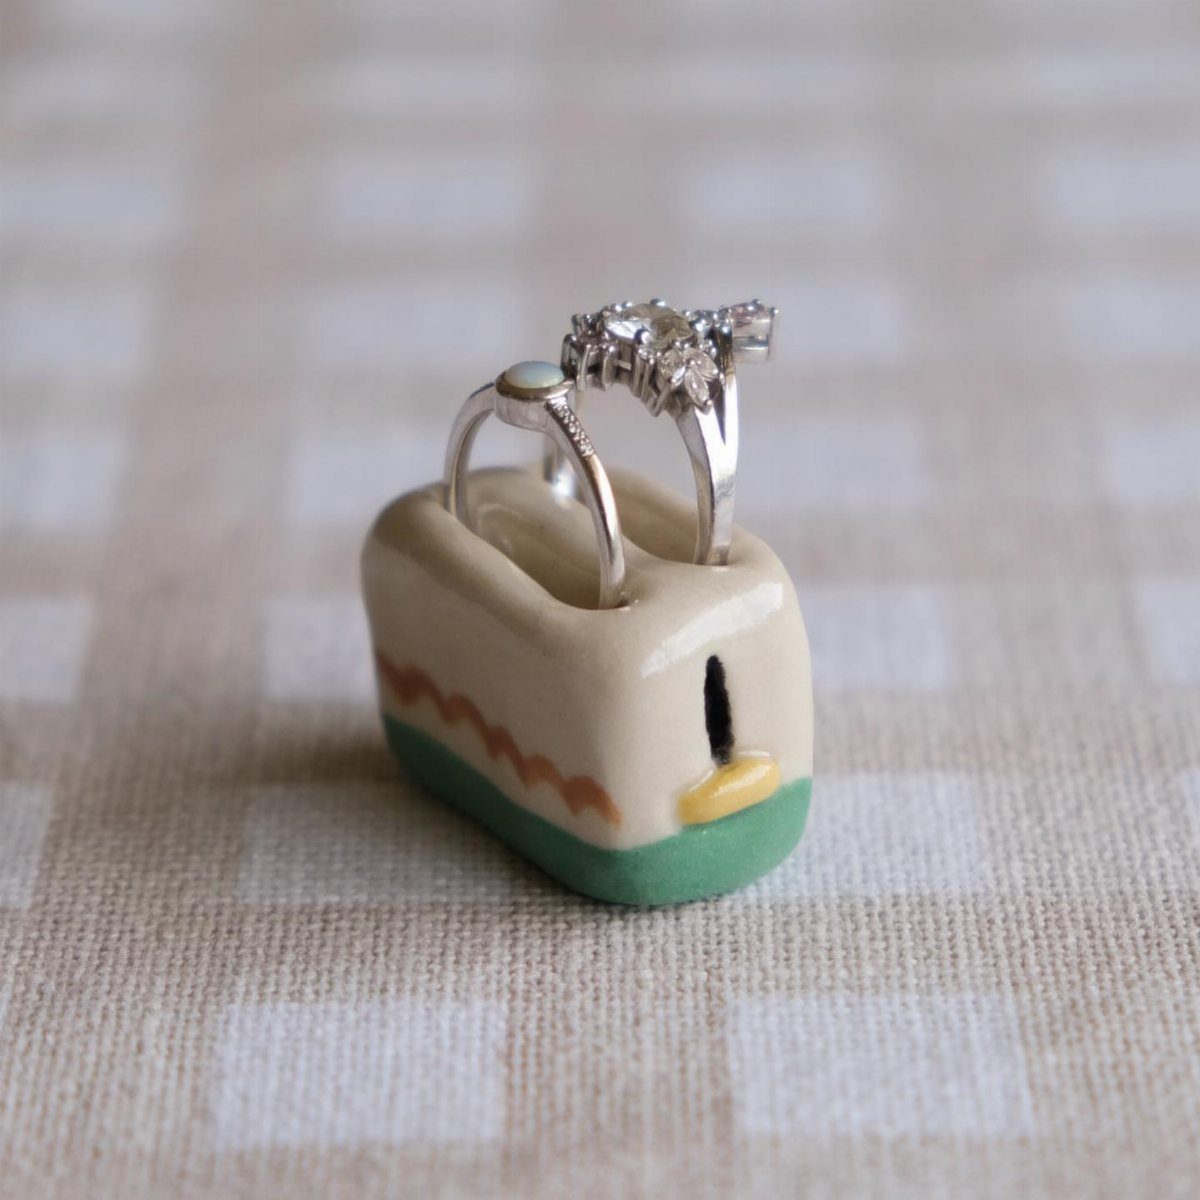
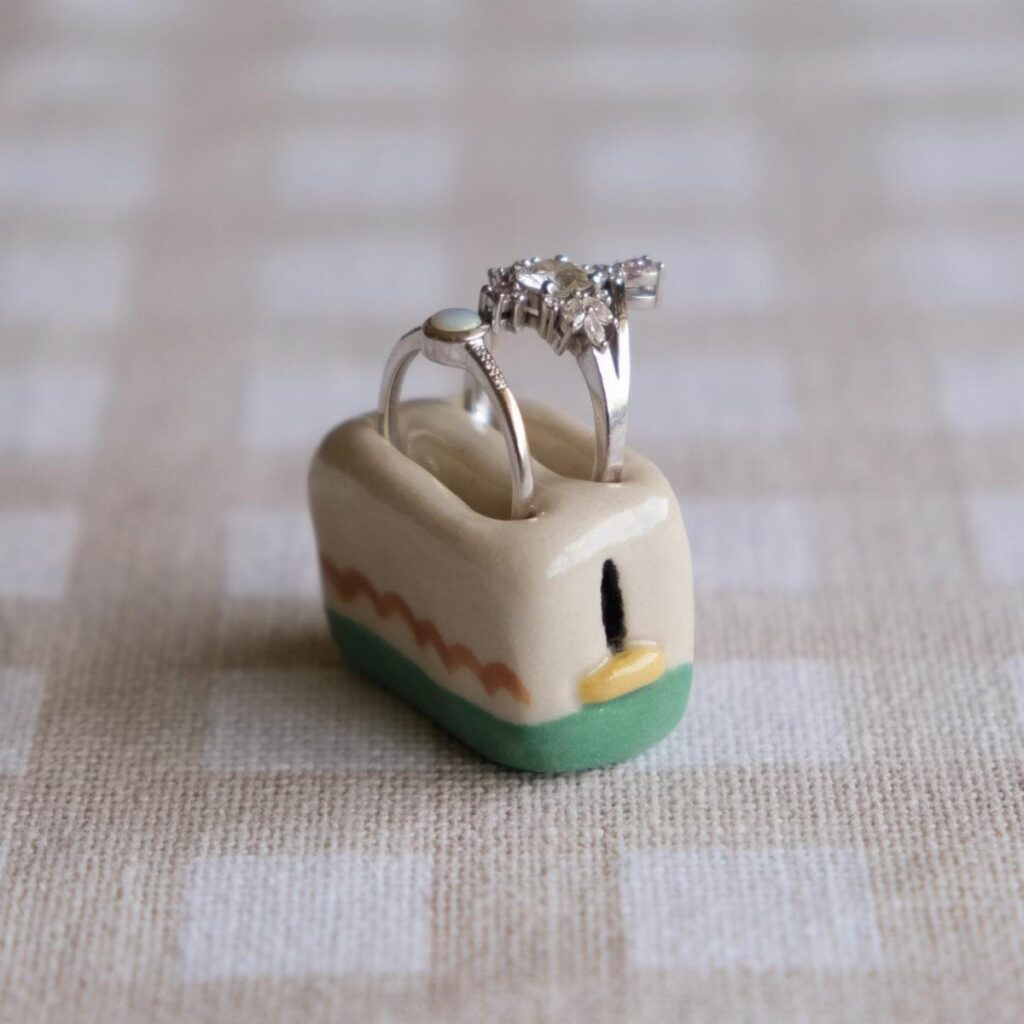
A house shape gives a ring holder a built-in story, and I like it better than a plain dish for that reason.
Painting the roof and walls in a few soft colors keeps it looking like a keepsake rather than a craft-fair leftover.
It takes very little clay, so it works well as a first small project. Set it by the bathroom sink or on a dresser and the rings have one place to land.
2. Marbled Trinket Dish
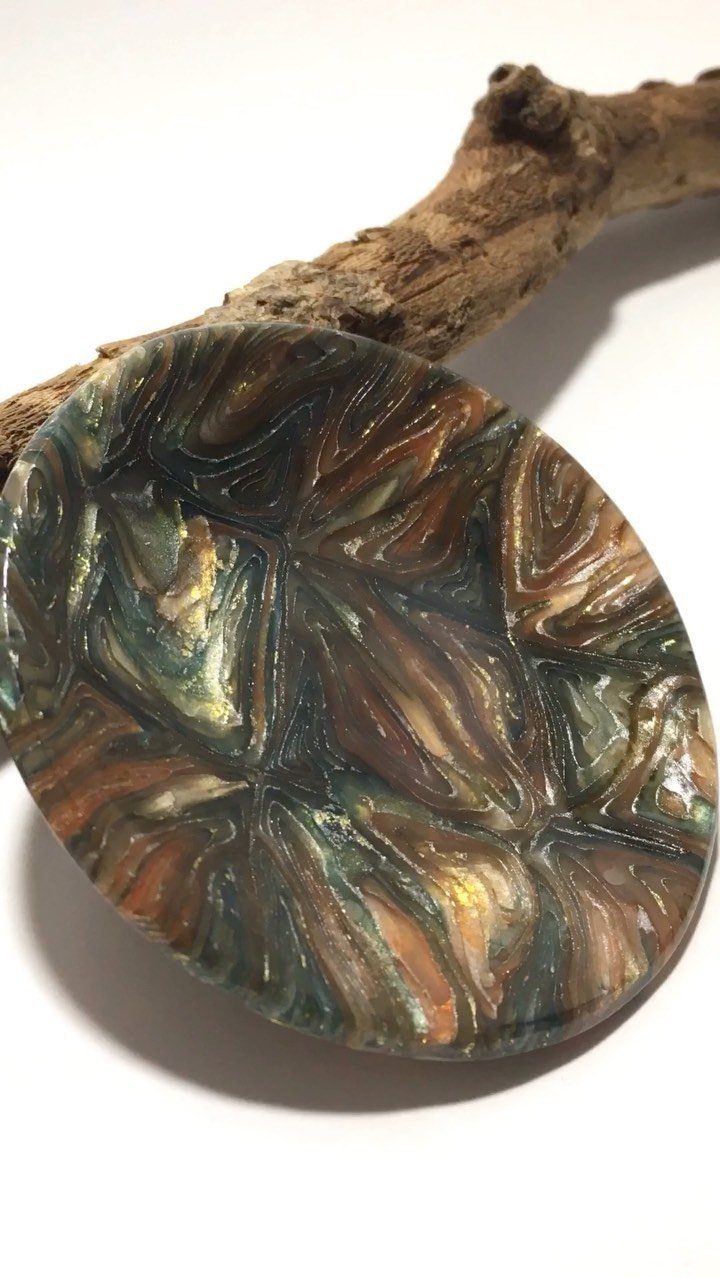
Swirls of brown, gold and grey look expensive in an oval dish, and the effect comes from restraint. Fold the colors together only a few times; push it further and they blur into one muddy tone.
An oval fits a bedside table or dresser top better than a round dish, and it holds earrings, a watch or loose change without crowding. I’d pick 3 colors at most, with one metallic as the accent.
3. Clay Ornaments
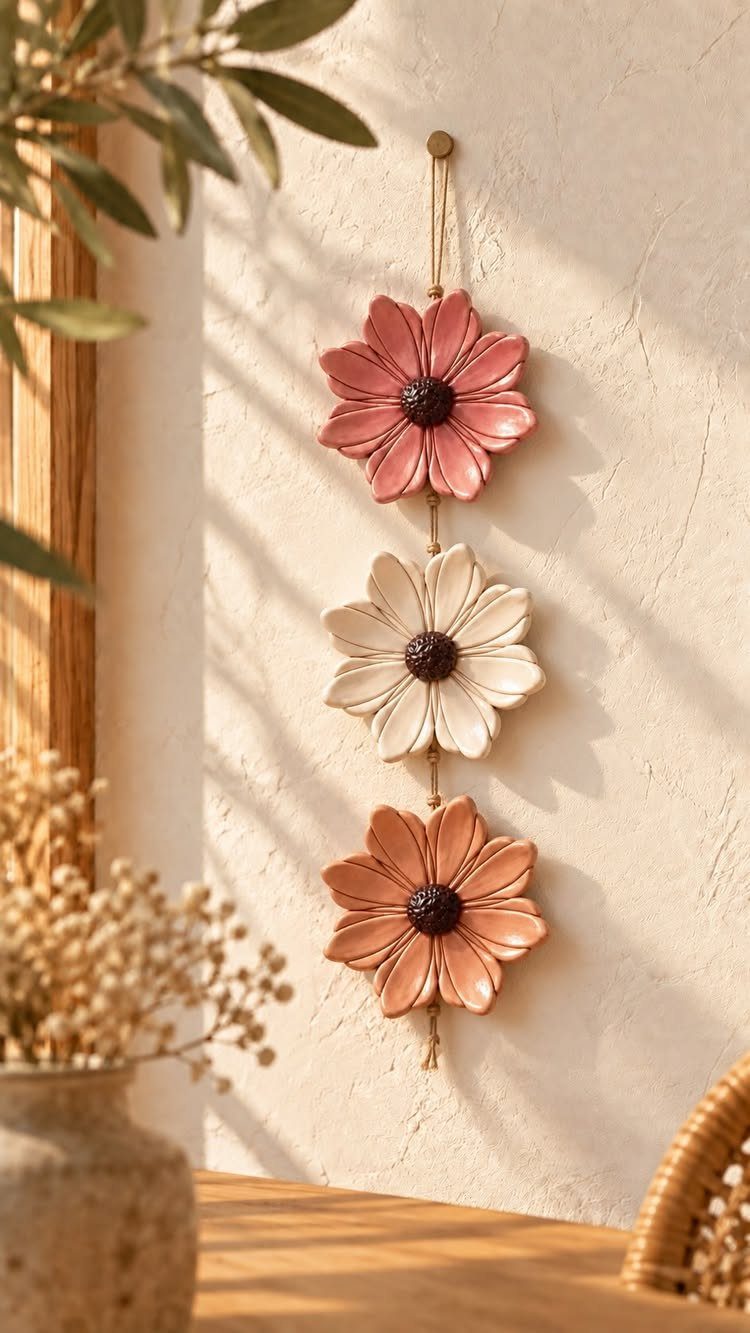
Hang 3 flowers on one string, each in a different color, and you get a decoration that suits a wall, a window or a gift tag. Pink, white and terracotta sit well together because they stay in the same warm family.
Swap the shape for a holiday motif or add a name or date, and the same string becomes a keepsake. I’d keep the set to an odd number of pieces so the column looks deliberate.
4. Clay Magnets
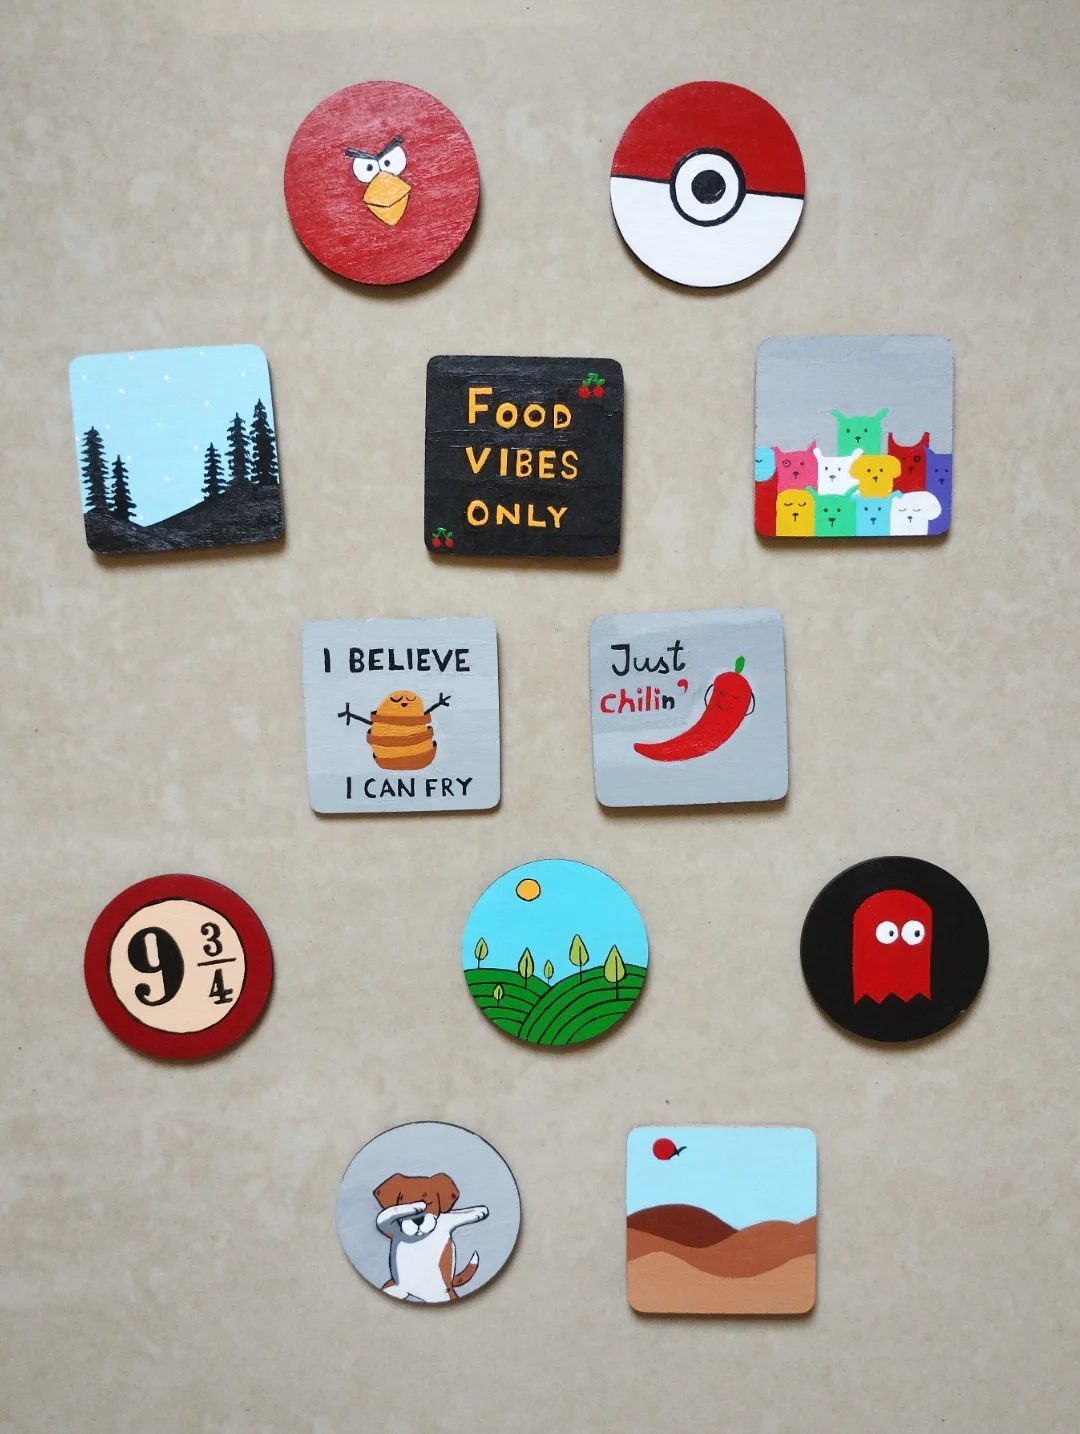
Short phrases suit magnets because a small surface leaves no room for a long one.
Cut a mix of circles and squares and give each one its own hand-painted design, because a set of matching shapes looks mass-produced while mixed ones look collected.
A dozen small magnets also makes an easy gift, since each one can match a different joke or interest. I’d paint the lettering last, once the background color has fully dried.
5. Clay Vases
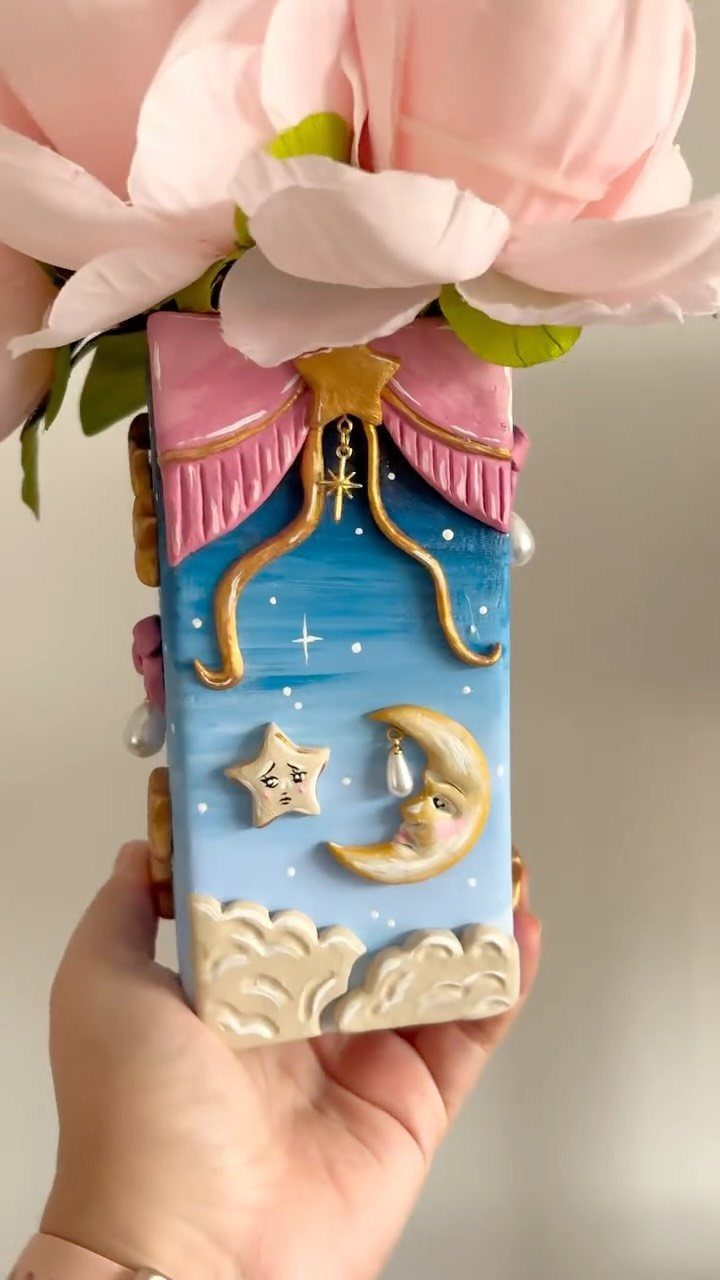
Start small with a first vase. A house-shaped one with a painted moon and stars holds just a few stems, which suits a shelf or windowsill better than a big piece would.
If you’re not sure your clay holds water, set a small glass inside or fill it with dried flowers instead. Gold details on a blue base are worth the extra paint; they make a handmade piece look finished.
6. Flower-shaped Clay Dishes
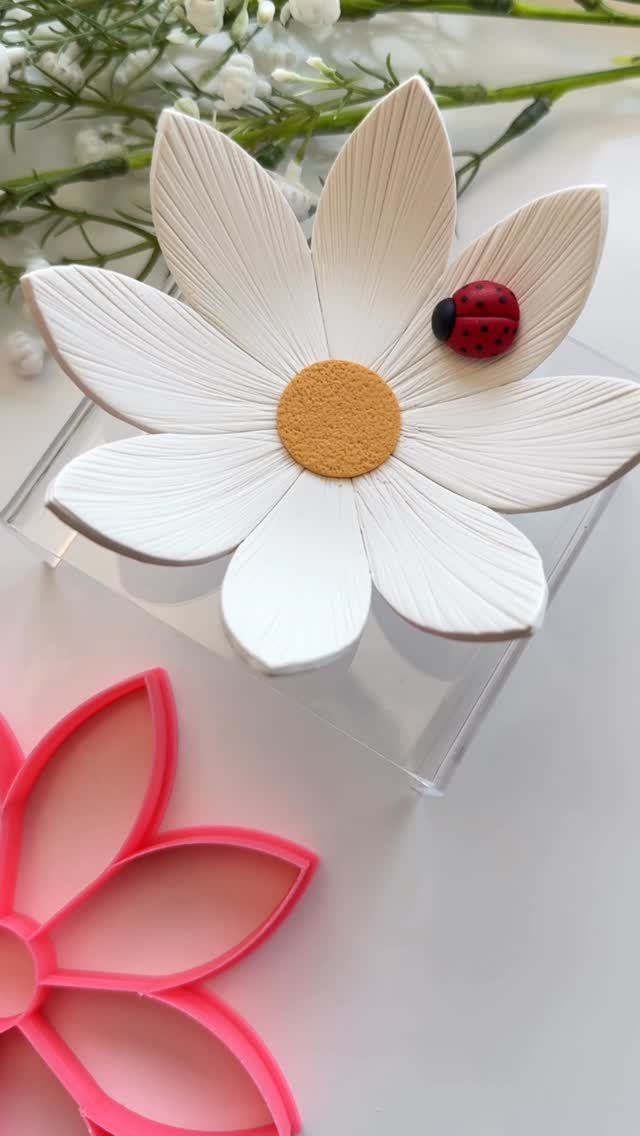
Cookie cutters do the hard part of a flower dish. Roll the clay to an even thickness, press the cutter straight down, and every petal comes out the same.
Gently lift the edges so the shape cups into a dish, then add a flat yellow center.
A small ladybug is a fun extra, and it doubles as a handle for your fingertip. White with a bright center is my favorite, since it looks clean on any shelf.
7. Clay Flower Pots
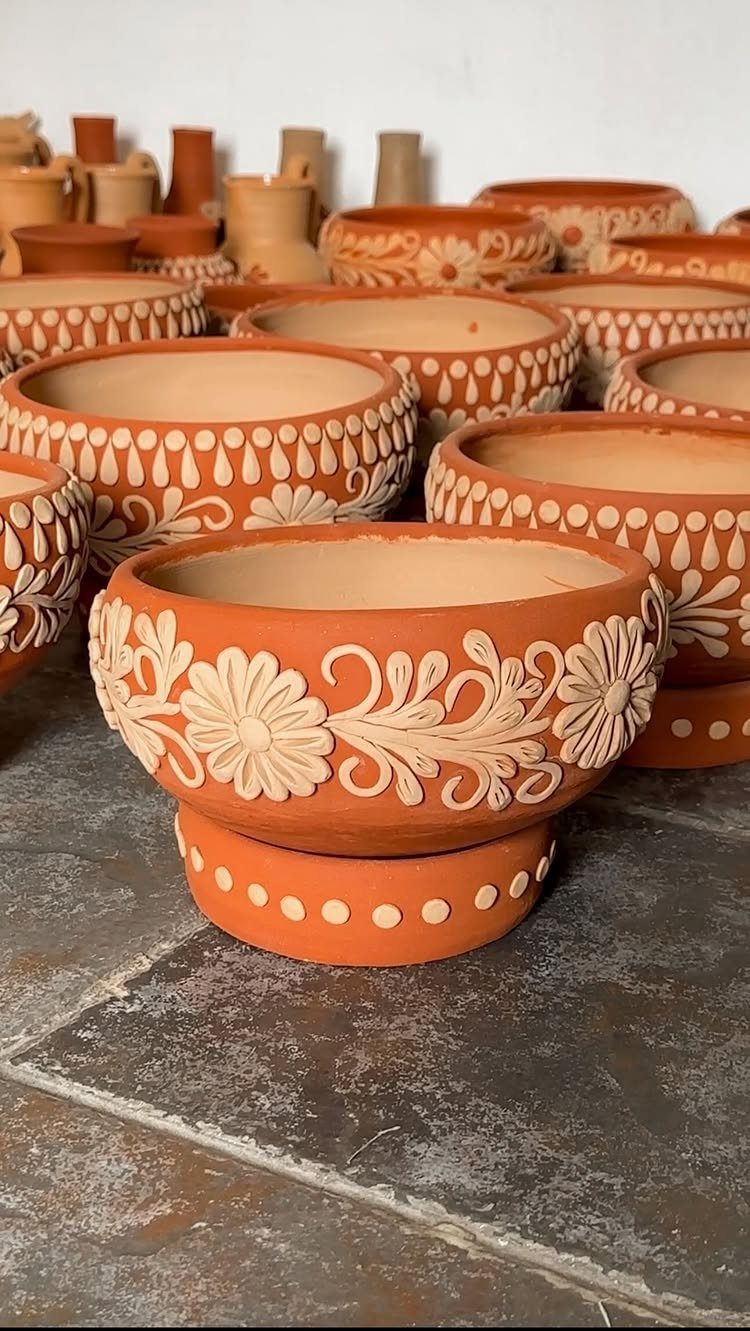
White embossed flowers and dots stand out sharply against a terracotta base, so the pattern does the decorating. Keep it simple: one flower motif and a dotted border.
Make several pots in different sizes so they group on a step or windowsill. I’d leave the plant in its nursery pot and set it inside, so the clay never has to hold soil or water.
8. Boho-style Clay Wall Hanging
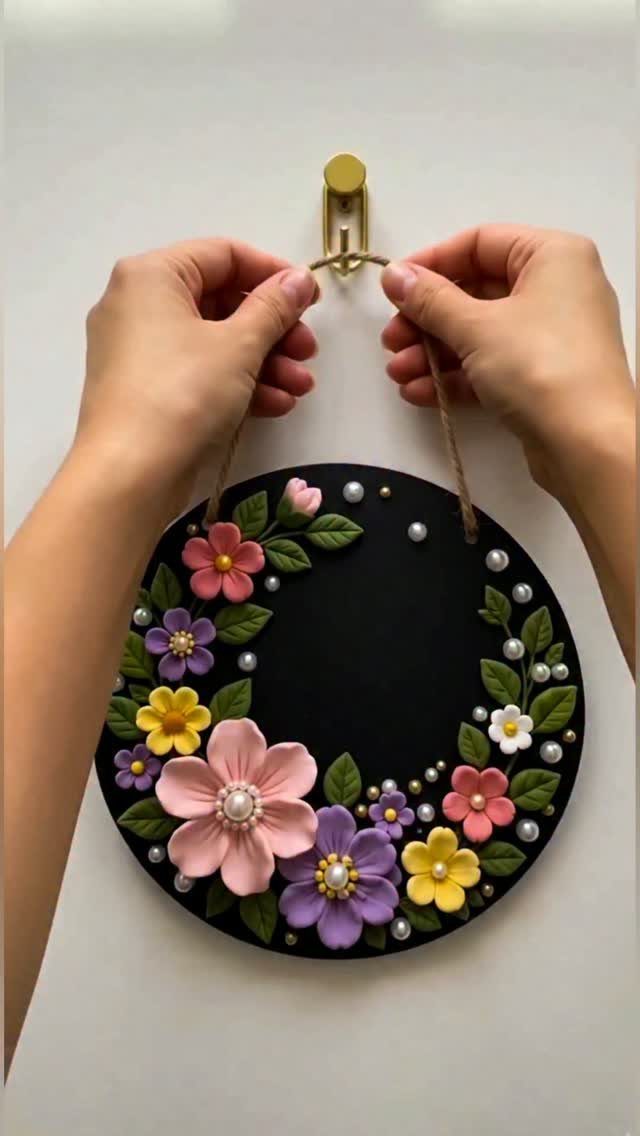
Black is the smart base for a hanging like this, because colored flowers and pearls glow against it. Make the flowers first, then press them onto the round plaque in an off-center cluster rather than an even ring.
Tuck the pearls into the gaps between petals, and add the string loop at the top so it hangs level.
9. Clay Mushrooms
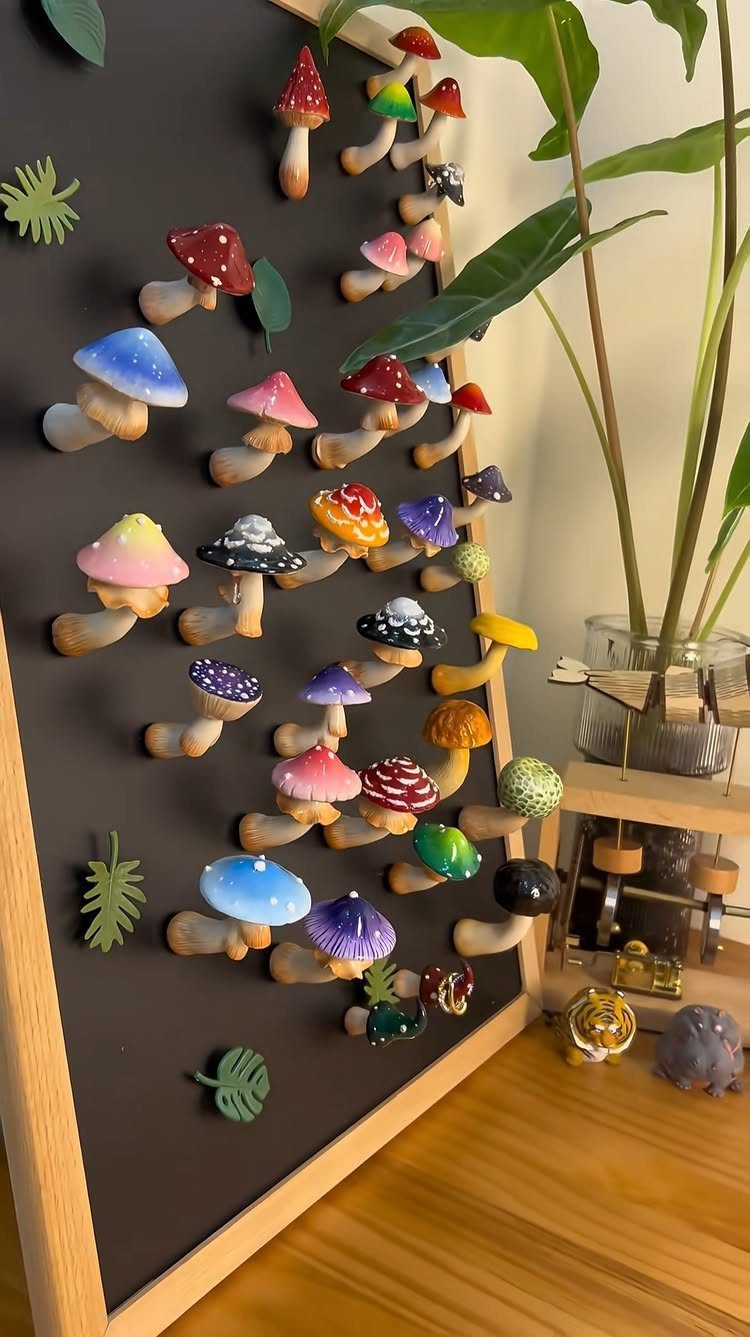
Mushrooms are forgiving to shape: a dome for the cap, a short stem, and you’re done. Vary the cap sizes and colors, and mix tall stems with stubby ones so the group looks grown rather than stamped out.
Green clay leaves between them fill the empty spaces. A black board makes every cap color stand out, and I’d choose it over white.
10. Clay Candle Holders
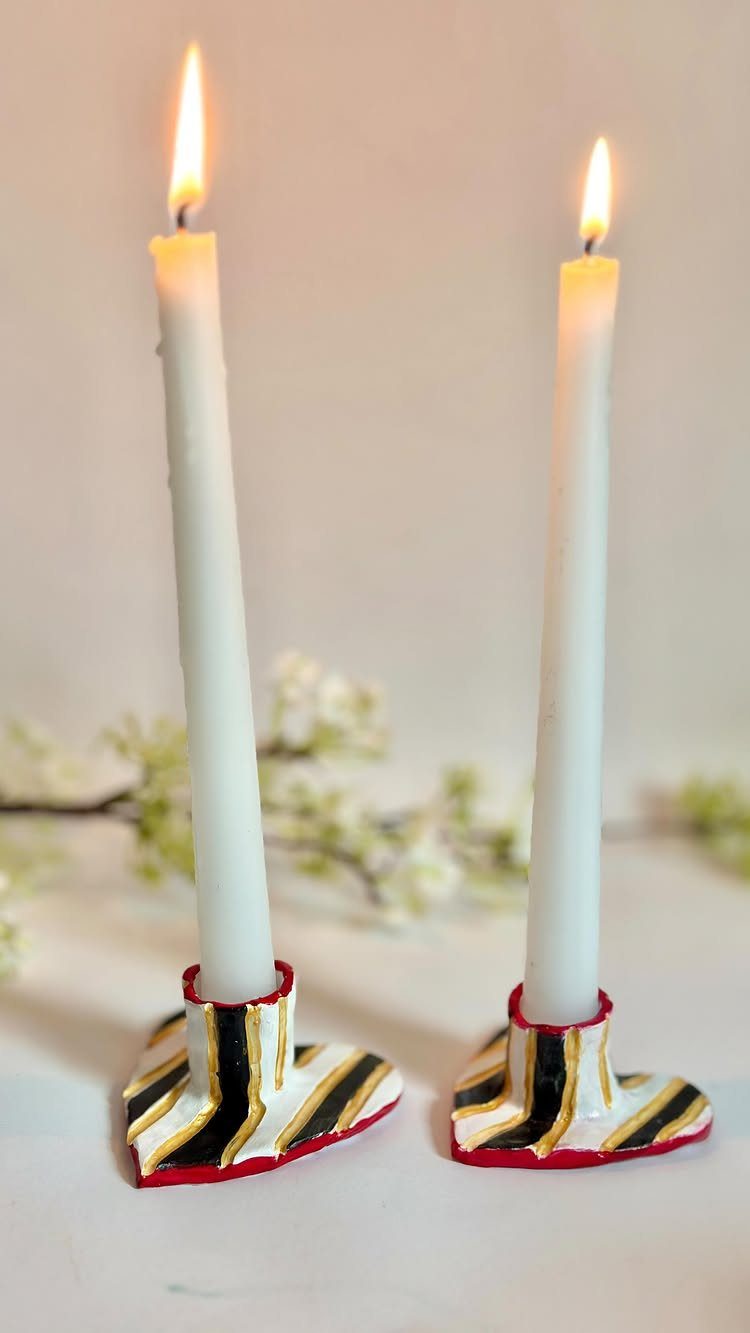
A boot is an odd shape for a candle holder, which is exactly why I like it. Stick to 3 stripe colors, like red, black and yellow, so the pattern reads as playful instead of busy.
Make the pair together, shaping and striping them side by side so they match. 2 white tapers look best as a set on a mantel or dining table.
11. Polymer-clay Earrings
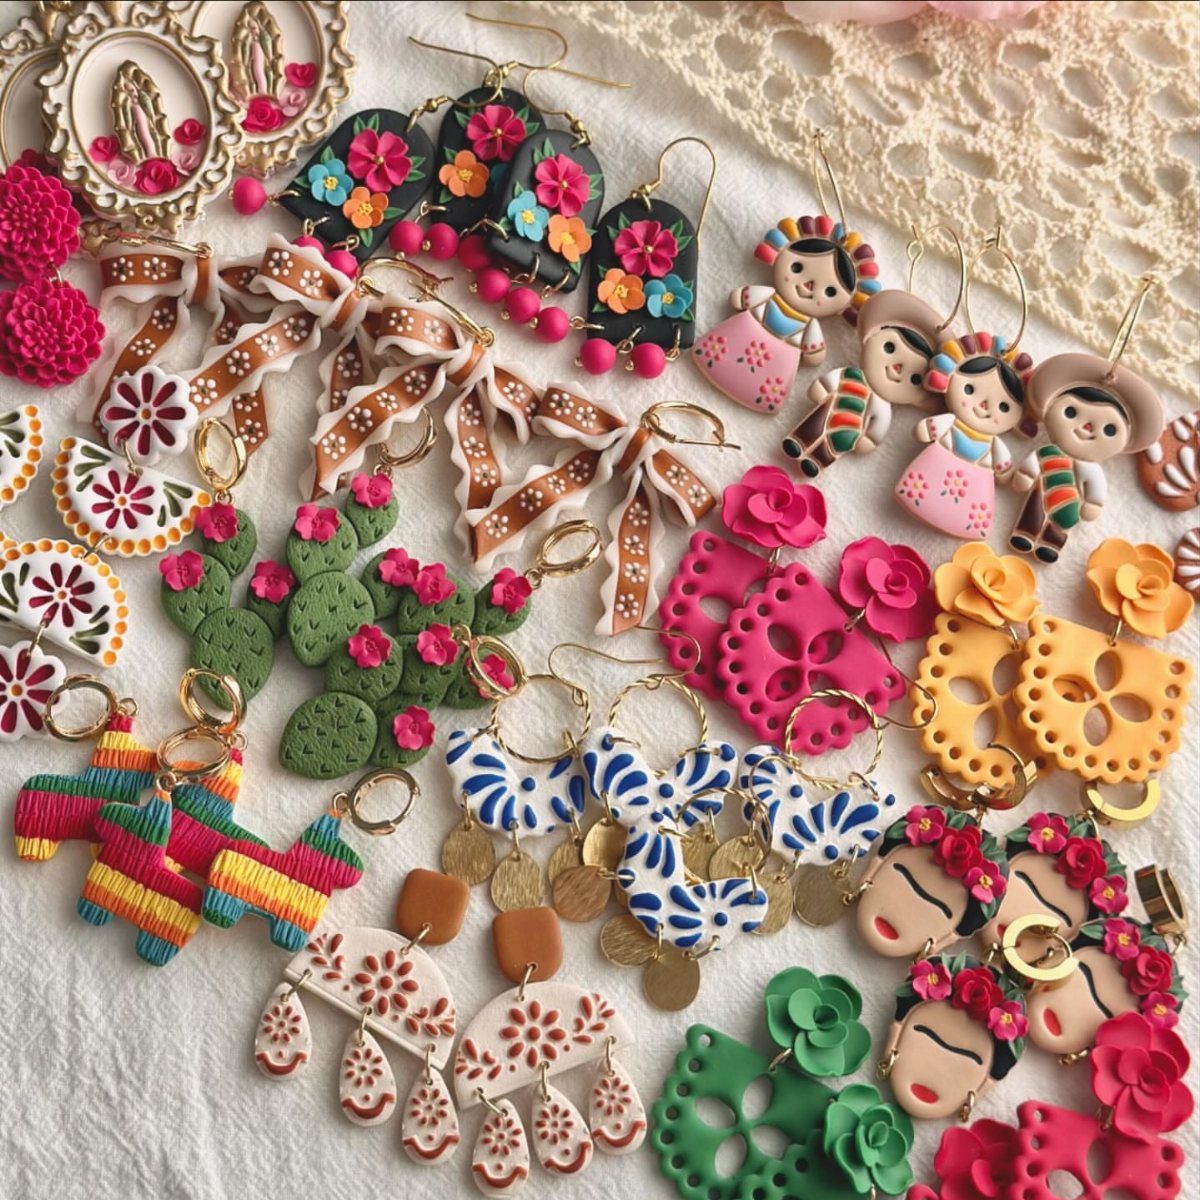
A mistake on earrings costs only a little clay, which makes them a forgiving place to practice. That makes them a good place to try cacti, dolls or flowers in tiny sizes.
Choose one theme per batch and a tight color palette, and the pairs will look like a collection.
Cut or shape both earrings of a pair at the same time so they come out matching. A few pairs together make an easy gift.
12. Apple Pinch Pot
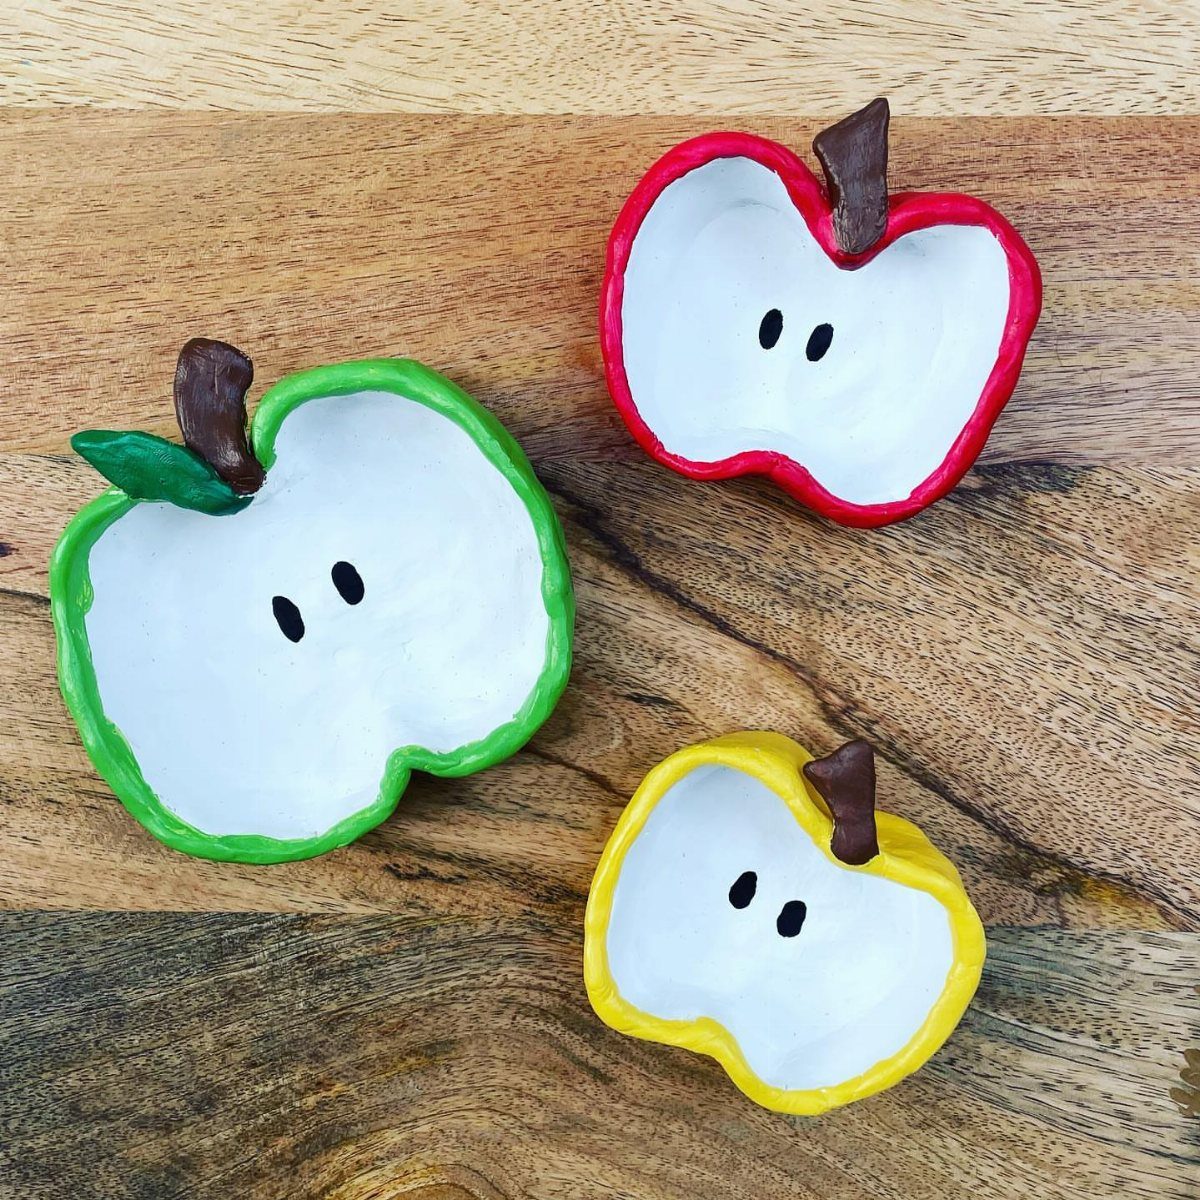
Thumbs are the only tool an apple pinch pot needs. Roll a ball of clay, press your thumb into the center, then pinch and turn the walls until the bowl is an even thickness all around.
Paint one in red, one in green and one in yellow, and the trio looks like a bowl of fruit. I’d make them different sizes, since a set of identical apples looks stiff.
13. Clay Photo Holders
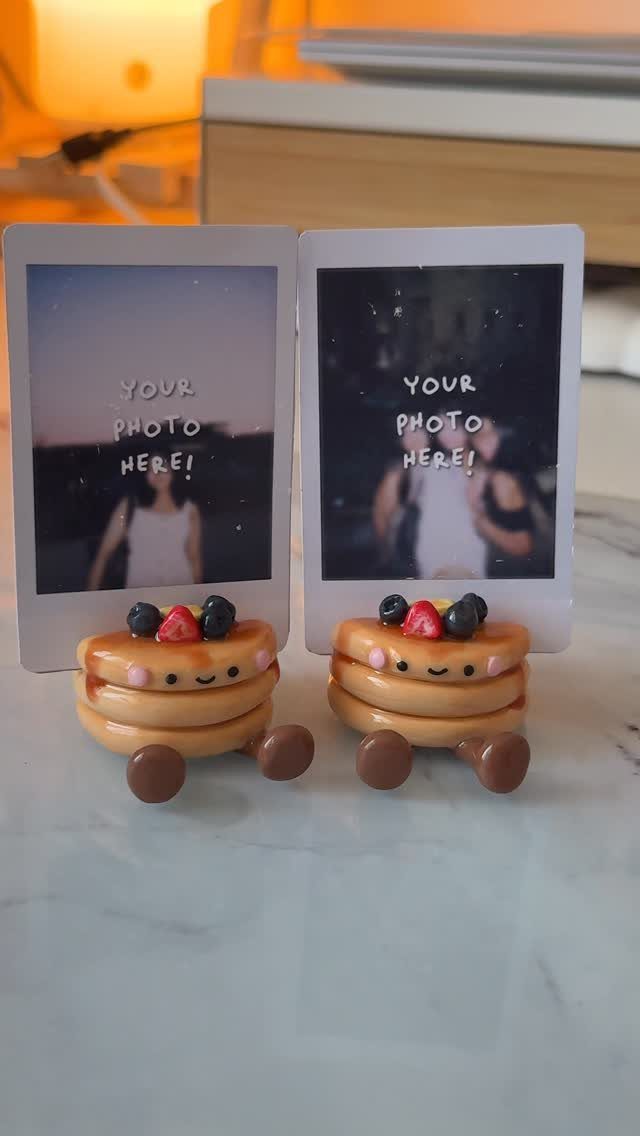
Pancake stacks make a surprisingly good photo stand.
A flat round of clay with a slit cut across the top grips the edge of a print, and the little pat of "butter" on top is just a small square of clay.
Roll the base thick enough to stay upright, and cut the slit before the clay dries. I’d shape two at once so the pair matches.
14. Clay Garden Markers
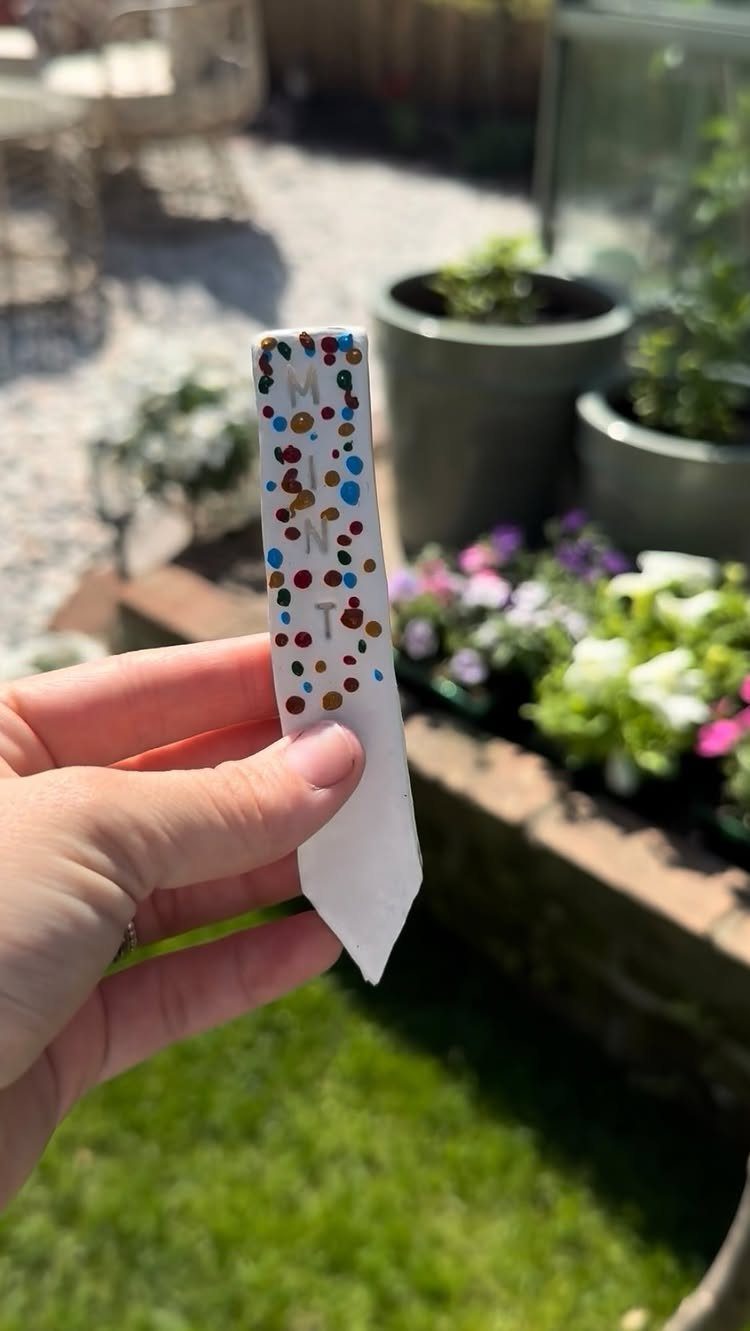
Stamped letters on a flat white tag keep a garden marker readable from a few feet away. Press the name in deep, then add a border of colored dots so the tag looks cheerful beside the pots.
Make one marker per herb, and push a skewer or stick into the back while the clay is soft so it can anchor in the soil. I’d stamp the word first and add the dots after.
15. Clay Rainbow
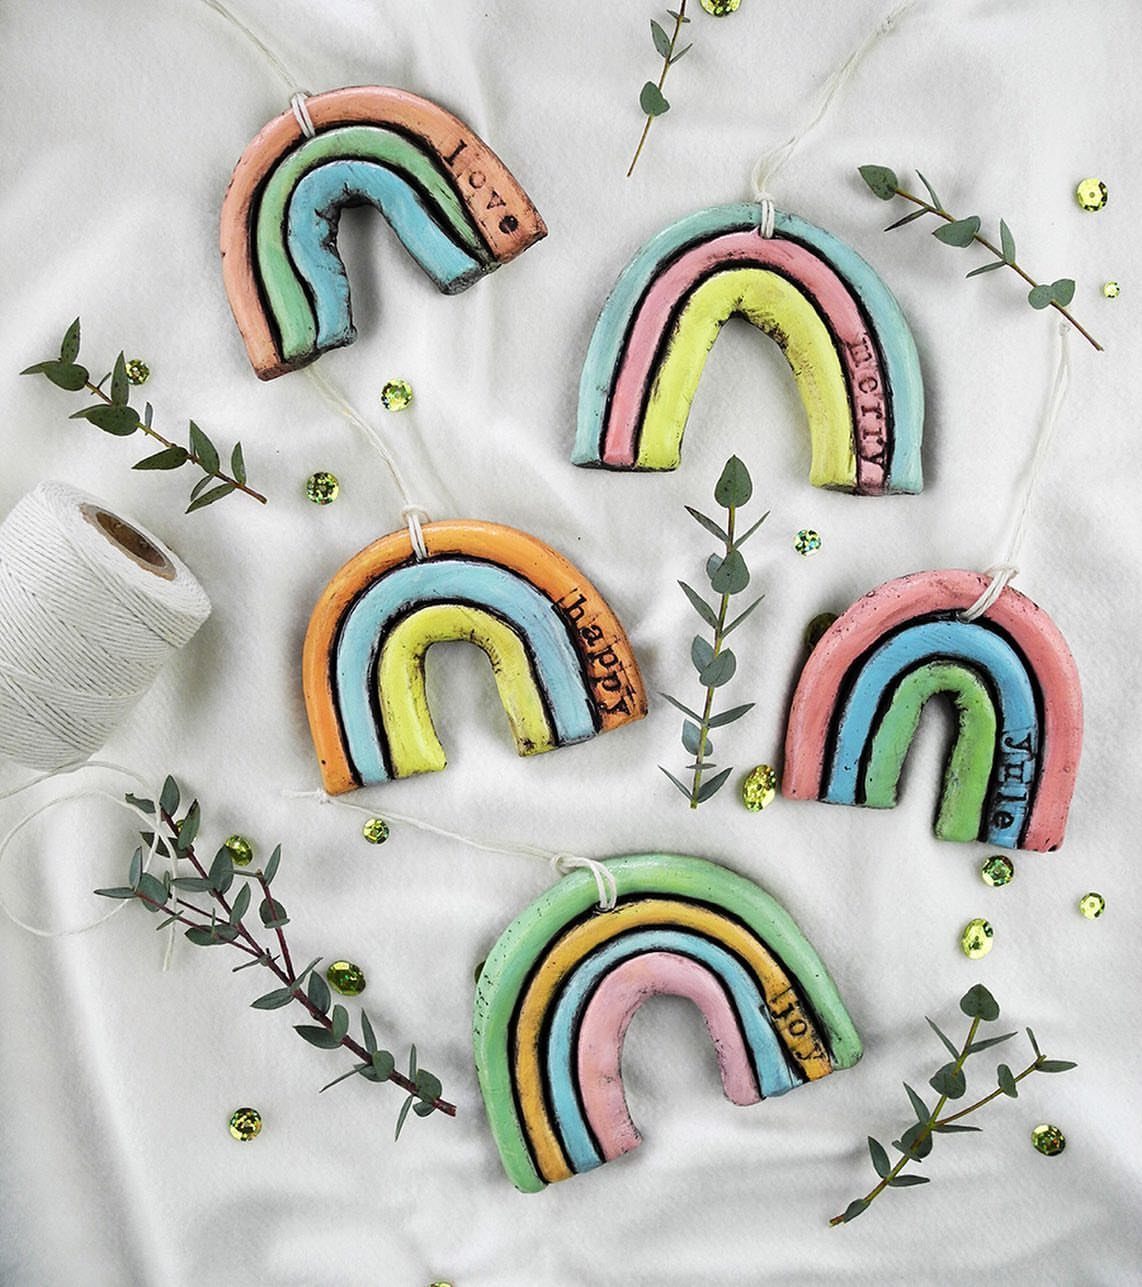
Pastel stripes in a curved arch turn a few scraps of clay into a decoration that sits well in a nursery or on a shelf. Add a single word like "Love" or "Happy" and the piece becomes a small message.
Build the arch from stacked bands of color so the stripes stay even. I’d finish each one with a tuft of small green leaves and a few gold beads at the base, because the metallic touch lifts the soft colors.
16. Clay Picture Frame
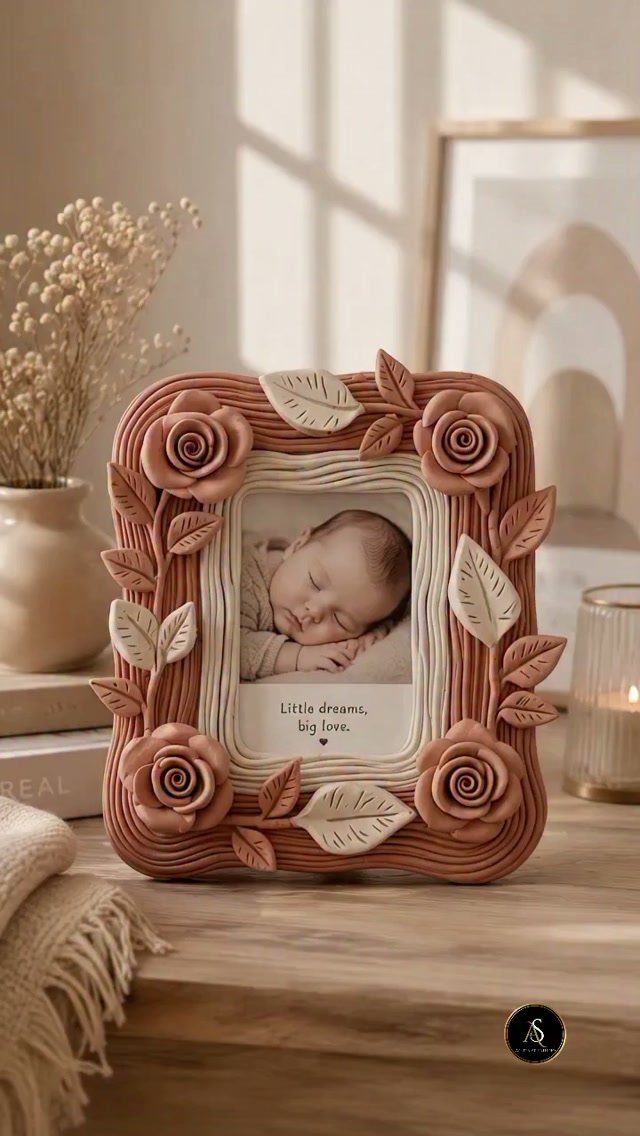
Coils are the whole technique here.
Terracotta color suits a baby photo because it stays warm without competing with the picture.
I’d add a short phrase beneath the opening, like the "Little dreams, big love" lettering, and make the frame wide enough that the flowers never cover the photo.
17. Clay Animals
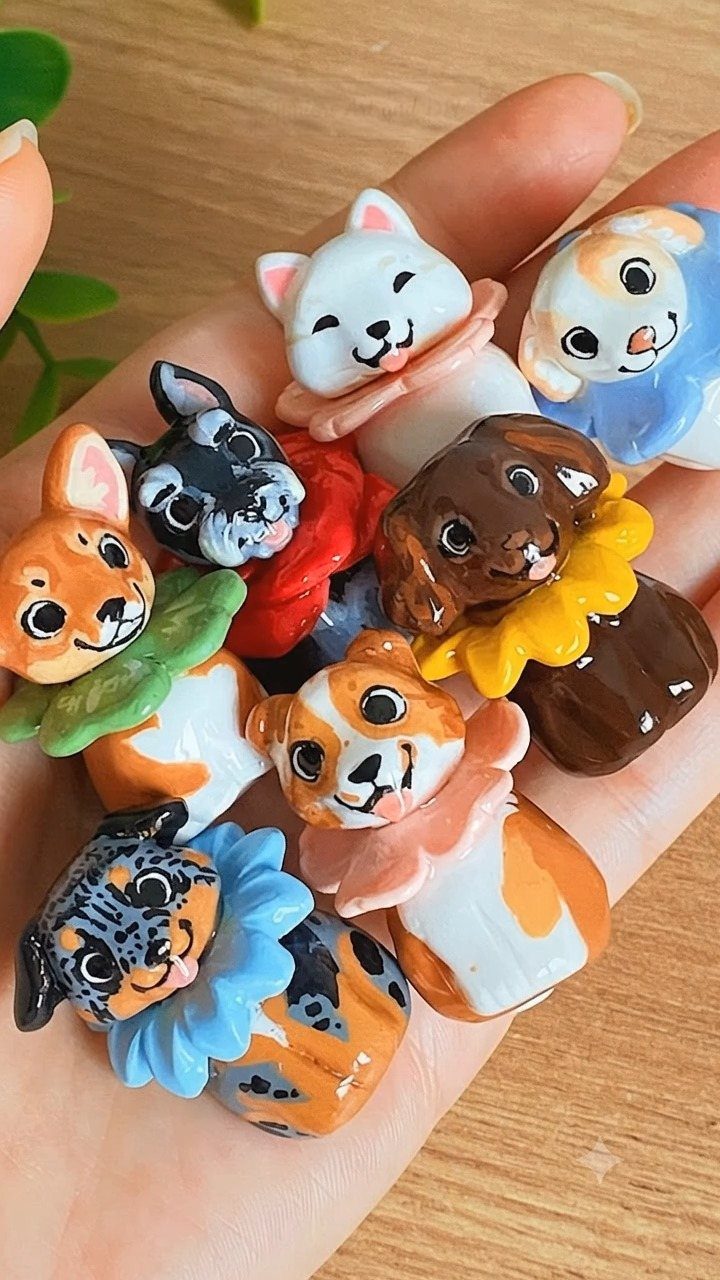
Tiny animals get their personality from the accessories. A ruffled collar, pressed around the neck in a contrasting color, makes a simple lump of clay look dressed up.
Keep the bodies small enough to hold in one hand and give each animal its own color. A family of animals beats a single figure, since small sculptures look better in a group and kids can swap collars and ears.
18. Clay Diffusers
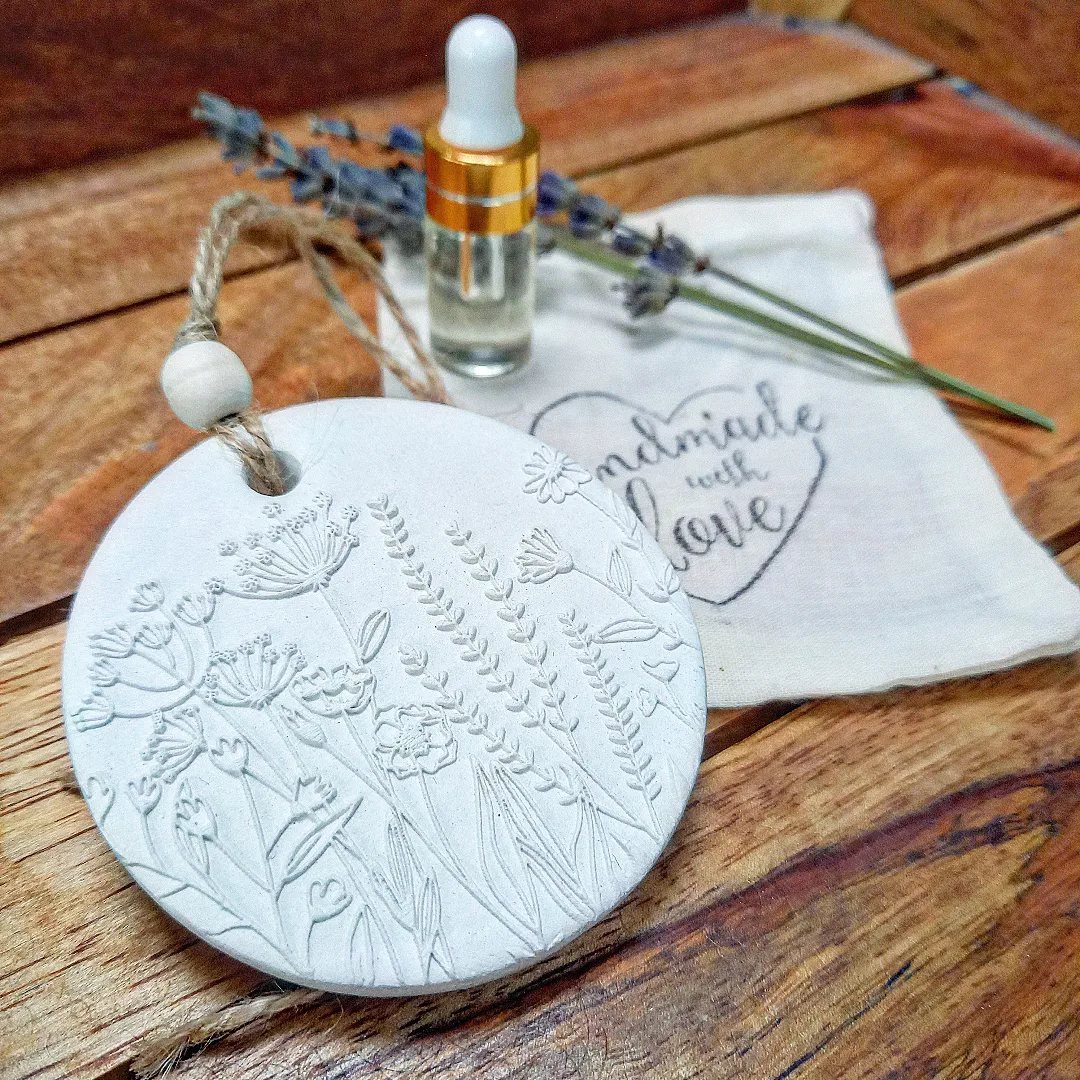
A clay disc holds scent the way a blotter does: add a few drops of essential oil from a dropper bottle and the piece releases fragrance slowly.
A raised floral pattern gives the oil more surface to cling to and looks pretty on its own.
Press the flower into the clay before it dries, and poke a hole at the top for a twine loop. I’d hang one in a closet or set it beside a sprig of lavender on a shelf.
19. Clay Flower Frogs
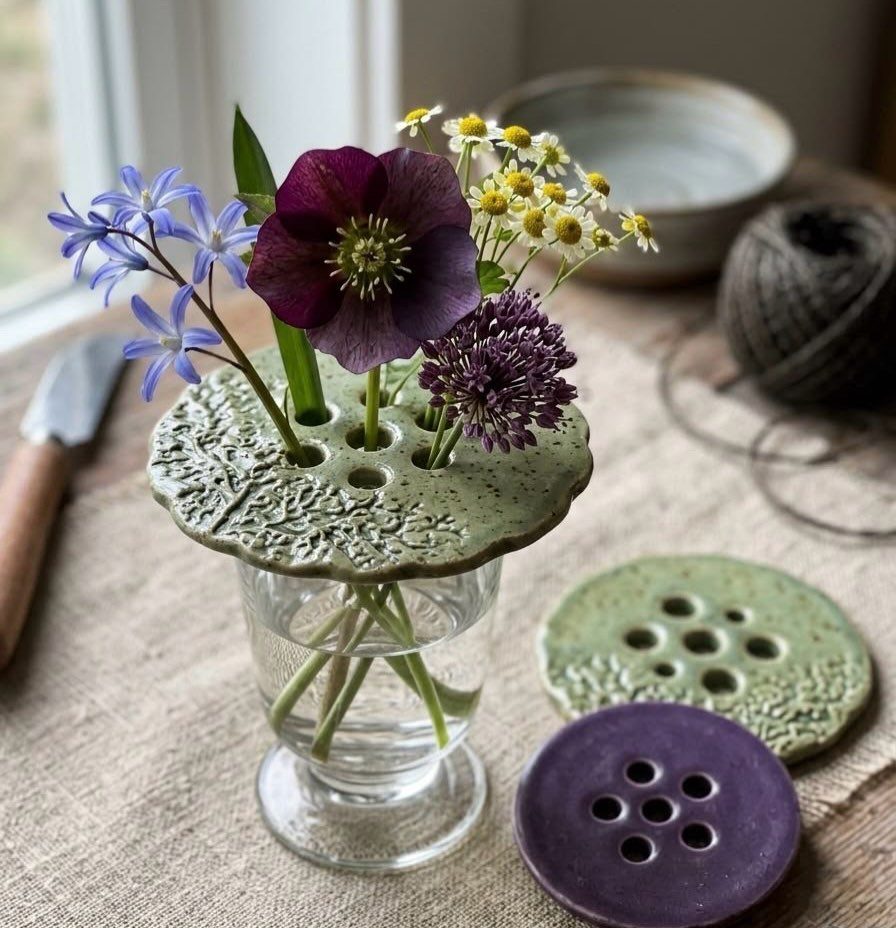
Poke holes through a flat disk of clay, rest it in the mouth of a vase, and every stem stays exactly where you put it. That is a flower frog, and it fixes the lopsided, flopping bouquet.
Cut the disk a little wider than the vase opening, and make the holes before the clay dries. Green blends into the stems, while purple makes the disk part of the display, so I’d make one of each.
Tie a length of twine around the vase neck to finish it.
20. Clay Bowls
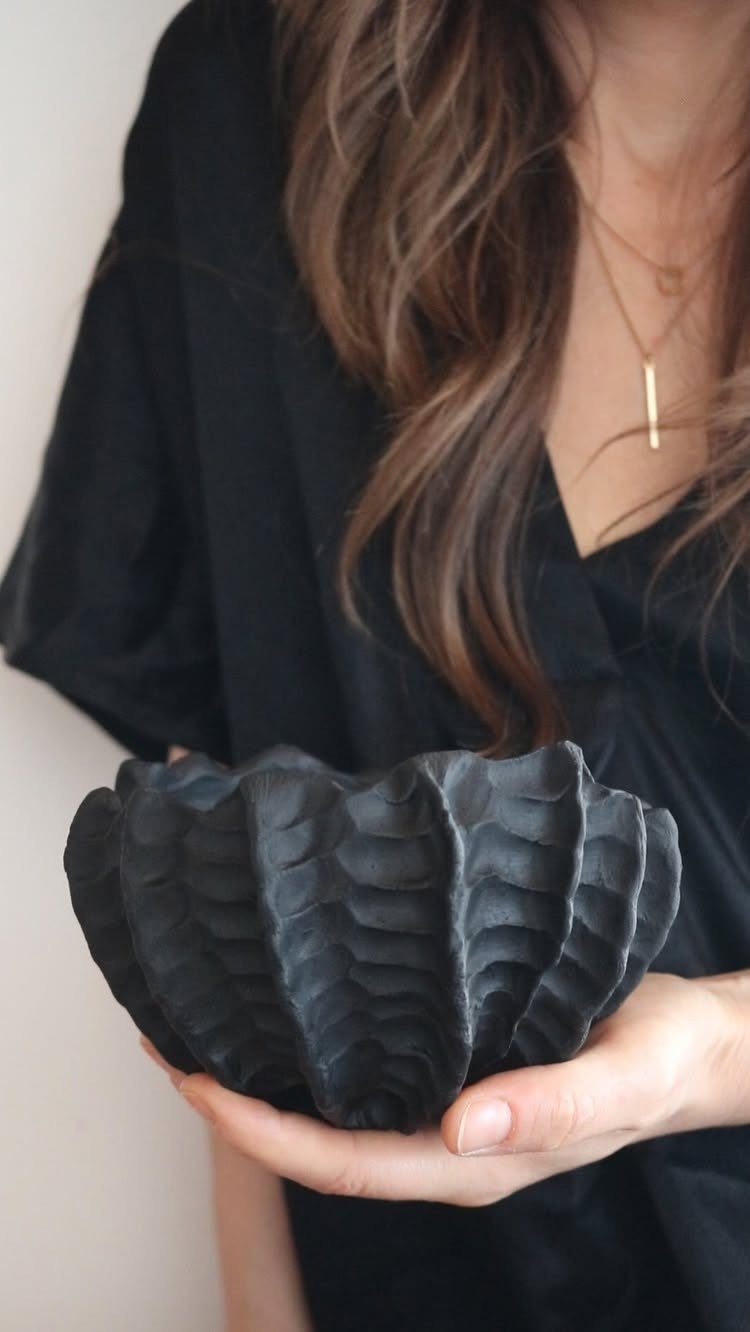
A ribbed texture does the decorating on a bowl like this, so the paint stays plain. Press the ridges in while the clay is soft, working from the center outward, and keep the wall an even thickness as you go.
Matte black suits the texture better than gloss, which would blur the ridges.
I’d keep the bowl small enough to sit in one palm, since a bowl that size is easy to shape by hand and holds rings, keys or loose change.
21. Clay Keychains
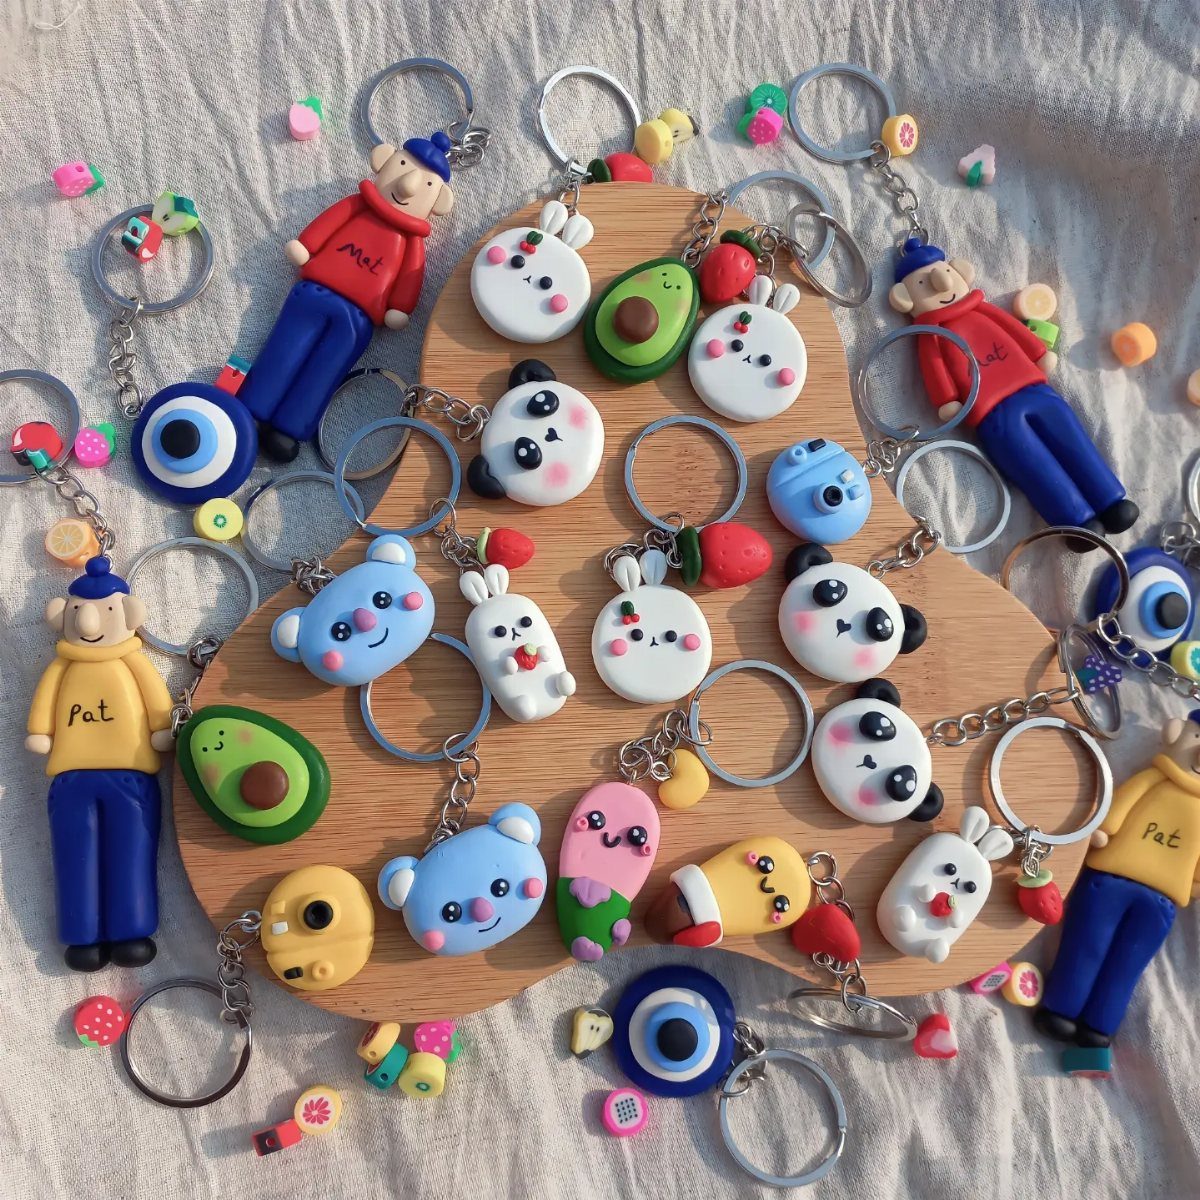
Make the hole at the top of each charm while the clay is still soft; drilling or piercing it later risks a crack. Then loop a key ring through and the piece is done.
Little people, animals and food shapes all work, and painting a name on the front, like "Pat" or "Mat," gives each one a personality. Keep every charm small so the bunch doesn’t drag at your pocket.
I’d make a handful in one sitting, since they’re quick and each one can go to a different friend.
22. Textured Slab Clay Vessel
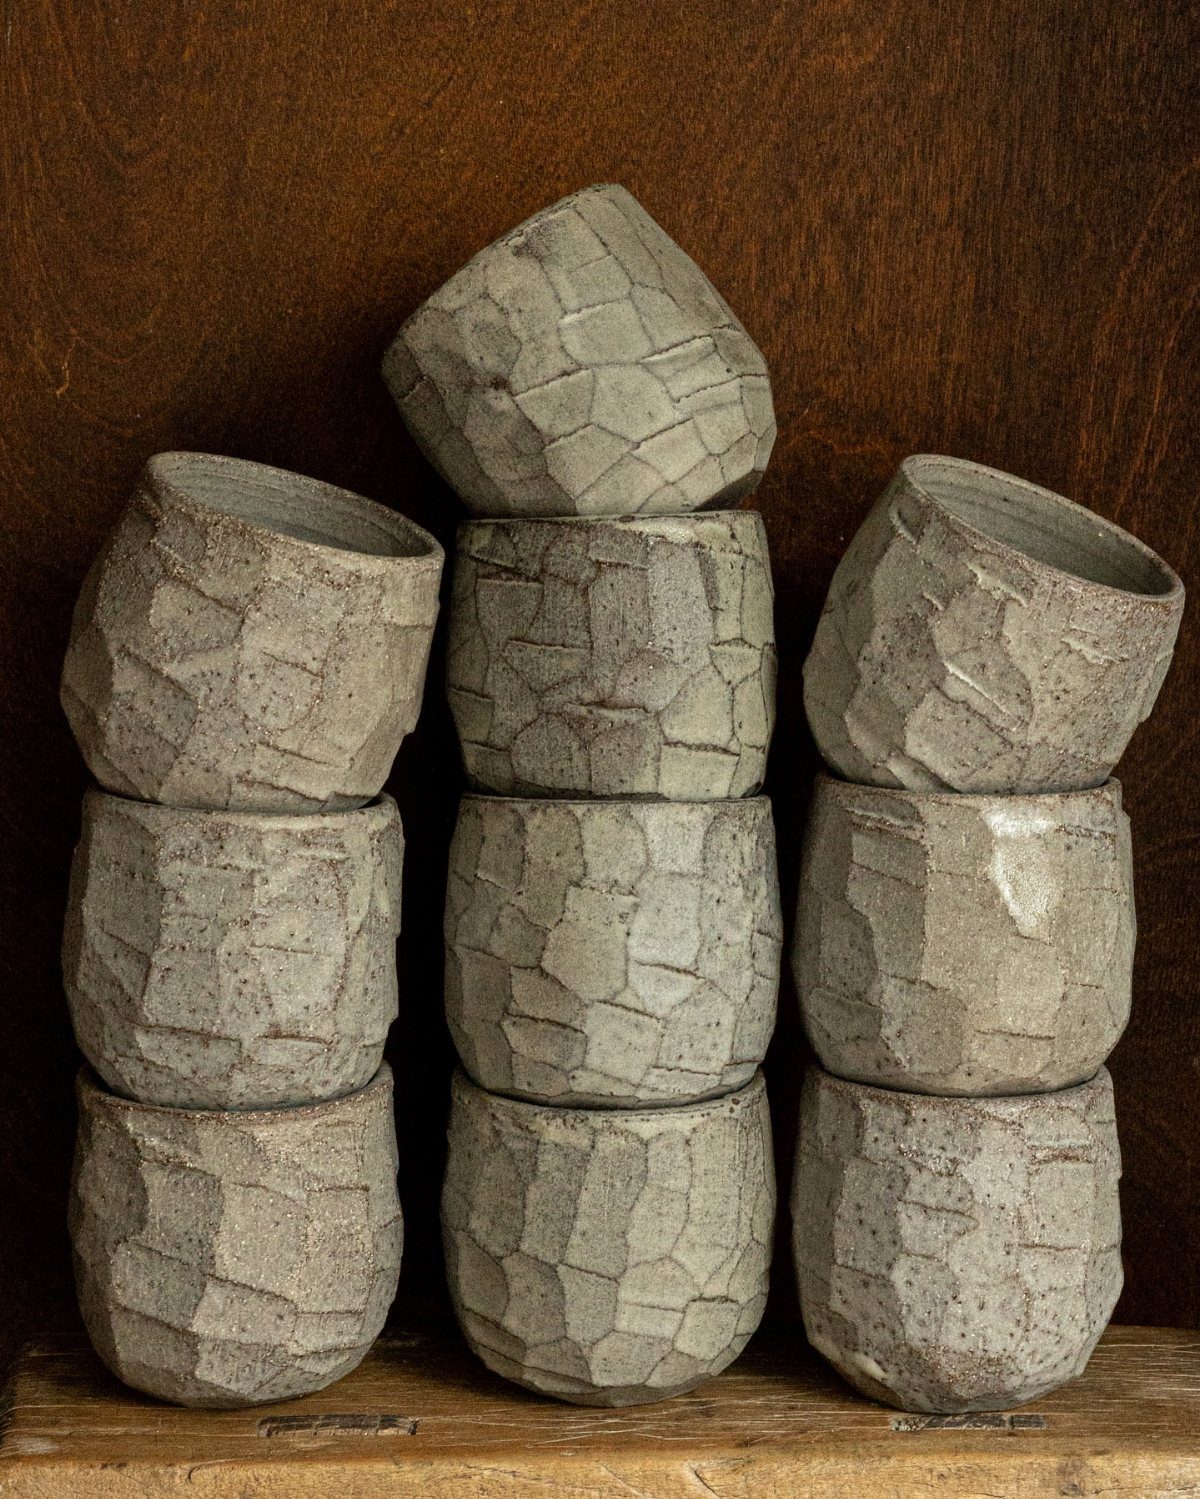
Texture goes on while the slab is still flat. Roll the clay out, press your pattern into it, and only then cut the pieces, so the surface stays crisp instead of smudging at the seams.
Cut paper templates first so the walls and base fit together without gaps, then join the edges. Grey clay keeps the shape quiet and lets the texture carry the piece.
I’d make several in matching grey and stack them as a display; the stack looks more intentional than one lone vessel.
23. Slab Clay Fish
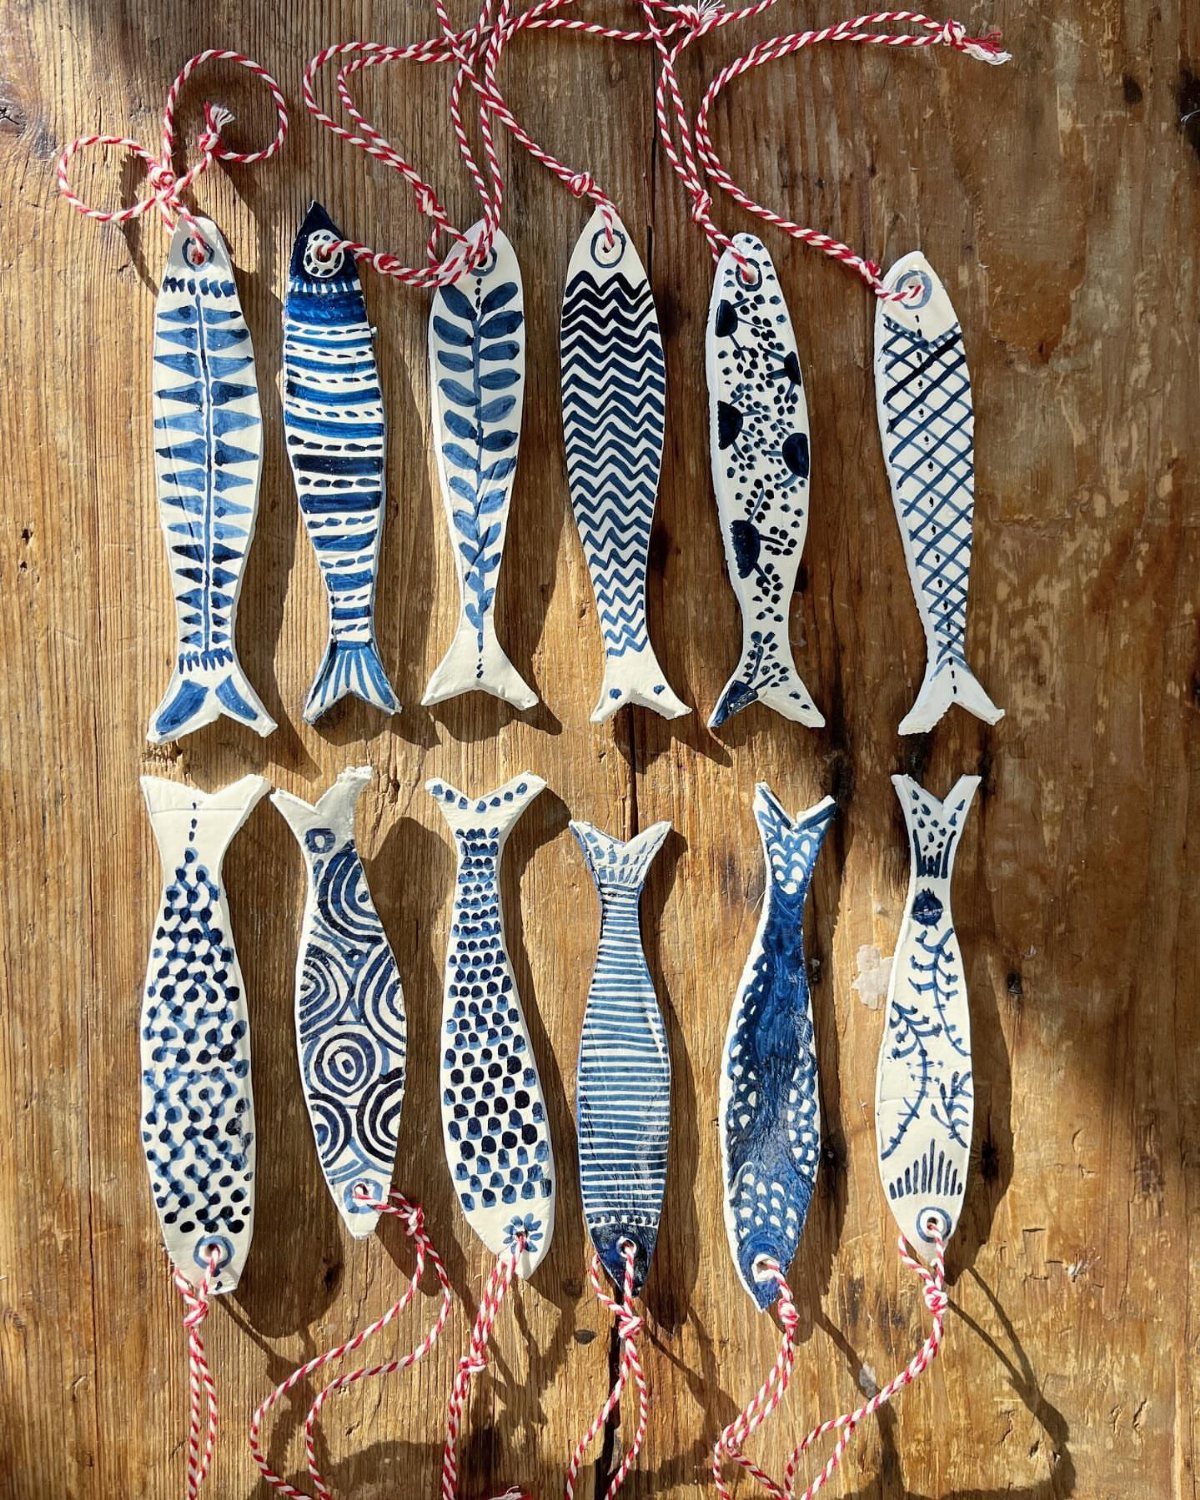
Cut one fish template from paper and every slab fish after it comes out the same size. Trace it onto rolled clay, cut around it, and you can turn out a whole school in one session.
Blue and white keeps the set cohesive, and I like red string against it because the color pops while the paint stays the star. Poke the hole for the string before the clay dries.
Hang them in a cluster at different lengths, so they look like they’re swimming.
24. Clay Face Pot
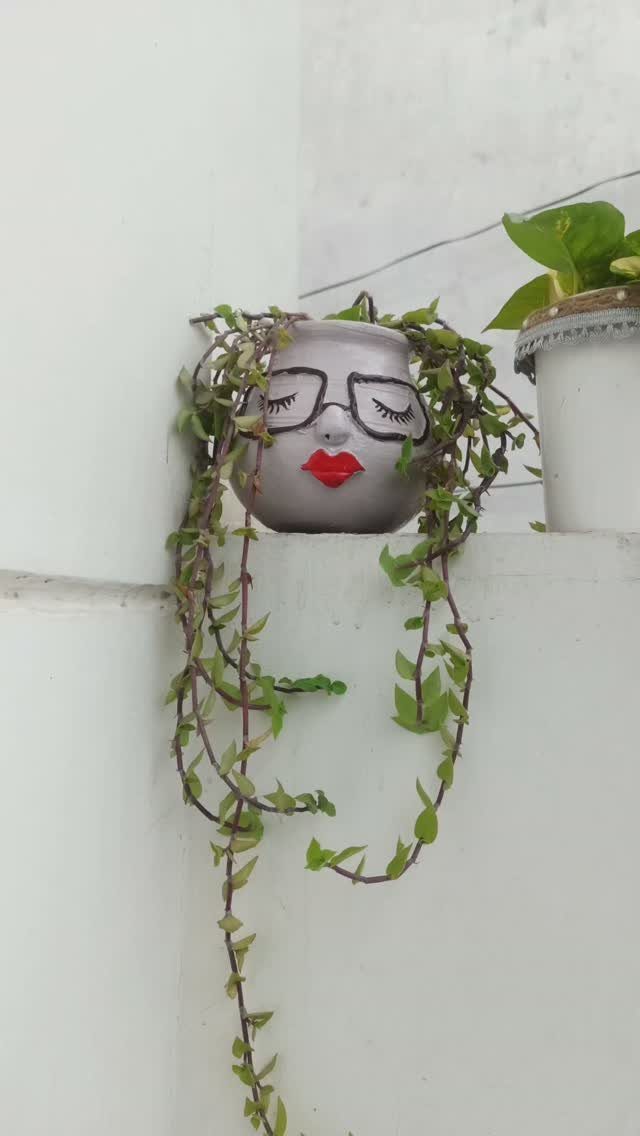
A face makes a pinch pot funny before it makes it useful. Shape the bowl first, then paint the features around the opening so the rim becomes the top of the head.
Glasses and bright red lips give the grey clay a character, and I’d paint the lips last so the color stays sharp.
Set it on a ledge or shelf where the face looks out at the room.
25. Clay Frog
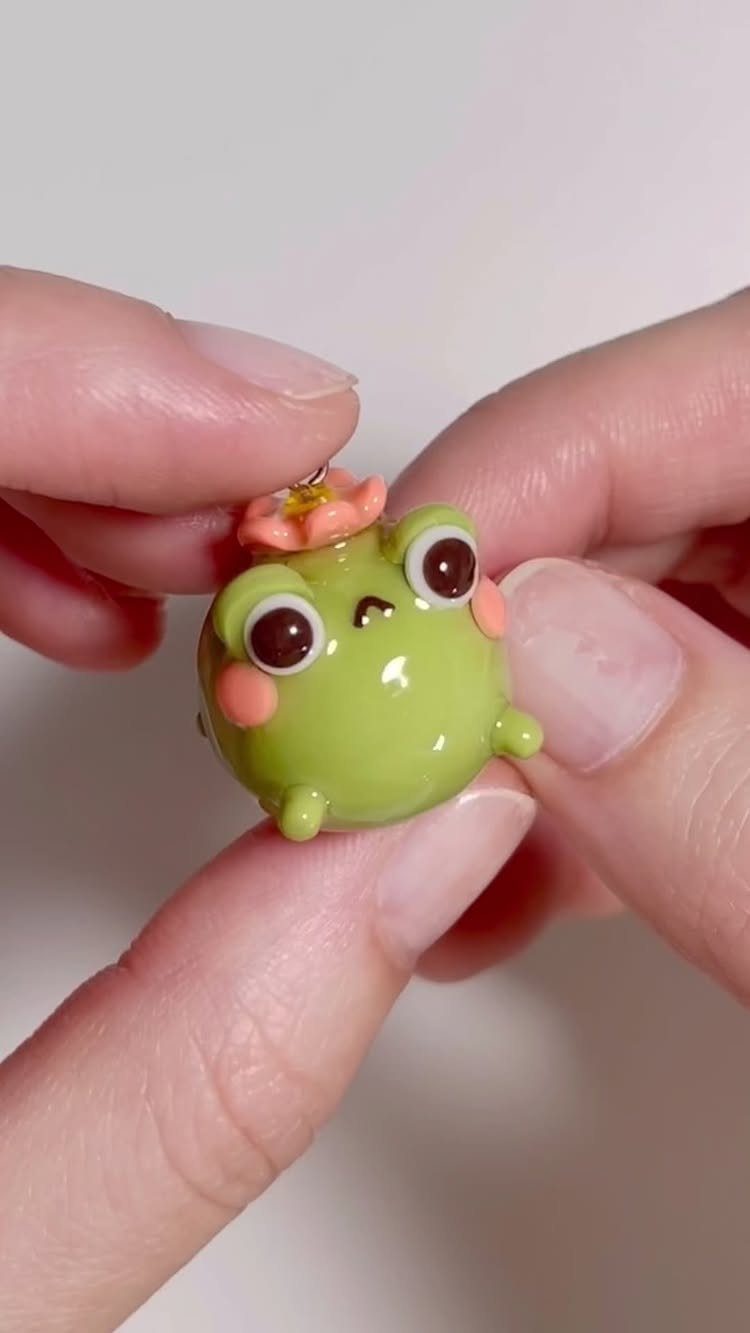
A pea-sized ball of pink clay, flattened and pressed onto the head, is all a plain frog needs to get some personality.
Shape the body as one rounded lump, pinch two bumps on top for the eyes, and press the flower on last so it sits firmly.
Green with a glossy finish suits a frog, since it makes the skin look wet. I’d keep it small enough to sit in a palm, and put it on a windowsill beside a plant.
26. Clay Turtle
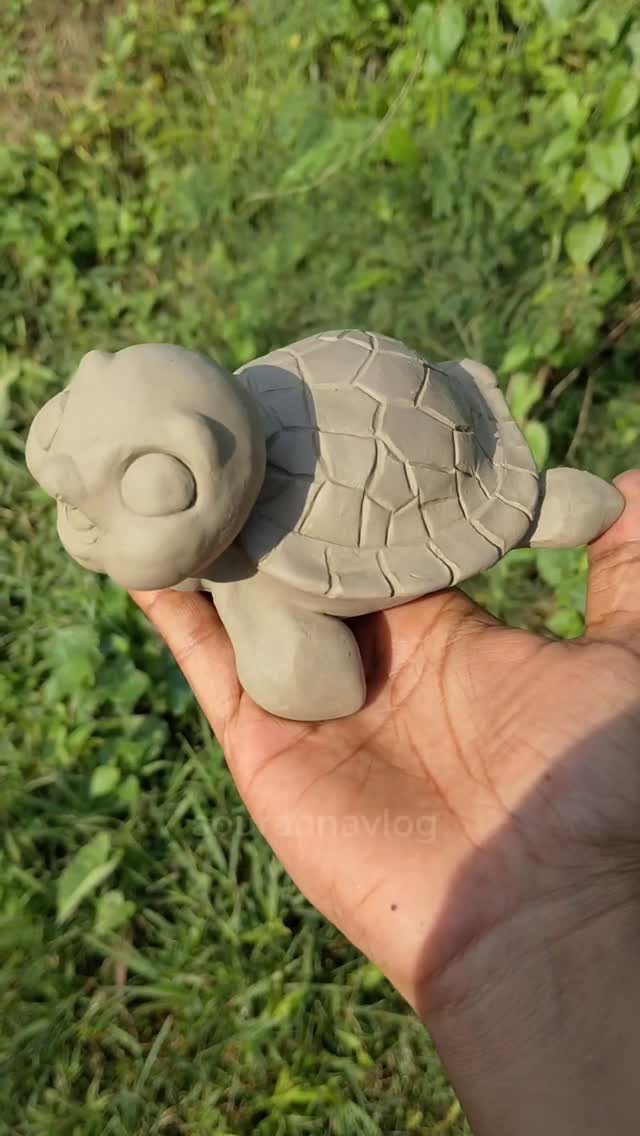
Shell texture is what makes a turtle read as a turtle. Dome the body first, then press a pattern into the top with a pencil tip or a toothpick, working in rows so the marks stay even.
Keep the head and legs small against the shell; oversized limbs make it look awkward. I like grey clay here because the texture shows without any paint, which makes this an easy first sculpture for a beginner.
27. Clay Turtle Figurines
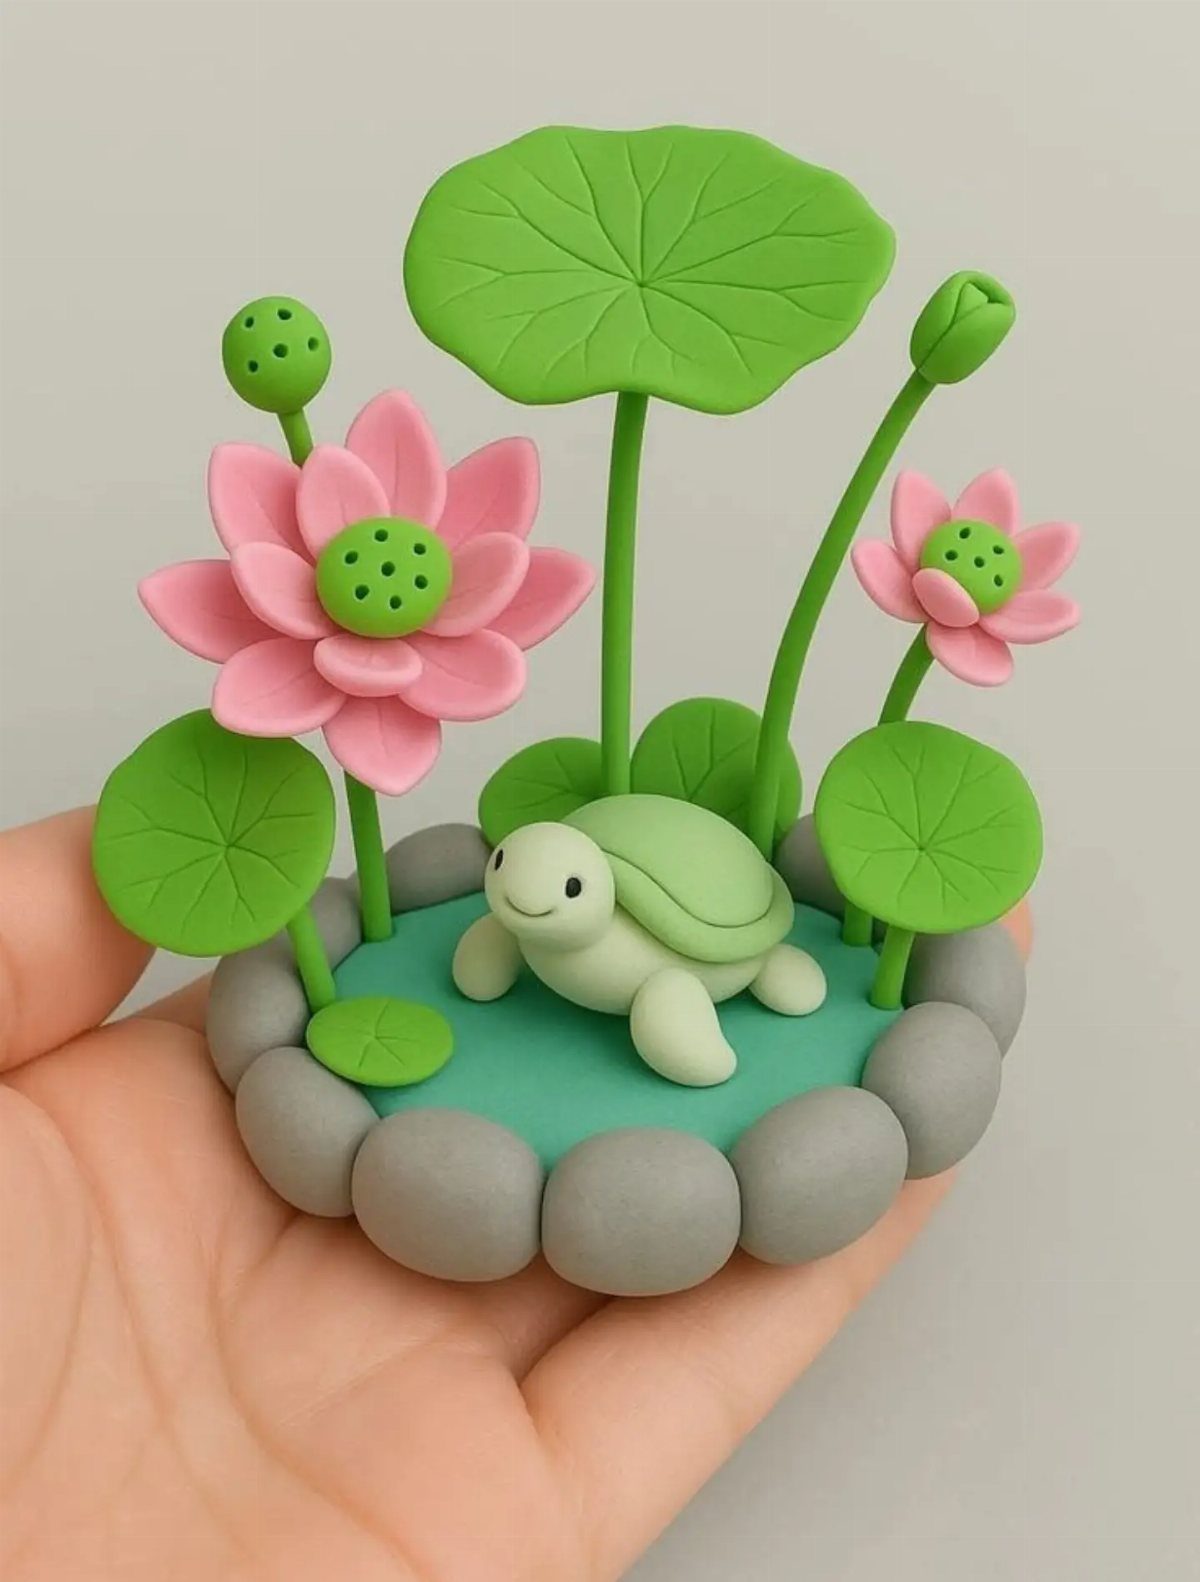
Build the pond before the turtle. Flatten a base, press thin discs of green clay on it for lily pads, and add a few small grey balls as stones.
Pinch the lotus petals one at a time and layer them into pink flowers, then set the turtle in last so it sits among them. Smoothing each joint with a damp fingertip keeps the pieces from peeling apart.
28. Air-dry Clay Geodes
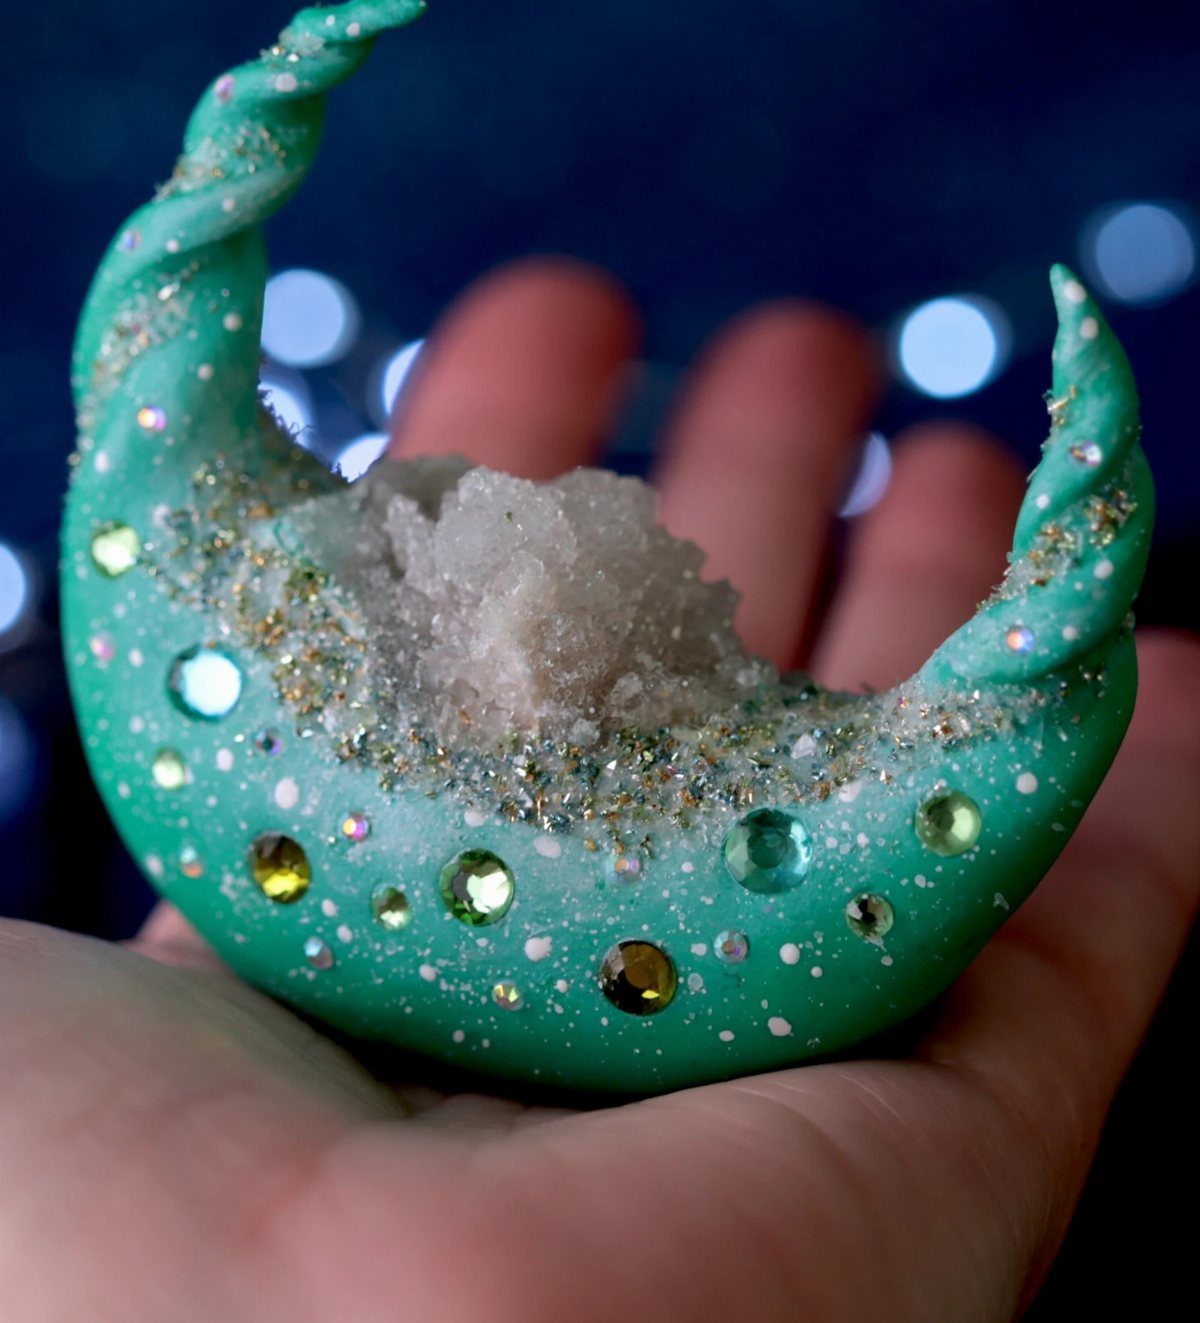
Press the gems in while the clay is still soft. Cut a crescent, push a shallow hollow into the center, and fill it with small rhinestones and crystal pieces so the middle looks like cut stone.
Teal is a strong color for a geode, and a crescent moon is an easy shape to cut.
I’d press the gems in at different angles rather than in a neat line, because real crystals never sit evenly. If one pops loose after drying, a dot of craft glue fixes it.
29. Air-dry Clay Imprints
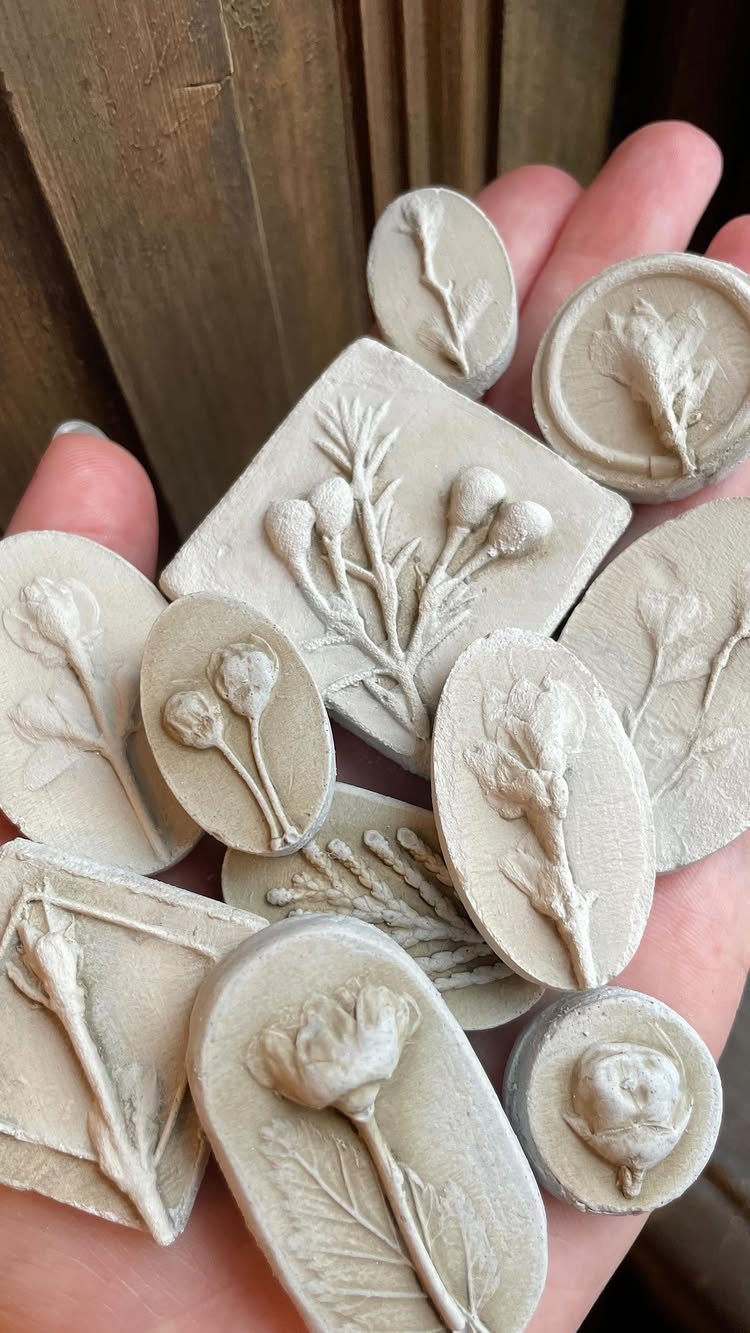
Real flowers do the sculpting here. Roll the clay to an even thickness, lay a flower or stem on top, and press down firmly with a rolling pin so every petal vein prints.
Peel the plant away carefully, then cut around the impression.
Thin, flat blooms print the sharpest detail, so I’d skip chunky ones. Off-white clay with no paint shows the pattern best, and the finished pieces make good tags, ornaments or small dishes.
30. Air-dry Clay Wall Decor
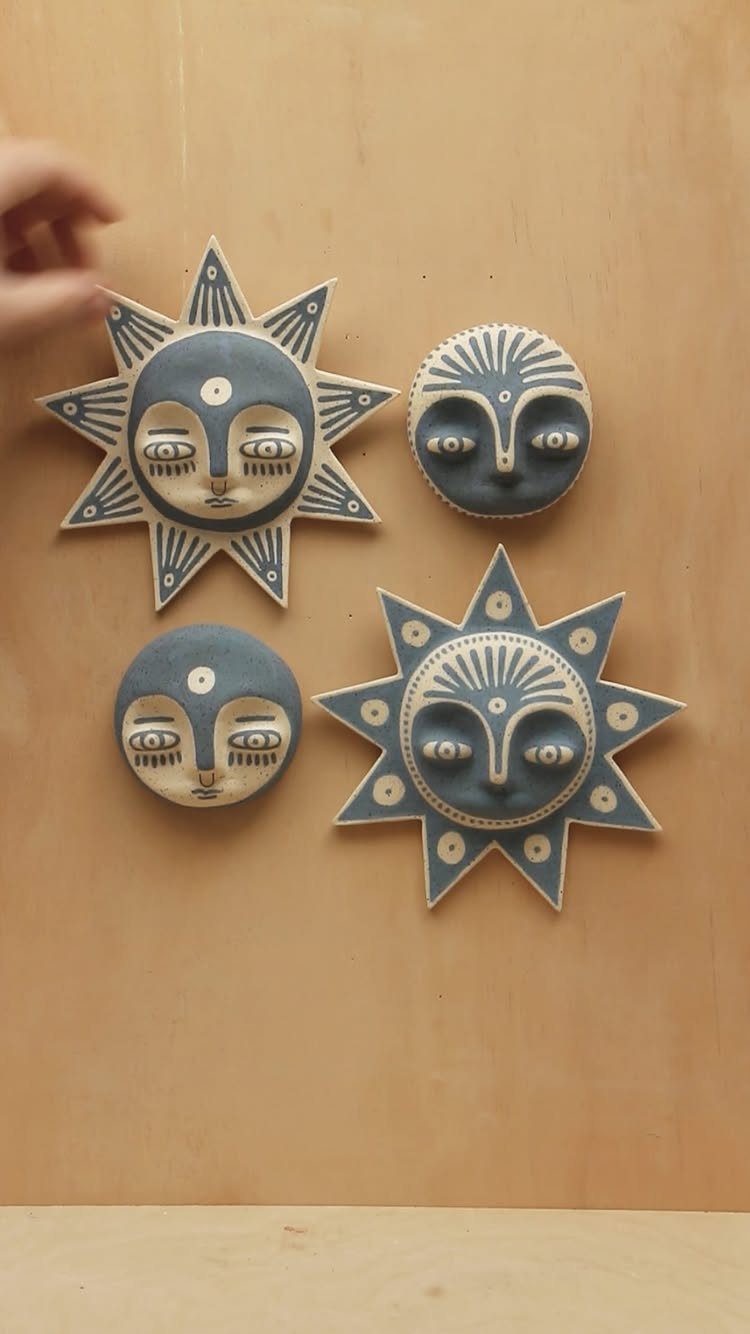
Suns and moons with sleepy little faces look best hung as a set of 3 or more, since a single one on a big wall tends to get lost.
Cut each shape from rolled clay, add the face details while it is soft, and punch the hanging hole before it dries.
Blue, grey and cream keeps the group calm, so I’d stay inside that palette. Make a couple of each shape and hang them close together on one wall, which looks more deliberate than a single plaque on its own.
Choosing and Using Air-dry Clay
Air-dry clay needs no oven and no kiln, so a table and an afternoon are enough to go from a lump of clay to a finished piece.
It’s inexpensive, forgiving for a first-timer, and works as well for a kid at the table as for an adult.
Texture is the cheapest upgrade. Press a piece of fabric, a rubber stamp or a patterned rolling pin into the rolled clay before you cut, and a plain shape picks up an embossed surface.
Flat stars are the easiest way to try it, and a loop of string through the top turns each one into a tree decoration.
I’d pick paint shades from colors already in the room, so the finished pieces look at home on the shelf.
Homemade Clay Drying and Storage
Slow drying is what keeps homemade clay from cracking. Plan on about 3–5 days of air time, and resist the urge to rush it.
If you’d rather not wait, bake at 200°F for 1–1.5 hours, flipping each piece halfway through. Then let it cool inside the closed oven so it comes down gradually.
Wrap any leftover dough in plastic and seal it in an airtight container, where it lasts up to 2 weeks. I’d mix only what the project needs, since dough that sits that long is easy to forget.
Frequently Asked Questions
What are easy things to make with clay?
Pinch pots, flat cutout shapes and small animals are the easiest places to start. Cookie-cutter stars or flower dishes come out uniform with little skill, and mushrooms and turtles are forgiving because small lumps just read as character.
What can you craft with clay?
Clay covers small household pieces like ring holders, trinket dishes, vases, flower pots, candle holders, picture frames, magnets and wall hangings.
It also makes earrings, keychains, ornaments and garden markers, plus figurines such as turtles, frogs and mushrooms. Most of these are small, so a batch of keychains or magnets can be made in one sitting and handed out as gifts.
What is the easiest clay to work with at home?
Air-dry clay is the easiest to start with, since it hardens on its own and never touches an oven or kiln. A lump of it can become a finished piece in an afternoon.
How long will homemade clay last?
Homemade clay keeps for up to 2 weeks when the leftover dough is wrapped in plastic and sealed in an airtight container. That window is short, so I’d mix only as much as the project calls for.
Can homemade clay be colored?
Yes. To get one even shade, mix a few drops of food coloring into the water first, then add that water to the dry ingredients.
For several colors, let the dough cool to room temperature, split it into balls, and knead a different color into each one. You can also leave it white and paint the dry piece with acrylic paint.
How can I make clay dry faster?
In the oven, set it to 200°F and give each piece 1–1.5 hours, turning it over at the halfway point, then let it cool inside with the door shut.
Left on its own, clay air-dries in about 3–5 days, and that slow pace is what keeps it from cracking. Use the oven only when you truly can’t wait.