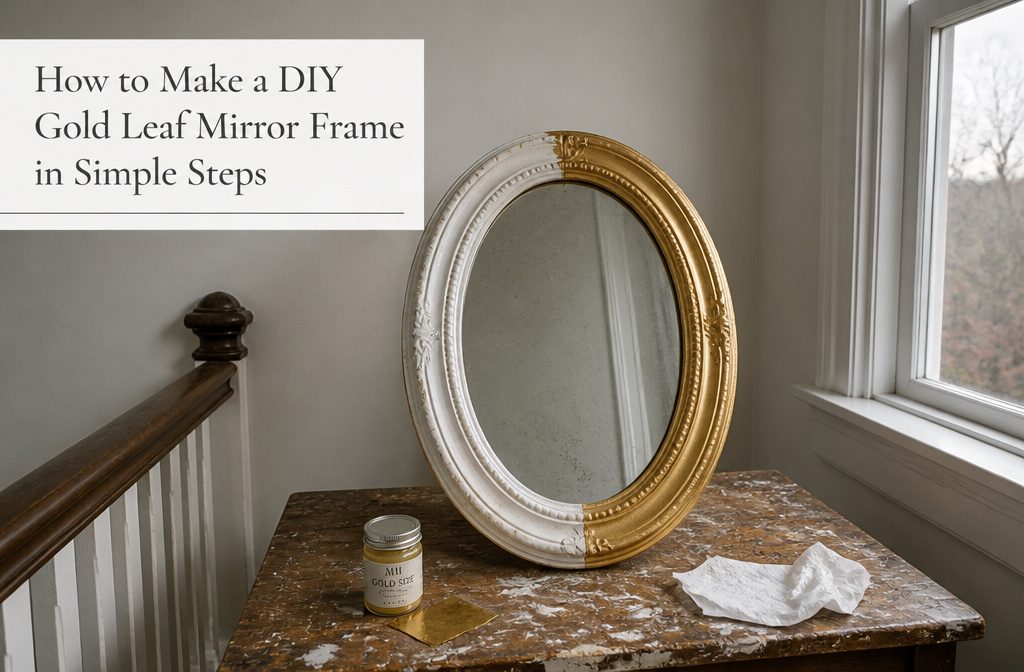
A gold leaf frame costs about $12 on a $5 flea market mirror, and the base coat is where people go wrong.
Gold over a dark base floods the frame, so wood needs white paint first. A metal frame gets Rub ‘n Buff instead, which takes under 10 minutes per mirror.
1. Prepare the Mirror and Frame

These are three different projects, so pick the one that matches your mirror.
On a metal frame getting Rub ‘n Buff, painter’s tape around the edge is optional insurance. I’d skip it if you’re comfortable freehand, because stray wax scrapes off the glass with a razor.
On a wood mirror getting sheet leaf, start with white paint.
Gold over a dark base reads as a flood, while gold over white reads as an accent. Two coats of Annie Sloan Chalk Paint in Old Linen is a warmer stand-in if you don’t have white on hand.
For a sunburst built from wood shims, paint them first and give the coat about an hour to dry before any leaf goes on.
2. Apply Adhesive or Finish
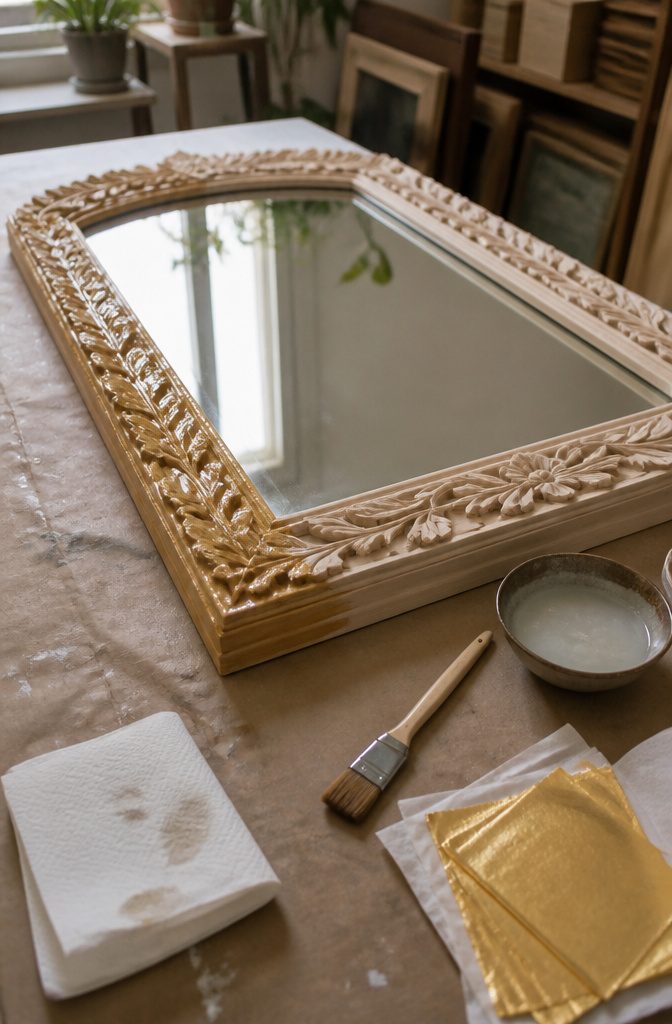
For leaf, the adhesive does the real work.
Brush gilding adhesive onto about half the frame at a time, then wait a few minutes until it turns tacky. The leaf only grabs once the glue feels sticky to the touch.
Decoupage adhesive on a small paint brush also works if that’s what’s in your drawer. Working in halves keeps the glue from drying out before the leaf reaches it.
The no-leaf route skips adhesive entirely. Rub ‘n Buff is a wax, so rub it on with a paper towel or an old T-shirt.
Plan on two light coats, because one pass leaves gaps. On a sunburst mirror, brush it onto each spindle instead, since a brush gets around them better than a rag.
3. Lay Down the Leaf
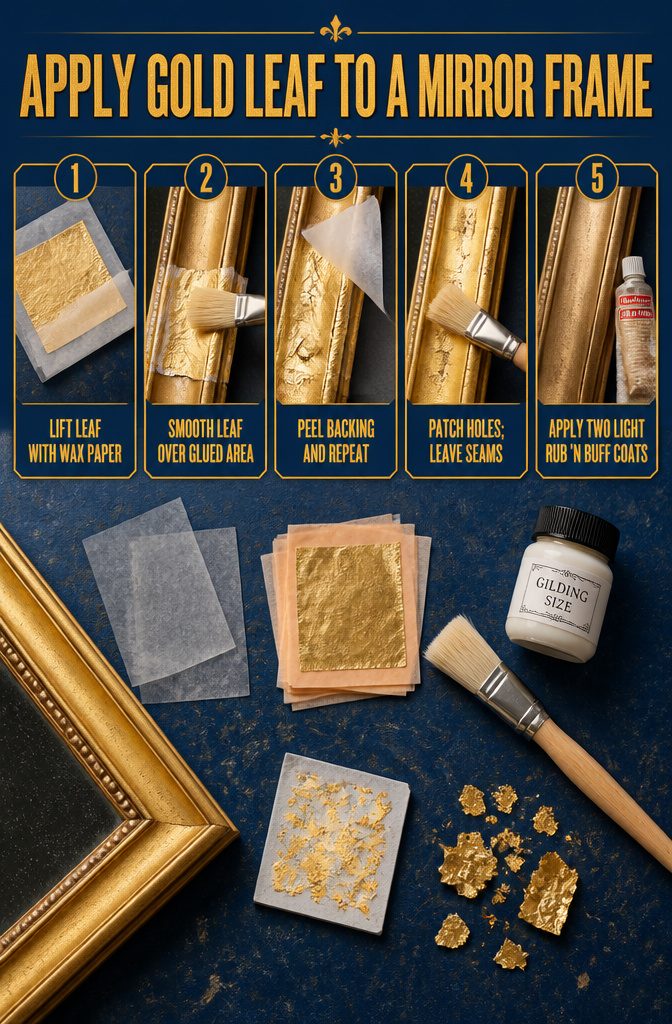
- Hold a sheet of wax paper against the foil. Static pulls the leaf off its tissue, so you can carry it to the frame.
- Lay the leaf over a glued area and smooth it with a light brush. Foil this thin floats and rarely lands smooth, so expect wrinkles and patch them later.
- When the foil is stuck, pull the wax paper away. Press more leaf into the adhesive, lift the backing, and repeat around the frame.
- Brush more glue over any holes and patch them with scraps. I’d leave the seams alone, since they read as character.
- For the Rub ‘n Buff route, rub it on with a paper towel or old t-shirt. Two light coats cover better than one, which comes up patchy.
4. Fix Coverage and Finish the Look
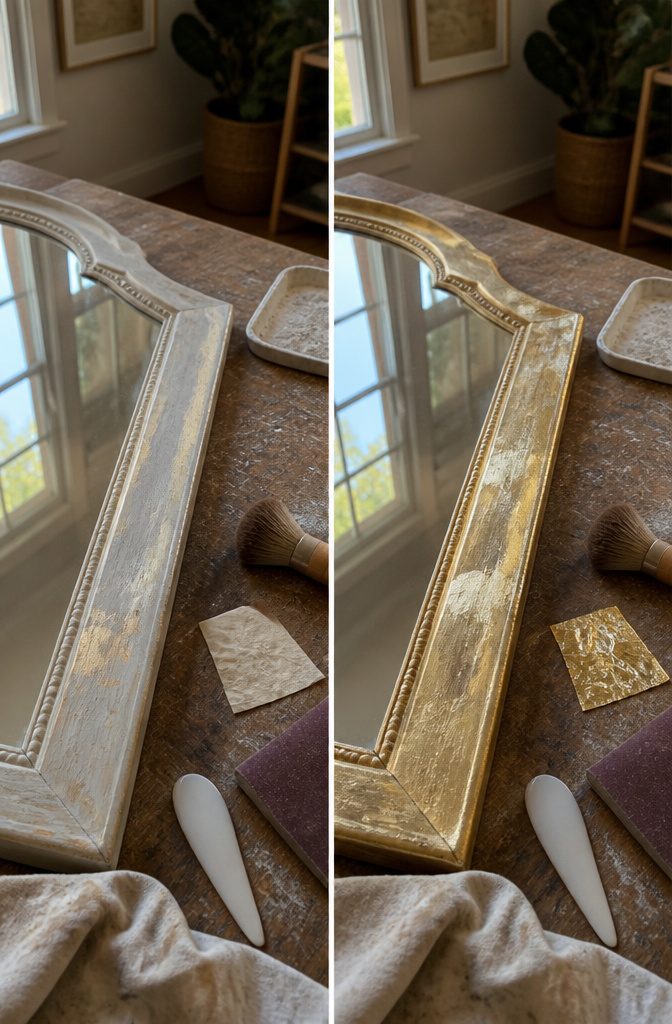
Wait one hour after the last sheet goes down, then brush off the loose flakes with a soft brush.
Gaps and bare spots will show. Patch them with a dab of adhesive and another scrap of leaf, but I’d leave the cracks between sheets alone, because they read as age, not error.
For a softer look, paint over the gold.
Two coats of chalk paint in Old Linen work well. Once it dries, wet sand only the area where you want the gold to show through.
Dark wood may peek out too, so add adhesive and leaf there. Scrape stray paint off the glass with a plastic spatula so it doesn’t scratch.
For a quick aged finish, sand the gilded top very lightly with 150-grit paper, hitting only some spots so others stay shiny. Amy Howard At Home Dark Wax and Dust of Ages add patina if you want it.
5. Seal or Attach the Mirror
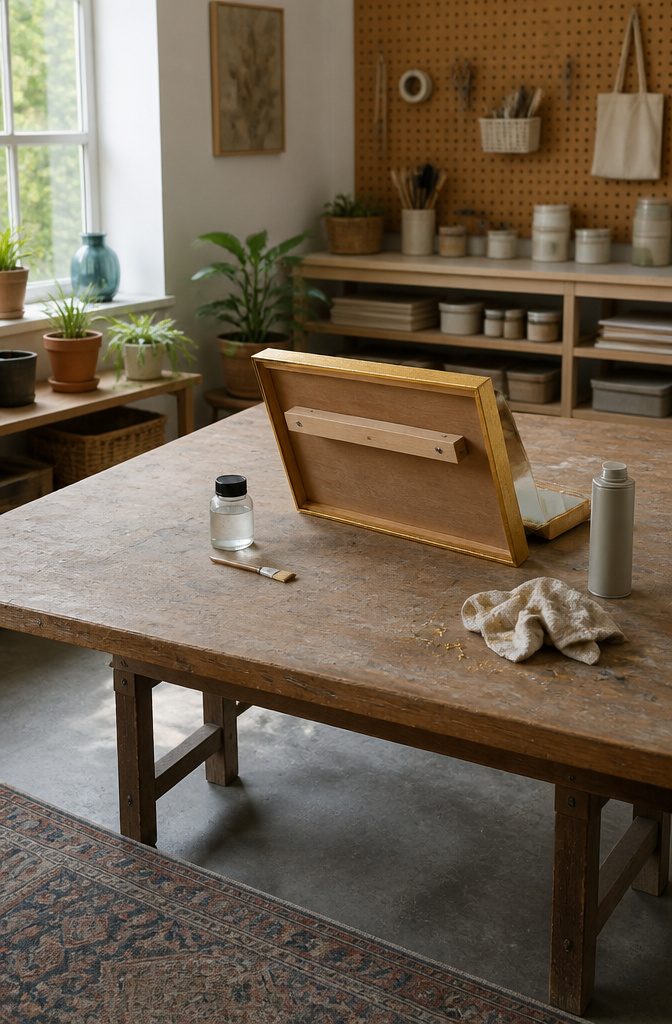
Metal leaf is paper-thin and rubs off at the edges where hands land, so brush a clear water-based sealer over silver leaf and let it dry fully.
Imitation metal leaf can also oxidize and dull, and a clear spray sealer slows that. I’d use one on any frame near a bathroom or entry door.
For a frame you built yourself, glue the mirror to the back of the finished frame and hang it on a French cleat, which spreads the weight along the wall better than a single wire.
For a lighter fix, a ready-made sunburst can hang over an existing mirror on an adhesive hook.
Match the hook’s weight rating to the frame, with room to spare. A wax-based paste finish also tolerates glass cleaner, though I’d spray the cloth, not the frame.
Gold Leaf or Rub ‘n Buff
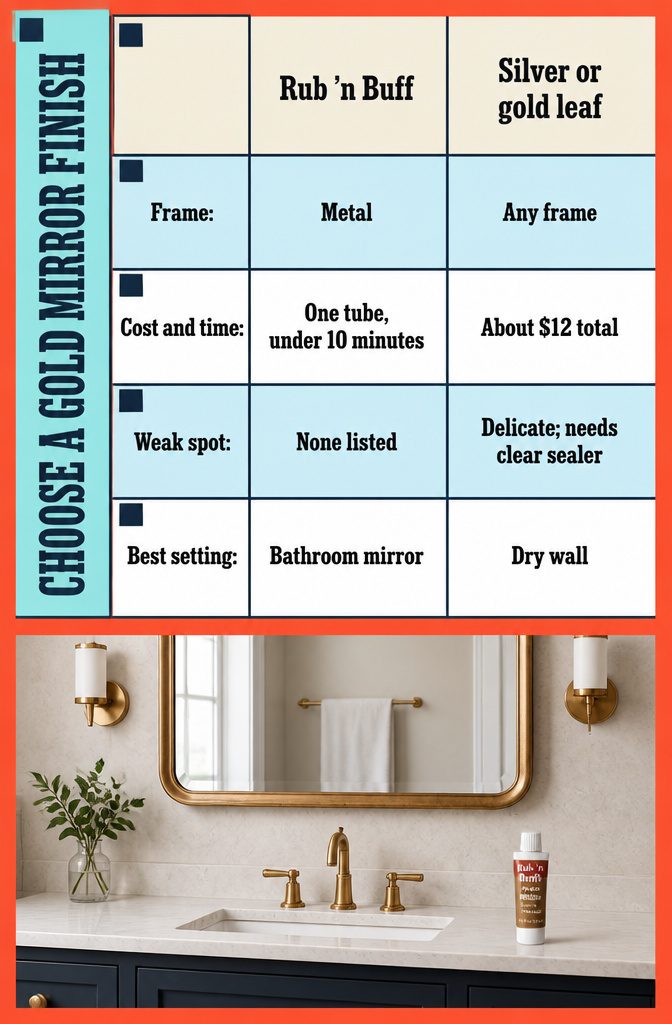
Rub ‘n Buff in Antique Gold is my pick for a bathroom mirror, since toothpaste splatters will hit the finish and leaf is too delicate for that. Hobby Lobby carries it, and one tube covers more than one frame.
| Finish | Frame it suits | Cost and time | Weak spot |
|---|---|---|---|
| Rub ‘n Buff | Metal | One tube is plenty; under 10 minutes per mirror | n/a |
| Silver or gold leaf | Any frame | About $12 total on a $5 flea market mirror | Delicate, needs a clear sealer |
| Gold metallic spray paint | Shims | Needs Rust-Oleum primer first | Metallic sprays can wear poorly over time |
Leaf gives the most dramatic cracked, seamed look, so I’d save it for a dry wall.
The Finished Look
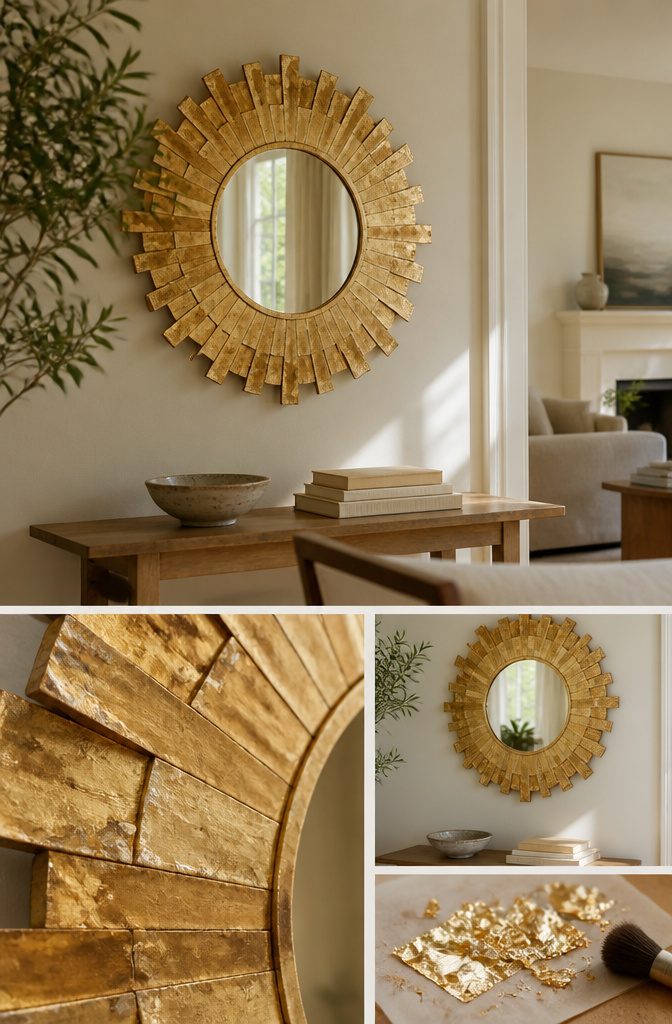
The finish to aim for is antiqued gold that varies across the frame, not one flat yellow. Some patches run warm and bright, others darker or paler, with paint showing through where the leaf thins.
Faint seams where the leaf sheets meet are part of the look; they read as hand work, and a spray can can’t fake them. Layering gold over paint gives that depth.
Shape changes the effect.
The shim sunburst reaches 37.5 inches across, up from an earlier version at 18–20 inches, and at that size it behaves like wall art. The layered-mirror look stacks glass and gold in tiers, so the frame becomes part of the reflection.
For a rental or a small budget, I’d start with a single antiqued frame. It hangs easily, costs less, and the sunburst takes far more wall than most rentals can spare.
Frequently Asked Questions
Can I use gold leaf instead of silver leaf on a mirror frame?
Yes. The silver leaf frame tutorial says gold works the same way if you prefer it.
Brush on gilding adhesive (decoupage glue also works), lay the sheets, then seal the frame with a clear coat, since metal leaf is delicate and rubs off with handling.
How do you hang a mirror on top of another mirror?
Use an adhesive hook rated for the weight of the frame, with room to spare, and stick the new mirror right over the existing one.
One blogger who hung a gold sunburst this way reported it stayed put for a month without a wobble. Gold leafing the back of the smaller mirror is a nice touch, because the larger mirror reflects it.
Can you paint a mirror frame gold?
Yes, and the best product depends on the frame. On a metal frame, Rub ‘n Buff in Antique Gold goes on in two light coats.
On wood shims, gold metallic spray paint works over a Rust-Oleum primer, though metallic sprays can wear poorly over time. If paint lands on the glass, scrape it off with a plastic spatula so the glass doesn’t scratch.