

A meadow-style piece for the ground costs a few foam blocks, moss, and an afternoon of building.
Most people go wrong on order: line flowers like stock and delphinium must go in right after the greenery, before roses, cremone mums or dahlias, because once those bulky stems fill the foam, few clear gaps remain for a tall stem.
1. Plan the Design
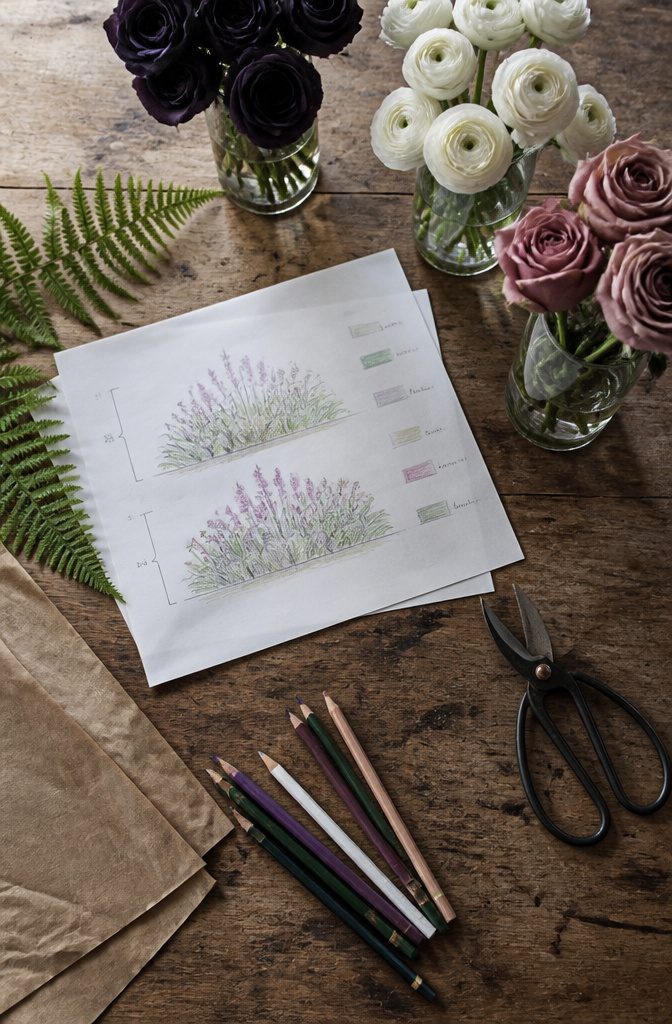
Pick your colors and sketch the arrangement on paper before buying a single stem. A rough drawing shows where the height goes and where each color repeats.
Plan in layers and roles rather than favorite flowers. Greenery gives structure and coverage: ferns, ruscus, basil.
Line flowers like stock, snapdragons and delphinium add height and movement. Roses, cremone mums and dahlias work as focal flowers that anchor the design.
Zinnias, scabiosa, asters and wax flower fill in texture. Ranunculus, Queen Anne’s lace and cosmos float above the rest and keep it airy.
For a palette that already works, I’d start with navy blue Austin roses, white ranunculus and dusty roses. Label every layer on your sketch with a flower name, and the shopping list writes itself.
2. Prepare the Base
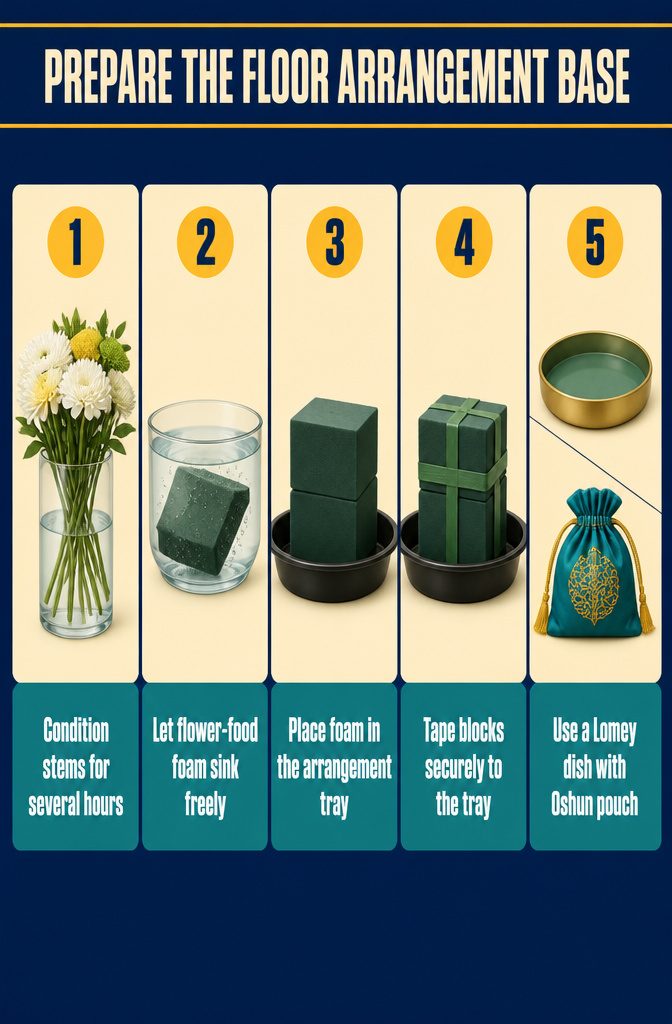
- Condition the flowers first, because they need several hours or overnight to hydrate. Strip any foliage that would sit below the water line, recut the stems at an angle, and stand them straight in clean water with flower food.
- Soak caged foam in water mixed with flower food. Let it sink on its own. Forcing it under is a shortcut I’d skip, since a fully saturated block is what keeps the stems drinking.
- Set the foam in a tray or directly on the ground where the arrangement will sit. For a larger arrangement with tall stems, stack 2 blocks in each tray.
- Secure the blocks to the tray with waterproof floral tape so they don’t shift when heavy stems go in.
- To skip foam, use a lomey dish with an Oshun pouch instead. It gives the same base, and the rest of the build works the same way.
3. Cover the Mechanics

Moss is the neatest way to hide the foam and cage underneath.
Tear it into small, thin pieces, since thick clumps make it harder for stems to push through the foam, then pin each piece down with floral pins. Turn the arrangement and check every angle until no foam shows.
This step is optional. A covered base looks finished sooner, though, so you can use fewer flowers and still get a full meadow look.
If you have no moss, extra greens tucked low around the base do the same job. I’d take that route over making a special trip for moss.
4. Build the Green Skeleton
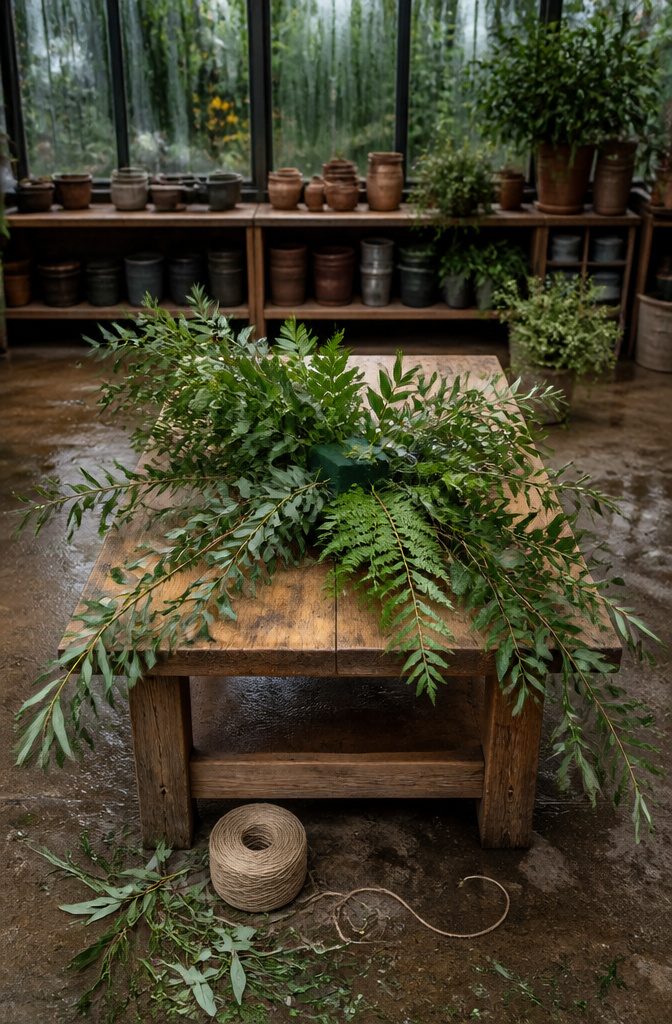
Cut your greenery to varying lengths before any stem goes in, then set the longest pieces at the outer corners and edges of the foam block. Shorter pieces fill in toward the center.
Willow leaf garland works well here. Ferns, ruscus and soft herbs like basil also give good coverage and movement, and ferns are the cheap, lush choice.
Add stems gradually until the foam is hidden from every angle. Keep the shape asymmetrical, with the gaps planned, so the arrangement looks like it grew out of the ground instead of piling into a mound.
I would rather leave an empty pocket on purpose now than hunt for room once the blooms arrive.
5. Add Line Flowers
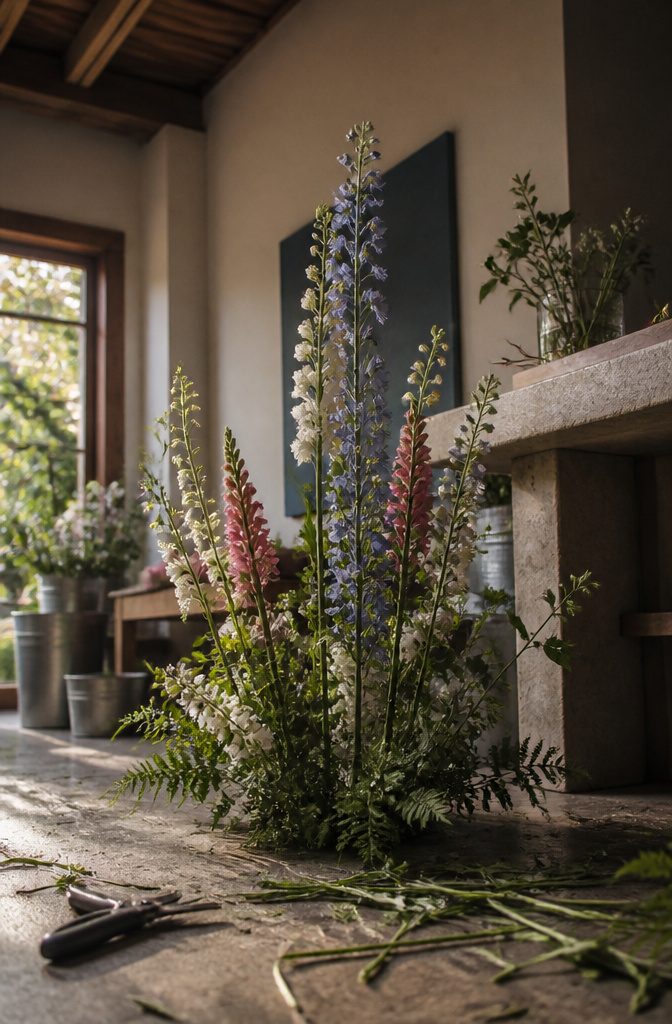
Stock, snapdragons and delphinium all carry their blooms along a central stem, which makes them the flowers that set your height. Push the stems into the greenery framework while it is still open, so each one stands straight.
Place them right after the greenery and before any focal flowers. Roses, cremone mums and dahlias are bulky, and once they are in, few clear gaps are left for a tall stem to slide through.
Vary the heights rather than lining stems up like a fence.
Tall spires with shorter ones between them lead the eye up and across, and that unevenness reads as flowers growing from the ground. Keep them sparse, since too many turn a meadow into a hedge.
6. Place Focal Flowers

Set the biggest blooms first. Roses, cremone mums and dahlias carry thick stems, and once the foam is crowded with greenery there is nowhere left for them to go in without cracking the block.
Cut each stem to its own length before it goes in, so some focals sit low and some stand taller, which gives the arrangement depth.
Cluster three of the same focal flower close together rather than spreading single blooms evenly. Flowers in a meadow grow in drifts, and a lone dahlia here and a lone rose there looks planted by a ruler.
If you’re working with navy Austin roses, group them at the base of the foam, then alternate light and dark blooms nearby so the color doesn’t read as a stripe.
7. Add Supporting Blooms
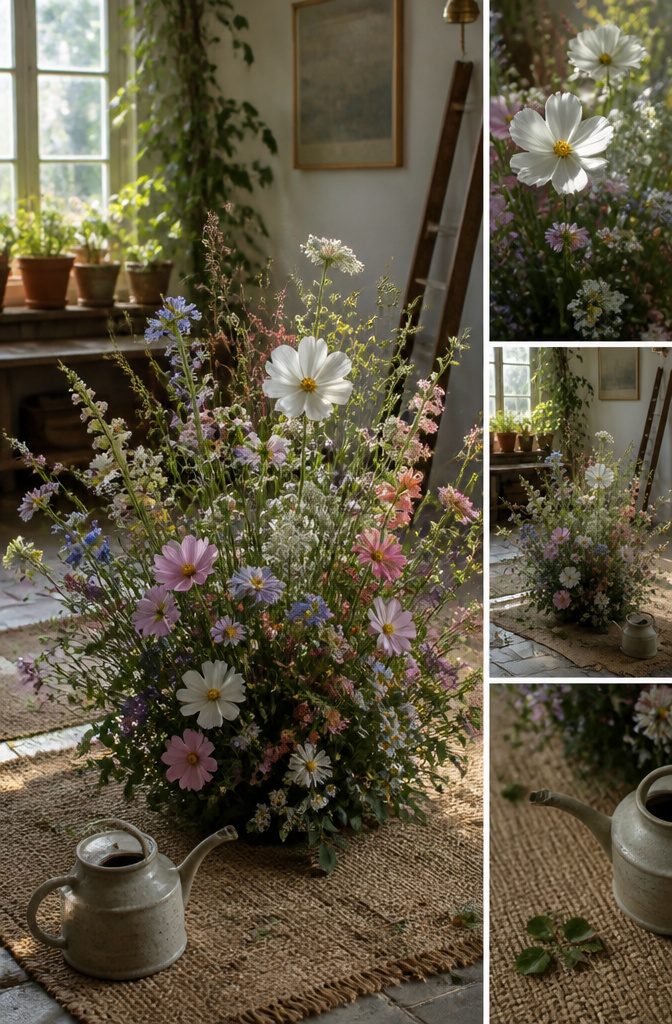
Medium-sized flowers go in right after the focal blooms, and their job is to fill the gaps between them. Set them at varying heights and angles so the arrangement gains depth instead of sitting flat.
Alternate light blooms with colored ones as you step down from tall to small, and spread colors and types evenly so no single shade clumps in one corner.
Smaller flowers and fillers come last. Zinnias, scabiosa, asters and wax flower add texture, color and fullness, and they belong after the larger stems are set, tucked into whatever spaces remain.
This is the step where a floor flower arrangement stops looking like scattered stems and turns lush and meadow-like. I’d under-fill first, then step back and look.
8. Fill Gaps With Floating Flowers
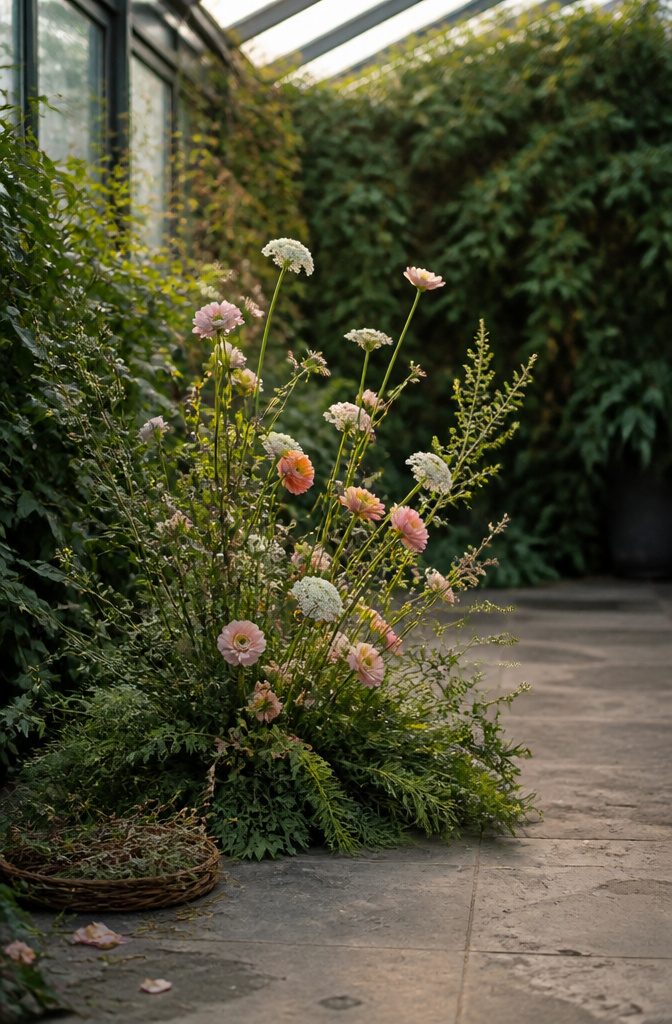
Gaps show up once the focal and filler flowers are in, and extra greenery and branches are the quick fix. Tuck a stem into each hole until the arrangement looks fuller.
If the outline still looks lumpy, pull the offending flowers and reinsert them. Nothing is locked in yet, and redoing a stem beats living with a bad shape.
Floating flowers go in last, once the gaps are closed.
Ranunculus, Queen Anne’s lace and cosmos are the three to reach for. Set them above the mass so they soften the outline and give the meadow its movement and airiness.
They need open space around them to read as drifting, so keep them sparse. A few too many and the lightness turns into clutter.
9. Balance and Finish

Step back and look at the arrangement from several angles.
Shift any stem that makes one side feel heavy, then tuck leftover blooms, greenery and accent florals into the thin spots. Mist lightly and press a finger to the foam: it should stay moist, not soaked.
Low arrangements are usually steady on their own. On grass, stake the cage into the ground with sturdy metal or landscape stakes, placed behind the greenery so they disappear.
Beside a chair or other structure, I’d hide a wooden dowel against it and secure the cage with a zip tie.
If you build a day ahead, keep it somewhere cool and dark, away from heat and direct sun. A light mist of Crowning Glory helps seal in moisture.
Materials and Supplies
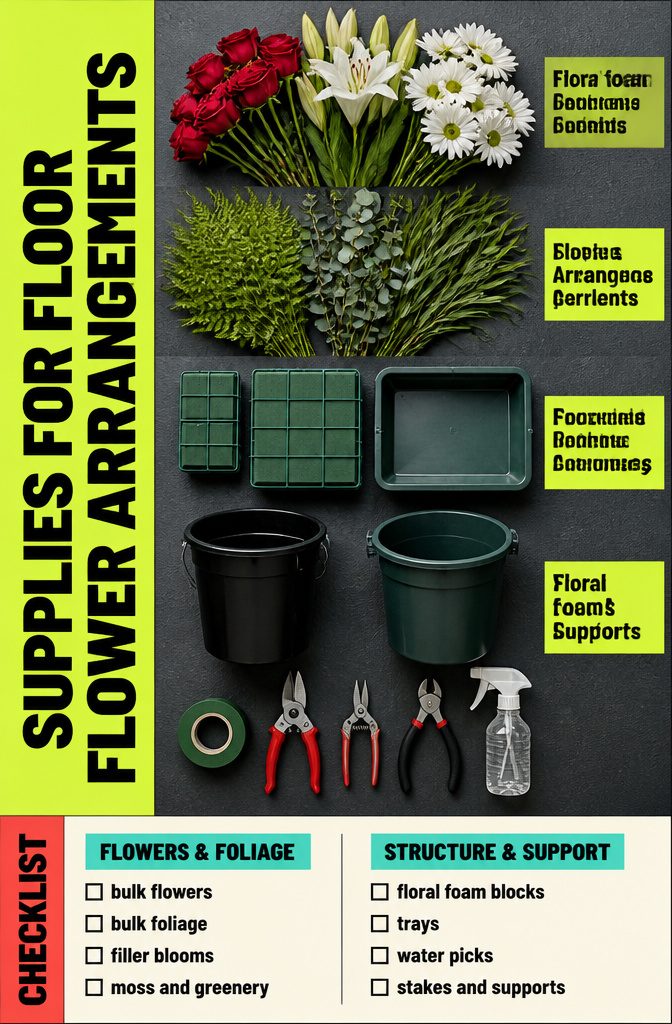
Gather everything before you cut a stem:
- Flowers in bulk: roses, lilies and daisies.
- Foliage in bulk: ferns and eucalyptus, plus willow leaf garland to stretch it.
- Pre-sorted DIY flower boxes, if you’d rather skip buying stem by stem.
- Floral foam blocks (caged ones hold up well) and trays. Casket trays suit large ground pieces.
- Buckets and fresh water for conditioning. A small plastic trash can at $1 does the job.
- Waterproof floral tape, sharp shears or snips, wire cutters and a spray bottle.
- Optional: water picks, zip ties, wooden dowels and stakes.
Doing it yourself cuts design labor, setup, breakdown, installation, delivery, strike charges and mechanics rentals, so the money goes into flowers and reusable tools. Filler blooms, moss, greenery and live potted plants stretch it further.
Symmetry Versus Asymmetry
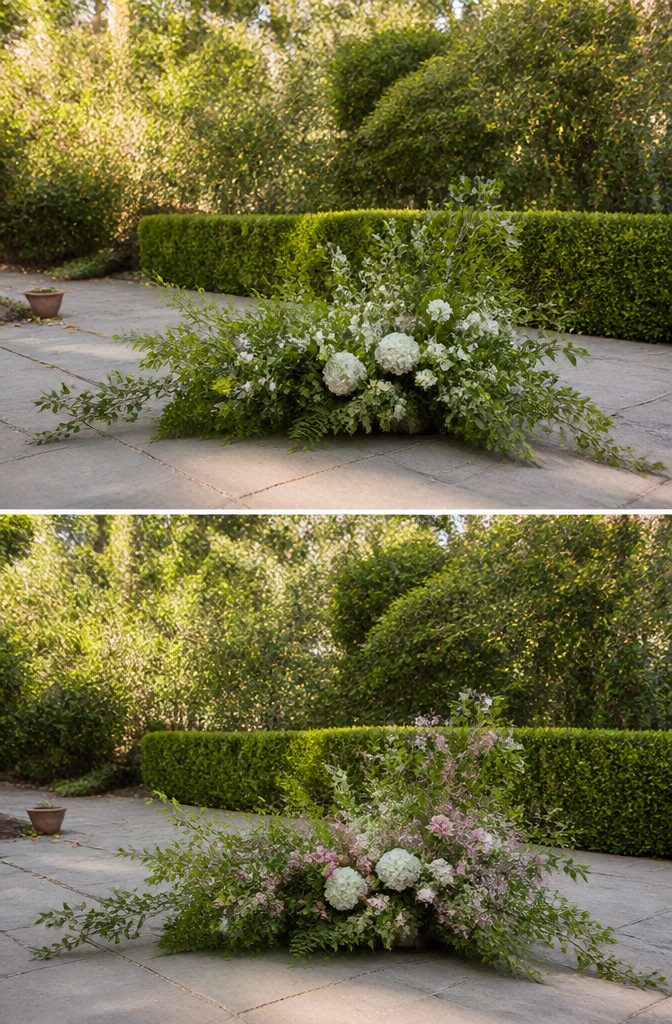
A symmetrical arrangement is built from the center outward, and you step back now and then to check that both sides match. It reads as formal and tidy, and it’s easy to judge by eye.
An asymmetrical one starts at the edges instead: the longest branches go on the outermost corners and edges of the foam block, and the shape is allowed to wander from there, as if it were sprouting from the ground.
For a meadow effect, I’d go asymmetrical. Mirror-image sides look arranged, and a meadow never does.
Symmetry is still a fair choice if you want a polished, balanced piece, but it will read as a design rather than a field. Either way, keep stepping back to check the shape from several angles.
Placement Around the Venue

Ground arrangements work best where guests already look: the aisle, the ceremony backdrop, an arch, the altar space and the entryway. Along the aisle, cluster several smaller pieces instead of setting one big arrangement at each spot.
Groups read as a meadow, while single large pieces read as a row of centerpieces. Pairs and staggered placement both work.
The pieces don’t have to stay put after the vows. Move them to the reception and they keep earning their place.
Artificial flowers suit that move.
They’re lightweight, so carrying them from ceremony to cocktail hour to reception is easy. They’re also allergy-friendly, keep curious bees away, and hold their shape if it rains.
Afterward they can be reused for later occasions or turned into home decor. For an outdoor wedding, I’d lean toward them.
Frequently Asked Questions
What is a floor flower arrangement used for at a wedding?
Floor arrangements go where guests already look: the aisle, the ceremony backdrop, an arch, the altar space and the entryway. They don’t have to stay there, since the same pieces can move to the reception afterward.
Is a floor flower arrangement a good DIY project?
Yes, as long as you prep ahead, choose your flowers by role, and follow a clear step-by-step plan. Building it yourself also skips charges for design labor, setup, delivery and rentals, so the money goes into flowers and reusable tools.
How many floor flower arrangements do I need for a wedding aisle?
There is no fixed number; it depends on how long the aisle is and how full you want it to look.
Several smaller pieces grouped together read as a meadow, while one big arrangement at each spot looks like a row of centerpieces. Pairs and staggered placement both work.
Can I reuse a floor flower arrangement after the ceremony?
Yes, and moving the pieces from the ceremony to the reception is one of their main advantages. Artificial flowers make the move easiest because they’re lightweight, and they can be reused for later occasions or turned into home decor.
How long does a floor flower arrangement last?
With well-hydrated flowers and foam, it typically lasts through the whole event day and often longer. Mist it lightly and check that the foam stays moist but not soaked.
How far ahead should I make a floor flower arrangement?
Build it the day before or the day of the event.
If you build a day ahead, keep the foam hydrated and store the arrangement somewhere cool and dark, away from heat and direct sun. A light mist of Crowning Glory helps seal in moisture.